
It was a summer afternoon when I stepped onto my newly built deck, only to notice the glaring silver screws peeking out from every board. Not only did they ruin the sleek look I was after, but the snagging and splinters from exposed screw heads also became a constant annoyance. That moment was a real lightbulb for me—there’s gotta be a better way to keep a deck looking pristine without resorting to those plastic plugs that often fall out or look terrible over time. If you’ve ever wrestled with this same dilemma, you’re not alone. Today, I want to share my personal tricks and proven methods to hide those deck screws seamlessly, so you can enjoy a beautiful, safe, and inviting outdoor space without the eyesore.They can be more than just aesthetic issues; exposed screws can also compromise the integrity of your decking if not properly secured. As noted by experts at [Decks.com](https://deckforgebuilders.com/why-standard-post-bases-fail-in-high-wind-areas-2), secure fastening is crucial for durability, but how we conceal those fasteners can make a huge difference in the final look. Over the years, I’ve experimented with a variety of techniques—some worked, some didn’t—and I’ve learned a few secrets worth sharing. Whether you’re building a new deck or tidying up an existing one, these tips will help you achieve a flawless finish without breaking the bank or risking structural issues. Ready to ditch the unsightly plugs and enjoy a sleek deck finish? Let’s dive into the best methods I’ve found for hiding screw heads effectively and effortlessly.
Effective Ways to Conceal Deck Screws Without Drawing Attention
Master Pre-Drilling for Seamless Screw Placement
During my first attempt at hiding screws, I learned the importance of pre-drilling holes just slightly smaller than the screw shank. This prevents splitting and ensures the screw sits flush. I used a 3/32-inch drill bit for standard deck screws, aligning it carefully to avoid angled holes. I vividly recall accidentally drilling at a slight tilt, which made subsequent steps more difficult. Practice makes perfect—use a scrap piece to perfect your drill angle before starting on your actual decking.
Use Plug Kits That Match Your Decking Material
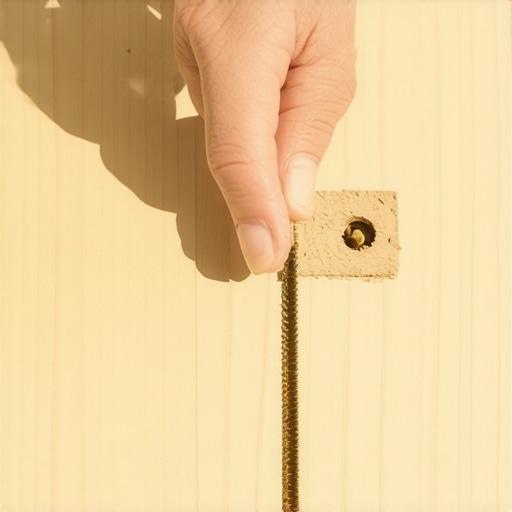
After trial and error, I found that using color-matched screw plugs yields the best results. These plugs are available in various shades to blend with natural wood or composite decking. I bought a kit with multiple sizes and kept a small container of wood glue on hand. When installing, I tapped the plugs into the pre-drilled holes with a rubber mallet, then applied a tiny dab of glue to secure them. Once dried, I sanded the surface lightly, revealing a smooth, uniform deck surface.
Drive Screws with the Right Tools and Technique
Using an impact driver set to a low torque prevented overdriving, which could damage the decking. I held the driver at a 90-degree angle to ensure the screw was perfectly flush or slightly below the surface. I also used a depth-setting bit to prevent the screw from sinking too deep or sticking out. During my second project, I discovered that a cordless drill with a clutch setting offered more control, especially on softer materials.
Apply Wood Filler or Caulk for Imperfections
In areas where the plug didn’t quite match or surface irregularities occurred, I used a small amount of exterior-grade wood filler or matching caulk. Applying it with a putty knife, I smoothed out any gaps or surface dips. Once dried, I sanded lightly to blend the repair seamlessly into the decking. This step was a game-changer, as it eliminated any residual imperfections and maintained the deck’s aesthetic appeal.
Maintain Regular Inspection and Touch-Ups
Over time, environmental exposure can cause plugs to loosen or change appearance. I make it a point to inspect my deck annually. If I notice any loose plugs or fading, I re-insert or replace them following the same steps. Keeping your finish consistent not only looks great but also extends the life of your deck—protecting it from moisture and rot. For more ideas on enhancing your outdoor space, check out pergola design ideas.
 While many believe that selecting the right materials is the sole factor in successful deck design, the real nuances lie in understanding advanced systems like composite decking and railing configurations. A frequent misconception is that any composite material will perform equally well; in fact, not all composites are created equal, and choosing a premium capped composite can significantly enhance durability and aesthetics, as discussed in [composite decking trends](https://deckforgebuilders.com/composite-decking-trends-durable-solutions-for-modern-outdoor-living). Another myth revolves around railing safety—some assume that simple post-to-beam connections suffice, but integrating advanced fastening techniques ensures longevity and meeting code standards, detailed in [railing system selection](https://deckforgebuilders.com/how-to-select-the-perfect-railing-system-for-every-deck). An often-overlooked nuance involves pergola placement and material choice; many skip considering how a pergola’s orientation affects shading and wind resistance, which can undermine the structure over time. Installing a pergola without accounting for prevailing wind directions or choosing inappropriate wood types may lead to quick deterioration; explore design ideas that turn your garden into a sanctuary with [pergola inspiration](https://deckforgebuilders.com/pergola-designs-that-turn-your-garden-into-a-sanctuary). Now, what about the common pitfalls in deck framing and joist spacing? Many underestimate the importance of precise spacing, leading to uneven surfaces or sagging, especially in wide spans; choosing the right spacing and reinforcement is vital, as covered in [joist support strategies](https://deckforgebuilders.com/3-hidden-spots-where-your-deck-is-likely-rotting-right-now). Here’s a critical tip: never assume that standard hardware meets your specific project conditions. High-wind zones, for instance, demand specialized post bases, a detail often ignored but essential for safety and compliance; learn more at [post-bases in high-wind areas](https://deckforgebuilders.com/why-standard-post-bases-fail-in-high-wind-areas-2). Remember, advanced deck design isn’t just about selecting quality materials but understanding how subtle details—like proper flashing, drainage, and structural reinforcement—play crucial roles in building a lasting outdoor space. Do you ever fall for these misconceptions? Share your experiences in the comments. Let’s dig deeper and elevate your deck design knowledge.Maintaining your deck’s beauty and safety over the years requires the right tools and a bit of know-how. Personally, I swear by using a cordless impact driver equipped with a quick-release chuck, which allows me to switch between screwdrivers and drill bits swiftly. This versatility is crucial when installing or replacing fasteners, especially in tight spaces or awkward angles. For precise screw placement, I use a depth-setting bit to ensure all screws sit flush or just below the surface, preventing trips and splinters. When sealing or filling imperfections, I rely on high-quality exterior-grade wood filler, applied with a silicone spatula for smooth, durable results. In terms of cleaning and prep, a pressure washer with adjustable pressure settings lets me remove grime effectively without damaging the surface—a gentle rinse rather than a destructive blast, which is essential for composite decking, as discussed in [composite decking secrets](https://deckforgebuilders.com/composite-decking-secrets-longevity-tips-for-a-lasting-deck).
How do I maintain my railing system during the changing seasons? In addition to inspecting for loose fasteners, I apply a corrosion-resistant lubricant to metal components and check the integrity of cable tensions. Upgrading to a modular railing system with adjustable fittings can help manage long-term wear and adapt to shifting structural elements. For aesthetic upkeep, I regularly clean glass or metal balusters with a mild solution of vinegar and water to retain clarity and prevent mineral deposits, aligning with the tips shared in [details on railing safety](https://deckforgebuilders.com/the-complete-guide-to-choosing-railing-systems-for-safety-style). If you’re considering adding a pergola, selecting a durable material like pressure-treated cedar or aluminum paired with reliable fasteners and regular inspections will extend its lifespan. Remember, a proactive approach—checking for loose joints, examining fasteners, and applying appropriate protective finishes—can prevent costly repairs down the road. Prediction-wise, I see the trend moving towards smart deck systems integrated with sensors for moisture and structural health monitoring, which could revolutionize long-term maintenance. Start by upgrading one aspect, like installing a concealed fastener system to reduce surface wear, and see the difference it makes in your deck’s longevity.The Hardest Lesson I Learned About Hidden Fasteners
My biggest realization was that patience beats speed when installing concealed screws; rushing often leads to misaligned plugs or uneven surfaces. Taking the time to pre-drill and carefully insert each fastener results in a professional look that truly elevates the deck’s appearance.
Why Matching Materials Makes All the Difference
I discovered that using color-matched plugs and high-quality wood glue is essential for a seamless finish. Skimping on these details can make your hard work stand out for the wrong reasons, so invest in the right products for longevity and beauty.
Never Underestimate the Power of Regular Touch-Ups
Environmental wear and tear can quickly make your deck’s finish look tired. Routine inspections and timely replacements of loose or faded plugs keep your outdoor space looking pristine, extending the deck’s lifespan and your satisfaction.
Inside Tip: The Value of Right Tools and Technique
Impact drivers with adjustable torque and depth settings have transformed my installation process, preventing overdriving and surface damage. Pairing these with proper sanding and sealing practices ensures your concealment efforts last for years to come.