
I’ll never forget the moment I realized I was throwing away perfect cuts simply because I didn’t have the right method. There I was, hunched over my saw, frustrated after mismeasuring yet another stringer cut, watching precious material go straight into the scrap pile. It felt like a slap in the face — all that time, effort, and money just wasted because I didn’t know about this clever trick. That was my lightbulb moment, and if you’re tired of wasting material on your deck stairs, you’re going to want to read every word of this.
The Secret to Zero-Waste Deck Stair Cuts
Today, I want to share with you a game-changing technique I discovered — the Stringer Template Trick. Not only does it simplify your measurements, but it also drastically reduces waste. Imagine cutting your stair stringers with precision, knowing you’re getting it right every single time, no more guessing or repeated tests. This method, rooted in practical experience and tested by countless DIYers and pros alike, can save you both time and money. Plus, it’s a fantastic way to make your project more eco-friendly by minimizing unnecessary material disposal. If you’re eager to elevate your deck-building skills and save resources, stick around. We’re about to dive into how this trick works, and I’ll walk you through every step.
Is This Trick Too Good to Be True?
Early on, I made a costly mistake: I blindly followed standard measurements, only to end up with stair stringers that didn’t quite fit, forcing me to redo entire cuts and waste more material. It was frustrating and honestly embarrassing — I was supposed to be handy, right? That’s when I realized that relying solely on traditional methods without a simple template was setting me up for failure. Learning from that, I developed my own approach, which I now swear by for any stair project. Want to know how I turned this problem into a solution? Keep reading! And if you’re curious about other cutting-edge tips, you might find [composite decking trends](https://deckforgebuilders.com/composite-decking-trends-durable-solutions-for-modern-outdoor-living) helpful for your outdoor upgrade. Now, let’s get into how this nifty trick can transform your deck-building experience.
Preparing Your Measurement Template
Start by cutting a scrap piece of your decking material to the exact height and run length of your stair stringer. Use a straight edge to mark the rise and run, ensuring the measurements match your planned stair dimensions. I once used an old piece of composite decking, which I custom-shaped with a jigsaw, to create a sturdy template. This allowed me to test the fit before making the actual cuts, saving me from costly mistakes later.
Creating the Cutout for the Tread and Riser
Next, mark the tread depth and riser height onto your template, using the actual measurements or code requirements. To replicate the angle for the stair cut, clamp your template onto your stringer board, aligning it carefully. Use a speed square to trace the cut line along the template’s edge, ensuring the angle is consistent for each cut. I recommend double-checking the measurements with a framing square, especially when working on sloped terrain where angles can vary.
Using the Template for Precise Cuts
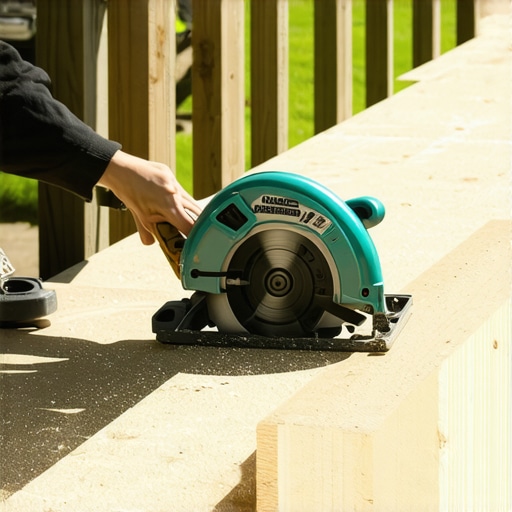
Align your template on your stringer, and clamp it firmly in place to prevent shifting. Using a circular saw with a fine-tooth blade, cut along the traced line. Remember to set the saw’s depth just slightly more than the thickness of your board for a clean cut. I found that making two passes—first shallow, then full depth—results in a smoother edge. Repeating this process on each stringer ensures uniformity, critical for fitting stairs seamlessly.
Applying the Template to Multiple Stringers
Once you’ve perfected your template, reusing it saves time and reduces waste across all stringers. Simply reposition the template on each board, double-check for alignment, and repeat the cutting process. When I built my last deck, I created a set of three identical templates, which allowed me to produce perfect, consistent cuts even with a slack day or two in between. This approach minimizes errors and material waste, making your project more efficient.
Final Check and Fit
After cutting, dry-fit the stringers on your framing to check fit and alignment. Adjust if necessary—sometimes slight tweaks are needed, especially if terrain is uneven. Remember, precise measurements and repeatable templates not only save materials but also enhance the structural integrity and safety of your stairs. For a comprehensive overview of deck design tips, check out deck design strategies for inspiration.
 When it comes to designing and building decks, many enthusiasts fall into traps stemming from misconceptions about railing systems, deck design, composite decking, and pergolas. One widespread myth is that all railing materials are equally durable; however, structural nuances can significantly impact longevity. For example, people often assume vinyl and aluminum railings are interchangeable, but aluminum typically offers better resistance to harsh weather, especially when properly anchored and shielded with quality flashing, as highlighted in recent building studies.
A common mistake is overlooking the importance of the system’s detailed installation process. Even premium materials can underperform if hidden fasteners aren’t correctly installed or if the foundation isn’t adequately prepared. An overlooked detail—like incorrect footing depth or inadequate flashing—can lead to serious issues like rot or instability over time. That’s why experts emphasize paying attention to this behind-the-scenes craftsmanship.
For advanced builders, understanding the subtleties of composite decking is critical. Not all composites are created equal; some scratch more easily or feel spongy underfoot. A frequent error is choosing a product based solely on aesthetic appeal without researching its structural composition and maintenance requirements. According to industry experts, selecting a solid core composite improves performance in cold or coastal climates, aligning with recommendations from [here](https://deckforgebuilders.com/composite-decking-secrets-longevity-tips-for-a-lasting-deck).
Examining pergolas reveals yet another nuance: the importance of bracing and pitch. Many assume a well-built pergola will stand solid on its own, but without diagonal bracing and a slight pitch to shed water, structural stability is compromised over time. This oversight can cause sagging or even failure during extreme weather. Modern designs incorporate these details for longevity and safety.
Have you ever fallen into this trap? Let me know in the comments.
### Why Do Many Railing Choices Fail in Harsh Weather?
A frequent misunderstanding is that aesthetics trump functionality. In reality, choosing the right railing involves assessing environmental exposure, material properties, and installation quality. For example, aluminum railings with proper hardware and flashing tend to withstand salt air better than vinyl options, which are vulnerable to fading and cracking. A comprehensive guide on selecting the perfect system can be found [here](https://deckforgebuilders.com/the-complete-guide-to-choosing-railing-systems-for-safety-style), ensuring you don’t compromise safety for style.
Maintaining your outdoor structures like decks, pergolas, and railing systems is crucial to ensure their longevity and safety. Investing in the right tools and adopting effective maintenance routines can save you time, money, and headaches down the line. One essential tool I personally rely on is a high-quality cordless electric drill with adjustable torque settings. It allows me to fasten or unfurl hardware with precision, reducing the risk of over-tightening or stripping screws, especially when installing hidden fasteners on composite decking. For inspecting older structures or checking for hidden rot, I recommend a moisture meter; it helps identify compromised wood before visible signs appear, preventing costly repairs. When dealing with cleaning and minor repairs, a power washer with adjustable pressure settings proves invaluable—just be cautious not to damage the surface, especially with delicate composite boards. I also swear by a good quality caulking gun and weather-resistant sealant to maintain gaps and prevent water intrusion, which is vital for structures exposed to harsh weather. In terms of software, I use CAD programs like SketchUp for designing complex pergola layouts or custom railing configurations, ensuring precision before any physical work begins. These technological investments streamline the planning process and minimize errors, ultimately extending the lifespan of your project. Looking ahead, I predict that smart sensors and IoT devices will increasingly assist with maintenance by providing real-time alerts for issues like moisture build-up or structural shifts, making upkeep even more manageable. How do I maintain my structures over time? Regular inspections, cleaning, and proactive sealing are key. For instance, inspecting flashing and joints monthly helps catch potential leaks early, especially around pergola posts; studies show that improper flashing installation is a leading cause of structural damage, as detailed in this resource. I recommend setting a seasonal maintenance routine—spring and fall checks keep everything in top shape. Lastly, don’t forget tools like a flexible putty knife for applying sealants smoothly and a soft-bristled brush for cleaning between tight spaces without damaging surfaces. By combining the right tools with disciplined upkeep, you’ll preserve your outdoor investments for years to come. To make your deck or pergola truly stand out, try incorporating a weatherproofing gel designed specifically for composite materials, which can make maintenance easier and extend the appearance of newness. Ready to take your maintenance game to the next level? Get started by applying a fresh coat of sealant this weekend, and enjoy the peace of mind that comes with a well-maintained outdoor living space.
What I Wish I Knew About Deck Confidence Early On
- I learned that trusting a customized template not only saves material but builds my confidence, making every cut predictable and reducing costly mistakes.
- Understanding that details like proper flashing installation and precise footing setup are the unseen heroes kept me from future repairs, proving that craftsmanship often hides in the smallest steps.
- Realizing the importance of material properties—like how aluminum outperforms vinyl in harsh climates—helped me choose the right railing systems and avoid premature replacements, saving money and headaches.
- My journey taught me that routine maintenance, paired with the right tools like moisture meters and weather-resistant sealants, keeps outdoor structures looking fresh and performing well for decades.
Tools and Resources that Elevate My Deck Building Game
- My go-to digital resource is this guide on composite decking trends. It helped me select materials that balance durability with aesthetics, which is critical in coastal or cold climates.
- For hardware selection, I rely on this comprehensive system guide, ensuring safety standards are met without sacrificing style.
- My toolkit includes a moisture meter and a cordless drill with adjustable torque, both of which I trust daily to prevent damage and ensure tight, secure fittings.
- The custom railing design tips inspire me to craft spaces that are both functional and beautifully integrated with the home’s architecture.
Seize Your Next Outdoor Challenge
Building or maintaining a deck, pergola, or railing might seem daunting at first, but with the right insights and tools, it becomes a rewarding journey. Every project presents an opportunity to learn, adapt, and create outdoor spaces that inspire relaxation and pride. Remember, the best results come from attention to detail, patience, and a willingness to learn from experience. So why not start your next project today, equipped with these insider lessons? Your outdoor sanctuary awaits — just dive in and make it your own.