
I vividly remember the first time I attempted to install a deck railing on a narrow rim joist. I was eager, ready to bring my outdoor vision to life, but as I measured and drilled, I suddenly realized: my posts weren’t quite fitting as seamlessly as I had imagined. The problem? The offset post move. It’s a sneaky technique that can make or break your deck’s safety and aesthetics—especially when working with limited space.
The Hidden Challenge of Narrow Rim Joists
Installing solid railing posts on narrow rim joists can feel like trying to fit a square peg into a round hole. The restrictions of space often force us into tricky situations, and without proper adjustments, the results can be shaky at best. Early on, I made a critical mistake: I overlooked how the offset move could provide a sturdy solution without compromising the deck’s integrity. That oversight led to wobbly rails and a lot of unnecessary frustration.
So, what’s the fix? Today, I’ll walk you through the ins and outs of the offset post move—an essential technique that transforms narrow, challenging spaces into secure, stylish deck features.
Is This Trick Really Worth the Effort?
You might be skeptical. I was too, initially. The truth is, many builders dismiss the importance of precise post alignment, thinking it’s a minor detail. But I learned the hard way that a small miscalculation here can lead to big safety concerns. The key is understanding how the offset move works and the right way to implement it, which can save you headaches and ensure lasting durability.
One mistake I made early on was rushing the measurement process—trust me, detailed planning is your best friend. For more insights on choosing the right railing system, check out our comprehensive guide on railing options for safety and style. Now, let’s get into how you can master this technique and turn that tricky narrow rim into a secure, attractive feature of your outdoor space.
Position Your Posts Precisely
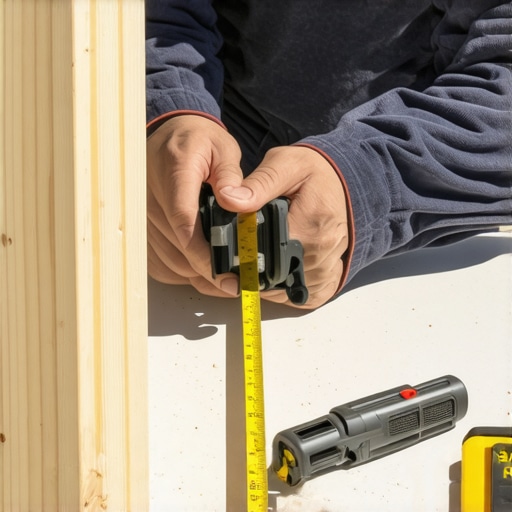
Start by measuring the exact width of your narrow rim joist at the intended post location. Use a high-quality carpenter’s square and a tape measure to mark the center, ensuring your post will sit squarely. Remember, accuracy here prevents future alignment issues and ensures a sturdy railing. I once mismeasured by fractions of an inch, leading to a wobbling post that took hours to correct — lesson learned: double-check measurements!
Locate the Offsets to Make Space
Identify the space needed to offset the post from the edge of the joist. Think of it like adjusting the position of a picture frame to make everything align perfectly. This offset creates room for proper fastening and allows the post to sit flush despite space constraints. For guidance linking railings and safety standards, see this comprehensive railing guide.
Install Blocking for Support
Cut a block of lumber matching your post’s width and height, then place it against the underside of the rim joist at your marked position. Secure it with lag bolts or structural screws. This block acts as a backing, providing a solid base for anchoring your post. When I did this on my project, I used pressure-treated lumber and gently hammered it into place, ensuring firm support—crucial for safety.
Attach the Post with an Offset
Position your post on the blocking, offset as planned. Drill through the post and into the blocking, then fasten with corrosion-resistant lag bolts. This approach ensures the post is securely anchored, even in tight spaces. To achieve a flush look, sand down any rough edges and verify the post is plumb with a level. I recommend using a spacer block during attachment to keep the post perfectly aligned vertically.
Sealing and Finishing Touches
Once attached, seal all wood surfaces with a weatherproof finish to prevent rot. Alternatively, wrap the base with metal flashing or a post skirt to improve longevity. Remember, this offset method doesn’t just improve aesthetics—it enhances safety by ensuring posts are robust and properly anchored. For advanced techniques on fixing and reinforcement, visit our hidden bracket guide.
 When it comes to deck construction and outdoor enhancements, many enthusiasts fall prey to popular misconceptions that can compromise both safety and aesthetic appeal. A common myth is that choosing the most affordable or trendy materials automatically ensures long-term durability. However, in my experience, understanding the nuanced properties of materials—like the thermal expansion rates of aluminum or the UV resistance of certain composites—can make or break your project’s longevity. For example, many overlook the fact that composite decking boards with hollow cores tend to scratch more easily and may deform under heavy loads, contradicting the popular belief that all composites are equally durable. To avoid such pitfalls, I recommend diving into technical specifications and expert reviews before making material choices.
Why Do My Deck Boards Cupping or Warping Over Time? Let’s dig deeper.
Cupping and warping are often thought to be caused solely by water exposure, but the real cause is often inadequate expansion gaps or incorrect fastener installation. Manufacturer claims can be misleading if they don’t account for environmental factors. For instance, a study published in the Journal of Building Materials highlights that improper spacing can lead to significant deformation, especially in regions with high temperature fluctuations. This level of detail is crucial for advanced builders aiming for precision and durability. Additionally, many people underestimate the importance of proper flashing and drainage when installing pergolas or railing systems, which can lead to rot and structural failures over time. For expert guidance on selecting the perfect railing system that integrates seamlessly with your deck design, check out this comprehensive guide. Remember, sophisticated projects demand nuanced knowledge—don’t settle for surface-level solutions. Have you ever fallen into this trap? Let me know in the comments.Maintaining your deck, railing, pergola, or composite decking over time requires the right tools and a solid understanding of effective methods. One of my go-to instruments is a high-precision digital moisture meter, which I use regularly to monitor wood and composite materials for early signs of rot or warping. This proactive approach allows me to address issues before they escalate, saving time and costs down the line. For detailed insights on selecting quality materials and tools, visit this comprehensive guide.
An essential part of long-term maintenance is proper cleaning. I recommend a soft-bristle brush paired with a gentle, environmentally friendly cleaner—nothing abrasive that could scratch your surfaces. For stubborn stains or mold, a pressure washer with a controlled, low-pressure setting can be effective if used carefully, especially around delicate areas like fasteners or joints. Remember, always follow safety guidelines and manufacturer’s instructions.
When it comes to refinishing, I rely on quality weatherproof stains and sealants. An electric paint sprayer equipped with a finer nozzle allows for even application, especially on large surfaces, ensuring thorough coverage without streaks. Regular inspections, ideally bi-annual, help spot issues like loose fasteners or minor cracks, which can be quickly remedied before they worsen.
Predicting future trends, I see a growing emphasis on smart maintenance technology—think sensors embedded in decking and railings that monitor temperature, humidity, and structural integrity. While still emerging, integrating these solutions could revolutionize how we care for our outdoor spaces, shifting from periodic check-ups to real-time data. To stay ahead, consider exploring innovative tools like digital inspection drones or IoT-connected sensors.
How do I maintain my deck and railing systems over the long haul?
Regularly clean with soft brushes and eco-friendly cleaners, use moisture meters for early detection of issues, apply high-quality weatherproof finishes, and consider adopting smart monitoring tools. These strategies not only extend the life of your outdoor features but also enhance safety and aesthetics. For complex projects or upgrades, I recommend reaching out to experts via our contact page. Take time today to try out that advanced sealing technique I mentioned—your future self will thank you.
The Unexpected Lessons Behind Perfect Post Placement
One of the most profound lessons I learned was the importance of meticulous planning—initial measurements and understanding space constraints can save you hours of frustration later. Experimenting with different offset distances revealed how small adjustments could significantly enhance stability without sacrificing aesthetics. It’s a reminder that in deck building, patience and precision often trump haste, especially when working within tight spaces.
Invest in Tools That Reveal Hidden Opportunities
I discovered that using a high-quality levels, coupled with adjustable spacers, makes aligning posts on narrow rim joists far more manageable. These tools, which I trust personally, turn a complex task into a straightforward one, ensuring your posts are plumb and well-supported. For example, a simple digital angle finder can help you verify that all posts are perfectly aligned, avoiding unevenness that might crack your design over time. Knowing the right tools can turn a tricky offset move into a seamlessly executed detail.
Leverage Your Space Smartly—Offset as a Design Strategist
Most builders overlook how thoughtful offset moves can reflect style just as much as function. By offsetting posts precisely, you can create visual interest and accommodate unique architectural features. I realized that with careful planning, the offset can serve as a focal point, accentuating the deck’s lines and complementing your home’s exterior style. Embracing this approach turns a challenging detail into an opportunity to showcase craftsmanship and creativity.