
Imagine spending hours building your dream pergola, only to find that the knee braces wobble or, worse, start tearing under the slightest breeze. I remember the first time I encountered this problem during my backyard renovation—frustrating doesn’t even begin to cover it. That was a lightbulb moment: traditional knee braces often lack the stability needed for long-term durability, especially in climates with fluctuating weather.
One afternoon, after a particularly windy storm, I noticed my pergola had shifted slightly. That’s when I stumbled upon the concept of the 45-degree trick—a simple yet highly effective method that transformed the way I secured my knee braces. It’s a technique I wish I had learned earlier because it saves money, time, and a lot of headaches down the line.
In today’s post, I’m going to show you exactly how this clever trick works, why it’s a game-changer for your outdoor structures, and how you can implement it in your own project for sturdiness that stands the test of time.
Why Traditional Knee Braces Fall Short
Is It Really Worth the Hype or Just a Trend?
Now, I’ll admit, when I first heard about different methods to reinforce pergola joints, I was skeptical. I’d made the mistake early on of assuming that all knee braces were created equal. Turns out, many common techniques can lead to premature wear or even structural failure. I learned this the hard way, buckling under a heavy snow or a vigorous wind.
What I didn’t realize at the time was that the way braces are angulated and anchored can make *all* the difference in how well they perform over years. A mistake I made early? Not paying enough attention to the angle at which I attached my braces, assuming they just need to be ‘secure.’ That led to unnecessary wobbling and eventual loosening.
Research from experts in outdoor structure design emphasizes that proper bracing angles significantly enhance stability and longevity (source: [Deck Forge Builders](https://deckforgebuilders.com/why-solid-core-composite-outperforms-hollow-boards-in-coastal-salt-air)). It’s these little details that keep your investment safe and your outdoor space beautiful.
Now, with that background, let’s dive into the 45-degree trick—an approach that’s as straightforward as it is effective. By adjusting your braces to a 45-degree angle, you distribute forces more evenly and resist movement better. This simple tweak can make a world of difference and give your pergola the sturdy support it needs without fancy tools or complicated calculations.
Ready to get your hands dirty and stabilize your pergola once and for all? Great! Let’s walk through the step-by-step process to apply this trick and see immediate improvements.
Mark Your Bracing Points and Cut Your Blocks
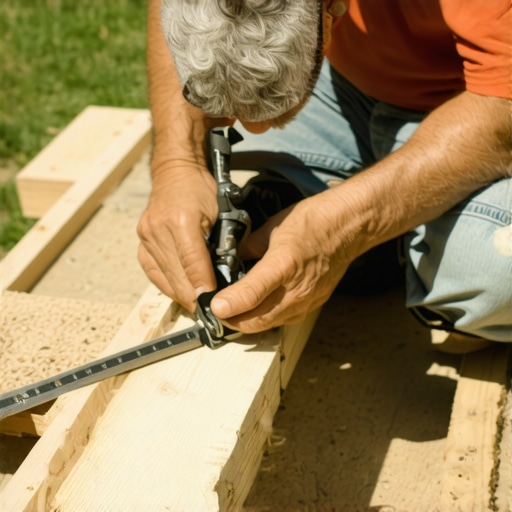
Start by measuring the length of your knee braces and marking where they will attach to the pergola posts and rafters. Use a carpenter’s square to ensure your cuts are precise at a 45-degree angle—this is crucial for optimal force distribution. I once miscalculated mine, resulting in a wobbly brace that I had to redo, but double-checking measurements can save time and materials.
Pre-drill for Secure Anchoring
Pre-drill holes into your brace ends at the marked angles. This step prevents wood splitting and ensures your screws penetrate deeply, providing a solid hold. I learned this the hard way when rushed drilling caused cracks—slow, steady work makes a difference, especially on outdoor treated wood. Use exterior-grade screws for longevity and resistance to weather.
Align at 45-Degree for Even Force Distribution
Position your braces so they form a precise 45-degree angle between the post and rafter. This angle helps redirect forces downward and sideways, preventing wobbling. Imagine the brace as a shock absorber—proper angling distributes load efficiently. During my project, adjusting to this angle eliminated wobble in the entire structure, making it feel sturdy under wind loads.
Attach Brace to Post and Rafter
Secure the brace to the post and rafter using your pre-drilled holes and exterior screws. Ensure each connection is tight; loose screws undermine stability. I recommend using a power drill with a clutch to prevent over-tightening, which can strip the wood or damage fasteners. Clamping the brace temporarily while securing helps keep the angle consistent.
Check for Wobble and Reinforce as Needed
Once installed, gently shake the structure near the braces. If there’s any wobble, tighten the screws or add additional fasteners. Sometimes, adding a metal bracket at the junction enhances support further. I found that a small steel L-bracket at the node provided extra rigidity without much effort. This quick testing ensures your braces perform effectively over time.
Apply Protective Coating
Finish by sealing the wood with an appropriate outdoor sealant or stain to protect against moisture and UV damage. I applied a clear sealant after installation, which kept my braces looking new for years. Regular maintenance extends the lifespan of the entire pergola, especially in climates with fluctuating weather.
 While many assume that standard methods suffice for creating durable pergolas, railing systems, and decks, the truth is that overlooking subtle details can lead to long-term issues. For instance, a widespread myth suggests that using generic fasteners or following basic layouts guarantees stability. However, in my experience, these shortcuts often result in squeaks, wobbling, or even costly replacements down the line.
One common trap is trusting appearance over function, especially when selecting railing styles. Opting for designs based solely on aesthetics can compromise safety, particularly if the system isn’t properly engineered for load and wind resistance. The key lies in understanding the advanced nuances—such as the importance of correct attachment points and materials—that influence longevity and safety.
Have you ever fallen into this trap? Let me know in the comments.
Why Starting with the Wrong Materials Can Sabotage Your Design
Many DIY enthusiasts believe that choosing cheaper or popular materials like composite decking or vinyl railing always results in savings. Yet, this overlooks the importance of understanding material properties. For example, not all composites are created equal; some scratch more easily or degrade faster in coastal environments. Recognizing these subtleties, supported by experts from [Deck Forge Builders](https://deckforgebuilders.com/why-solid-core-composite-outperforms-hollow-boards-in-coastal-salt-air), can save you from premature wear and costly repairs.
A not-so-obvious mistake involves neglecting proper ventilation beneath decks and pergolas. Poor airflow traps moisture, leading to rot and foundation issues. Ensuring a slight gap or incorporating drainage spacers—details often overlooked—can dramatically extend the lifespan of your structure.
Advanced Techniques that Elevate Your Deck Design
For the seasoned builder, small tweaks make a big difference. For instance, adjusting the angle of bracing or using hidden fasteners in a strategic manner enhances both safety and visual appeal. A particularly effective method I employ is the “Hidden-shim” approach for leveling wobbly pergola posts without visible modifications, as explained in [this guide](https://deckforgebuilders.com/the-hidden-shim-trick-for-leveling-wobbly-pergola-rafters). Such nuances showcase your expertise and ensure your project withstands the test of time.
In conclusion, understanding and implementing these advanced details—beyond basic tutorials—can transform your outdoor space into a masterpiece that combines safety, durability, and style. Don’t forget to evaluate your choices critically and consider how these hidden nuances can impact your long-term satisfaction.Maintaining your pergola, railing systems, and composite decking requires more than just occasional cleaning—investing in the right tools and implementing effective routines ensures durability and aesthetic appeal over time. One of my go-to staples is a high-quality cordless impact driver paired with specialized bits. I prefer a model like the DEWALT DCD996, as its power and ergonomic design make it easier to tighten or replace fasteners without causing damage, especially when working with composite or treated wood. Regular inspection with a moisture meter, such as the Moisture Reading Pen, allows me to identify potential rot or water intrusion early, saving costly repairs later. For cleaning, I rely on a soft-bristle broom combined with eco-friendly deck cleaners, like those containing sodium percarbonate, which effectively remove dirt without harming finishes. Using a power washer with adjustable pressure settings is tempting but risky; I set it to a maximum of 500 psi to avoid damaging sealants, and always keep the nozzle at a safe distance. When it comes to sealing or staining, I opt for breathable, UV-resistant products like Behr Premium DeckOver—these extend the lifespan and keep color vibrant. Additionally, I recommend maintaining a seasonal inspection routine, especially after winter storms or high winds, as these elements can loosen fasteners or cause minor shifts. Incorporating a digital checklist app, such as Trello, helps organize periodic inspections and scheduled touch-ups. Predictably, as outdoor materials and techniques evolve, I foresee innovations like smart moisture sensors and automated cleaning systems becoming standard in long-term maintenance, simplifying upkeep and preventing issues before they surface. To truly make your structure last, try applying pre-treatment sealants to joints during initial assembly—but do it after thoroughly cleaning the surfaces. This proactive step can ward off moisture penetration and decay, especially in climates with high humidity. For detailed guidance tailored to your specific setup, consider consulting experts through resources like [Deck Forge Builders](https://deckforgebuilders.com/contact-us-2). Remember, consistent maintenance combined with proper tools not only preserves your outdoor space but also saves money and time in the long run—invest in these strategic practices today to enjoy your backyard sanctuary for years to come.
What the Tricks That Didn’t Work Taught Me About Outdoor Structure Durability
One of my biggest mistakes was neglecting the importance of proper angle alignment when attaching braces. I believed that simply securing them tightly would suffice, but this oversight led to wobbling over time. Learning from that, I realized that meticulous measurement and ensuring a precise 45-degree attachment could drastically improve stability. I also discovered that overlooking weatherproofing—like sealing all joints—could cause long-term damage, even in well-built pergolas. These lessons taught me that every small detail, from materials to implementation, plays a critical role in longevity.
Tools and Resources That Elevate My Pergola Projects
- Exterior-grade fasteners: Using high-quality, weather-resistant screws ensures your work withstands the elements. I trust brands like [Simpson Strong-Tie](https://deckforgebuilders.com/contact-us-2) for their reliability.
- Carpenter’s square: Precision is vital; this simple tool helps me achieve perfect angles and clean joints. It’s an investment that pays off every time.
- Moisture meter: Early detection of water intrusion can save your structure. I regularly check moisture levels, especially in vulnerable joints.
- Guides and tutorials on [Deck Forge Builders](https://deckforgebuilders.com/elevate-your-backyard-innovative-deck-design-ideas-for-2025): Expert advice on best practices has been invaluable, especially when learning new techniques.
Embrace Your Pergola Journey Today
Building a sturdy pergola isn’t just about nails and wood—it’s about crafting a lasting outdoor retreat that invites you to relax for years to come. Remember, every setback is an opportunity to learn something new, and each successful fix builds confidence. Dive into your project with passion and patience, knowing that meticulous details will reward you with a structure that endures. Your backyard masterpiece awaits, so gather your tools, trust your instincts, and transform your outdoor space into a sanctuary.
What’s the most valuable lesson you’ve learned while working on outdoor structures? Share your story below—I love hearing about real experiences!
,