
I still remember the moment I realized my pergola wasn’t quite straight. After hours of careful planning and installing what I thought were perfectly measured posts, I stepped back—and noticed a subtle tilt that threw off the entire aesthetic. That lightbulb moment was frustrating, but it also was a wake-up call. Turns out, no matter how precise your measurements are, the tiniest misalignment can sneak in without you noticing until it’s too late. And correcting such mistakes later is a whole lot messier than getting it right the first time.
Why Precision in Post Alignment Changes Everything
A well-aligned pergola isn’t just about looks; it affects the overall stability and longevity of your entire outdoor structure. When posts are crooked or uneven, it puts unnecessary stress on beams and rafters, increasing the chance of structural issues down the line. But let me assure you, there’s a simple, effective technique that can save you hours of headaches—using the humble string line.
Unlike relying solely on tape measures or eyeballing, a string line acts as a visual guide that ensures your posts are perfectly in a straight line. I’ve started using this trick on every project since my first failure, and the difference is night and day. Plus, it’s surprisingly affordable and straightforward to implement.
But how exactly does this work, and can it really make your installation flawless? Absolutely. Today, I’ll walk you through the step-by-step process of setting up your pergola posts using the string line trick, so you can achieve that professional, straight look without breaking the bank or losing your mind.
Is the String Line Trick Really Worth the Hype?
I confess, I was skeptical at first. It might seem overly simple, almost too good to be true. I remember rushing through my initial measurements, convinced I could eyeball the alignment—only to have to redo everything when I realized the posts were slightly off. Turns out, that was a rookie mistake I made early on, thinking I could cut corners with traditional measurement methods. Since adopting the string line approach, my projects have been smoother and more accurate.
This method isn’t just a quick fix; it’s rooted in proven construction principles that professionals swear by. According to the experts at Deck Forge Builders, precise post placement is critical for the structural integrity of any deck or pergola.
So, if you’ve ever faced uneven posts or felt unsure about your measurements, you’re not alone. Keep reading, because the next steps will show you how to master this simple trick and take your outdoor projects to the next level.
Setting Up Your Reference Line
Begin by measuring the total length of your pergola layout and marking the positions for each post on the ground with stakes and chalk lines. For example, in a recent project, I marked the spots for four posts, ensuring they were spaced evenly according to my design plan. This initial step establishes a visual guide, much like sketching the blueprint onto your yard, so you can proceed with confidence.
Aligning the String Line
Tie a durable string tightly between the stakes at the desired height—typically at the top of your posts. Make sure the string is taut; slack will cause inaccuracies. Think of it as stretching a tightrope; a sagging line won’t give you a true guide. During my last installation, I used a level to check the string’s height and ensured it was consistent across the entire length. This visual reference will serve as your straight edge, guiding post placement and alignment.
Maintaining Consistent Height
Since posts often vary in height due to uneven terrain, adjusting the string’s height ensures the top of each post aligns precisely with the guide. In my experience, marking the string with chalk at the correct height at each stake helped me visualize the ideal post height, especially when working on uneven ground. This technique prevents the common mistake of stacking posts at different levels, which can create a crooked pergola.
Marking Post Locations
With the string in place, use it to mark each post position on the ground. For instance, I used spray paint to mark the exact spots for digging holes. This method removes guesswork—every post will be aligned along the string, ensuring a straight line. During my last build, I discovered that slight deviations in measurements could lead to noticeable crookedness; the string line acts as your safeguard against this.
Double Checking the Alignment
Before digging, double-check each mark by measuring from multiple points or using a carpenter’s level across the string. I once realized a small misalignment that, if left uncorrected, would have caused my posts to tilt. Verifying at this stage saves time and frustration later, keeping your structure square and aesthetically pleasing.
Digging and Setting Posts
Now, dig your holes precisely where you’ve marked. Use a post-hole digger or a power auger for clean, accurate holes. As you insert the posts, periodically check their alignment with the string line using a level on each post. I recall a project where I adjusted each post slightly as I went, ensuring the top was perfectly in line with my guide. This real-time correction minimizes the need for future adjustments and guarantees a professional finish.
Confirming Final Placement
Once all posts are set, run the string across the top to verify that they form a straight line. Minor adjustments can be made by shifting posts slightly before the concrete sets. During one of my installations, I had to loosen and reposition a post slightly—this extra step prevented a crooked final structure and saved hours of redo work.
Final Checks and Adjustments
After the concrete cures, measure the distances between posts and compare them with your original design. Use a tape measure or a laser distance measurer for accuracy. If any posts are slightly off, you can shim or adjust the framing as needed. This meticulous attention to detail ensures your pergola will look symmetrical and structurally sound, avoiding the common pitfall of uneven posts that ruins the overall aesthetic.
Many homeowners assume that choosing the right materials or following basic measurements guarantees a flawless outdoor space. However, the nuances of design, such as railing system complexity or pergola detailing, often trip up even experienced DIYers. One widespread myth is that a uniform deck board pattern looks automatically professional, but in reality, subtle inconsistencies can make a big difference in visual appeal and durability. *Advanced builders know that incorporating proper spacing and considering seasonal expansion are critical for longevity.* Did you know that neglecting to account for thermal movement in composite decking can cause warping or buckling? According to experts at Deck Forge Builders, understanding the material’s expansion coefficient helps prevent costly mistakes. Moreover, many believe that all railing systems are equally safe, but the nuances of attachment hardware, post support, and infill panels determine longevity and safety standards. For instance, hidden fasteners might look sleek but require precise installation; otherwise, they can loosen over time, leading to rattling or structural issues.
Are You Overlooking the Bigger Picture in Your Design?
An advanced approach considers load distribution, local building codes, and aesthetic cohesion. For example, integrating diagonal bracing within a pergola not only enhances stability but also adds visual interest, elevating your design from basic to bespoke. Professional designers emphasize that innovative features—like adjustable louvers or smart lighting—are not just trendy but improve usability and value. Remember, even small details, such as proper drainage planning beneath decks, prevent issues like mold and rot—saving you money and stress long-term. To explore options that marry style and durability, visit pergola trends and discover design ideas that stand out. The key takeaway? Don’t settle for a cookie-cutter look; understanding and applying these subtle nuances ensures your outdoor project is both stunning and resilient. Have you ever fallen into this trap? Let me know in the comments.
Maintaining your outdoor structures like decks, pergolas, and railing systems is essential to ensure they stay beautiful and functional for years to come. Having the right tools and adopting effective maintenance routines saves you time and money, and keeps your outdoor space safe and inviting.
Investing in Quality Tools for Precision and Efficiency
One tool I personally swear by is a high-quality cordless rotary hammer drill. It’s versatile for drilling into composite decking or pressure-treated lumber, especially when installing hardware or anchors. I prefer models with brushless motors, such as the Makita XRH09Z, because they offer longer runtime and withstand heavy use without overheating. Pair this with a set of sharp diamond-tipped drill bits—they make penetrating composite materials smoother and prevent splitting.
For accurate measurements, I rely on a digital laser distance meter like the Bosch GLM 50 CX. It’s invaluable for confirming spans and ensuring your railing heights or pergola dimensions remain consistent over time. Manual tape measures are often too imprecise, especially for larger projects, while a laser tool provides quick readings with minimal fuss, reducing errors that might compromise structural integrity.
Effective Methods to Clean and Protect Your Outdoor Structures
Routine cleaning prolongs the life of your deck or pergola. I recommend using a pressure washer with adjustable pressure settings, set around 1500 psi, to remove dirt, algae, and mold without damaging composite surfaces. A dedicated deck cleaner formulated for composite materials ensures you’re not stripping away protective coatings. After washing, applying a high-quality sealer or protective coating extends the deck’s appearance and reduces UV damage.
Tools That Simplify Long-Term Maintenance
To monitor the health of your pergola’s joints and railing connections, I use an infrared thermometer. Sudden temperature fluctuations can cause expansion or contraction, warping components over time. Detecting these early allows preventive action, such as tightening fasteners or adding shims. Additionally, a stainless steel brush helps scrub away stubborn debris from metal fasteners, preventing rusting that can weaken structural supports.
Looking ahead, technological advancements like drone inspections equipped with thermal imaging may revolutionize how we monitor outdoor structures for hidden damage or moisture intrusion. As composites and smart materials evolve, maintenance tools will become even more sophisticated, making it easier to catch issues before they become costly repairs.
How do I keep my deck and pergola functioning smoothly over time?
Beyond tools, establishing a regular maintenance schedule is vital. This includes seasonal cleaning, inspecting fasteners, and resealing surfaces as needed. Remember, ignoring subtle signs of wear can lead to larger problems down the line. For instance, loose railing bolts or small cracks in composite decking can develop into safety hazards if neglected. Regular inspections using the right tools, like a digital level or moisture meter, help identify issues early, allowing timely repairs and ultimately extending the lifespan of your outdoor features.
If you want to try a proactive approach, use an infrared thermometer to detect hotspots in metal connections. This simple step can reveal corrosion or loose joints that are not immediately visible, helping you address problems before failures occur. For more detailed guidance, visit this resource on railing maintenance.
By equipping yourself with the right tools and routines, you’ll keep your outdoor structures looking pristine and functioning reliably for many seasons. Don’t wait for small issues to turn into costly repairs—start implementing these maintenance tips today and enjoy your backyard with peace of mind!
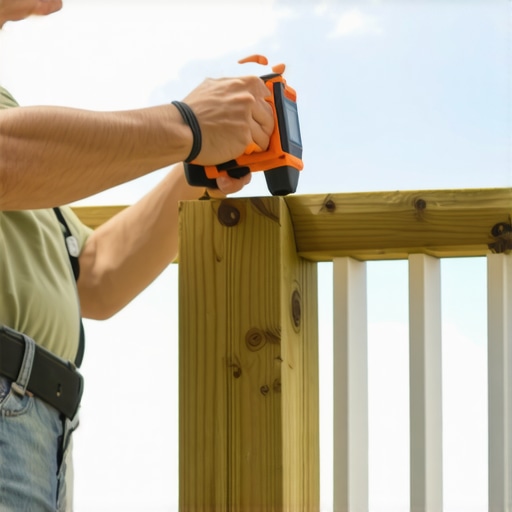
As I’ve spent years working on outdoor structures like decks and pergolas, I’ve realized that the most valuable insights often come from missteps and hard-earned lessons rather than textbooks. Here’s what I wish someone had told me early on about perfecting these projects.
How Overconfidence Taught Me The Power of Precise Alignment
I used to rely solely on measuring tapes and eyeballing, convinced that my eye could spot imperfections. That was until I saw a perfectly designed pergola leaning just enough to throw off the entire aesthetic. It was a turning point—nearly invisible misalignments can snowball into significant visual and structural issues. Now, I always double down on simple tools like string lines to keep things true, saving time and headaches.
The Hidden Strength of an Extra Support Beam
Initially, I thought minimalist support was enough. Turns out, an extra diagonal brace can be a game-changer, especially for larger, freestanding decks. Not only does it bolster stability, but it also offers peace of mind during windy days. Learning this taught me to look beyond the basic design and consider future-proofing your outdoor spaces for resilience.
Investing in Quality Tools Changes Everything
You might be tempted to cut costs, but I discovered that high-quality tools—like cordless rotary hammer drills or digital laser distance meters—are worth every penny. They make tasks like drilling into composite decking or measuring large spans quick and foolproof. This shift towards better tools significantly elevates the final look and safety of my projects, and I recommend that every DIY enthusiast prioritize them.
Small Adjustments Make a Big Difference
Details such as shim placement, fastener selection, and dimension checks can seem minor but are often the difference between a professional-looking finish and a crooked disappointment. Embracing meticulousness—like using a level on each post before setting concrete—has dramatically improved my results. Trust me: paying attention to these nuances pays off in longevity and curb appeal.
Curated Picks for a Flawless Finish
Over time, I’ve curated a toolkit of go-to resources that streamline my workflow. For example, custom railing systems guides help me choose the right hardware, while pergola design inspiration keeps my ideas fresh. These trusted sources are invaluable for anyone serious about crafting durable, beautiful outdoor spaces.
Seize the Moment to Elevate Your Outdoor Living
Every project is an opportunity to blend functionality with style, and your backyard is your personal canvas. By applying these insights—embracing precise alignment, investing in quality tools, and paying attention to small details—you can create spaces that not only impress but stand the test of time. Don’t wait for small issues to become costly problems; start refining your techniques today and turn your outdoor oasis into a masterpiece.