
Ever spend hours sweating over that initial pergola installation, only to realize it’sNOT quite level? I remember my frustration vividly. After pouring sweat and a good amount of cash into my backyard project, I finally stood back and noticed that my pergola’s beam was slightly skewed—enough to make me cringe every time I looked at it. That lightbulb moment hit me: I was missing a simple, cost-effective trick to get everything perfect without breaking the bank.
Why a Perfectly Level Pergola Matters More Than You Think
Getting your pergola level isn’t just about aesthetics. It affects structural integrity, water runoff, and even how comfortable and safe your outdoor space feels. An uneven structure can lead to unnecessary wear, especially when exposed to the elements. But here’s the thing: traditional methods like shimming with scrap wood or trying to eyeball the level can be inconsistent, costly, and downright frustrating.
So, how do you achieve a perfectly level pergola without spending hundreds? That’s where the legendary $20 shim trick comes into play. This simple yet powerful tool has transformed my DIY approach, saving me time, money, and countless headaches. Trust me, once you get the hang of it, you’ll wonder why you didn’t start sooner.
Is the $20 Shim Trick Really Worth the Hype?
Now, I get it—you’re skeptical. Or maybe you’ve tried similar approaches and found them lacking. Early on, I made the mistake of relying solely on a bubble level and a handful of random shims, which led to a wobbly, uneven pergola. That experience taught me that not all shims are created equal, and that a dedicated, precisely-sized shim can make all the difference. For an affordable investment, this small addition can provide big results.
Looking for more ideas on enhancing your outdoor living space? Check out strategic deck design tips that complement your pergola masterpiece. But let’s focus now on how this humble tool can change your DIY game.
Ready to level up your pergola project? Let’s dive into the step-by-step process that will have your structure standing tall and proud, just like the experts do.
Align Your Foundation Accurately
Start by laying out your pergola posts on a flat, level surface. Use stakes and string to mark the precise locations, ensuring they follow your planned design. When I built my pergola, I double-checked the measurements and used a laser level to confirm the positions, preventing costly adjustments later.
Set the Posts with Precision
Dig post holes that are deeper than the frost line to prevent shifting. Mix concrete and pour it into the holes, then insert the posts. Before the concrete hardens, place a level on the top of each post and adjust as needed. I found that using a short 2×4 on top of the post and a bubble level simplified this process, ensuring the posts are perfectly vertical.
Check Horizontal Alignment of Beams
Once the posts are dry and set, install temporary braces to hold the beams in place. Use a long carpenter’s level or a water level to verify that the beams are perfectly horizontal across the entire span. During my project, I adjusted the braces until the beam was level, then temporarily fixed it with clamps before final fastening.
Fine-Tune the Level with Shims
If you notice minor discrepancies, use specially sized shims under the beams or post caps. The $20 shim trick involves selecting the right thickness to match the uneven spot precisely. I kept a set of shims on hand and tested different sizes under the beam, which allowed me to achieve a flawless, even surface.
Double-Check Before Final Fastening
Before securing all connections, re-verify the level and alignment. Walk around the structure, checking from multiple angles. I once skipped this step and ended up with a slightly skewed pergola; a quick second check saved me from having to disassemble and redo parts later. Remember, patience at this stage ensures your project stands out for durability and style.
Secure and Seal the Structure
Finally, tighten all bolts and fasteners, ensuring no movement. Apply a weatherproof sealant to protect the wood and hardware from the elements. For detailed railing systems and pergola design ideas that enhance stability and aesthetic appeal, consider browsing pergola design inspiration. This meticulous process guarantees your pergola not only looks professional but also lasts for years without wobbling or settling.»} }\n}]}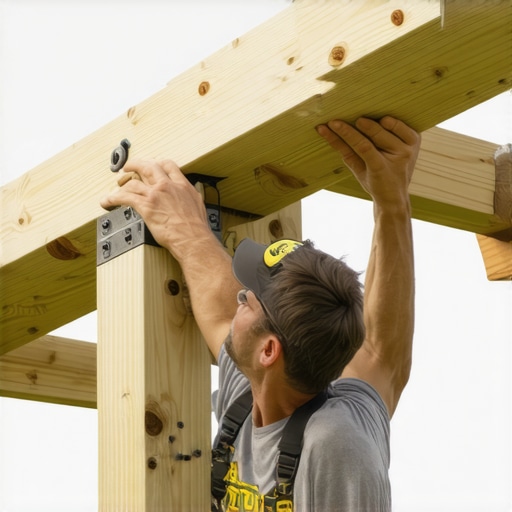 }{While many DIY enthusiasts believe that selecting top-rated composite decking and sleek railing systems guarantees long-lasting results, there’s often more beneath the surface. A frequent misconception is that all composite materials expand equally or resist fading uniformly, but in reality, many high-end products still face issues like warping or discoloration if not installed with nuance. For example, relying solely on standard fasteners without considering expansion gaps can lead to buckling over time, despite reputation claims. An overlooked aspect is the importance of understanding how climate influences the materials—studies show that temperature fluctuation can cause significant expansion and contraction, affecting the integrity of your deck’s framing and surface. This is why detailed planning and proper installation techniques are crucial; otherwise, you risk decades of problems that might have been avoided by knowledge of these advanced nuances. Do you think you’ve accounted for these factors in your projects? Let me know in the comments! For innovative design ideas that combine function and durability, explore https://deckforgebuilders.com/innovative-deck-design-ideas-that-elevate-your-homes-curb-appeal. Also, when selecting railing systems, consider the expert insights shared at https://deckforgebuilders.com/the-complete-guide-to-choosing-railing-systems-for-safety-style to ensure safety and style go hand in hand.
Keeping It Working: Tools and Techniques for Longevity
Ensuring your composite decking, pergolas, and railing systems remain beautiful and functional over the years requires more than initial installation skills. Regular maintenance, clever use of specialized tools, and understanding the right procedures help preserve their aesthetics and structural integrity. From cleaning to repairs, having the right equipment makes all the difference.
One of my favorite tools is a cordless power washer. Unlike standard garden hoses, a good power washer with adjustable pressure settings can effectively remove dirt, mold, and algae buildup without damaging the composite material. I personally use the Karcher K5 Power Pressure Washer, which offers variable pressure control and a wide spray pattern. This allows me to clean large deck surfaces efficiently while avoiding the abrasive effects that can cause surface scratches.
Another essential tool is a microfiber deck brush. For routine maintenance, I prefer a brush with soft bristles that can scrub the surface gently but thoroughly. It’s perfect for cleaning between deck boards and around railings without risking damage. Pairing this with a gentle cleaning solution—like a mix of mild soap and water—keeps the deck looking fresh without the harsh chemicals that could degrade the surface over time.
When it comes to repairs or adjusting your railing systems or pergolas, cordless impact drivers are invaluable. I rely on my DeWalt Impact Driver for tightening bolts and replacing fasteners. Its high torque and precision help ensure everything stays secure, especially when working with composite materials that can catch and strip standard screws. Using high-quality fasteners like corrosion-resistant stainless steel screws also extends the lifespan of your structures.
How do I maintain my deck over time?
Regular inspections are key. Check for loose fasteners, any signs of surface wear, or discoloration that may indicate mold or algae formation. Applying a UV-protectant sealant specifically designed for composites every few years can prevent fading and surface degradation. For detailed guidance, consult this comprehensive resource on composite decking trends.
Implementing these tools and maintenance routines can save you significant costs in the long run. As technology advances, I predict that future tools will incorporate smart sensors that monitor structural health and alert homeowners to potential issues before they become costly repairs. For now, I recommend starting with these proven equipment choices and practices.
Want to make your deck truly stand the test of time? Try using a power washer with adjustable pressure and a microfiber brush for your next cleaning session. These simple yet effective steps will keep your outdoor space looking its best for years to come.
Lessons from the Trenches: What I Didn’t See Coming
One of the biggest revelations in my DIY journey was realizing that even small details could make or break the overall look and longevity of my outdoor structures. For instance, I once thought that using generic fasteners was sufficient—until I noticed rust staining after just a year. That was a wake-up call: investing in high-quality, corrosion-resistant hardware truly pays off in the long run. Additionally, I learned that planning for expansion gaps during installation prevents warping and buckling—a lesson I wish I had embraced from the start. Lastly, understanding the importance of precise measurements and double-checking every step before permanent fixes saved me from costly rework and frustration, reminding me that patience and attention to detail are your best tools in outdoor construction.
Tools and Resources That Make All the Difference
Over the years, I’ve come to trust certain tools and resources that streamline the building and maintenance of decks and pergolas. The Karcher K5 Power Pressure Washer has become my go-to for thorough cleaning without damaging the surface, while a cordless impact driver ensures secure assembly, especially with resistant composite materials. For design inspiration and planning, pergola design ideas and deck strategies are invaluable. These tools and sources help me achieve professional results and stay motivated throughout my projects.
Your Next Move Toward an Outdoor Oasis
Now is the perfect time to take the leap and craft your dream backyard retreat. Whether you’re building a pergola that provides shade or designing a deck that transforms your outdoor space, remember that attention to detail and patience are your greatest allies. Start with solid planning, use the right tools, and don’t be afraid to incorporate innovative ideas. Your outdoor sanctuary is within reach—ready for years of enjoyment, relaxation, and pride. Want to share your next project or stumble upon a new trick? Drop a comment below and let’s elevate our outdoor living game together!