
I’ll never forget the day I spent hours wrestling with my pergola, trying to get those posts perfectly plumb. Frustration mounted as I pounded, measured, and re-measured—only to find that, despite my efforts, one post still leaned annoyingly. That lightbulb moment hit me: I needed a better way. If you’ve ever faced similar struggles—eyeing uneven posts, wondering why your measurements never quite line up—you’re not alone. But here’s the good news: mastering the art of the String Line Move can transform your project from a crooked mess to a stunning, professional-looking structure.
Why Precision Matters When Installing Pergola Posts
Accurate placement of pergola posts isn’t just about aesthetics; it’s about safety, longevity, and making your outdoor space truly shine. Uneven posts can cause structural issues, lead to water drainage problems, and derail your entire design vision. Early on in my projects, I underestimated the impact of minor misalignments. I made the mistake of relying solely on a level or eyeballing the placement, which often resulted in crooked posts and frustrating adjustments later. Trust me, investing time in proper alignment techniques like the String Line Move saves you days of headaches down the line. Did you know that even a slight tilt of 1 degree can cause noticeable differences in your pergola’s appearance and stability? (Source: The String Line Method for Perfectly Level Deck Surfaces)
Is the String Line Move Really Worth the Fuss?
At first glance, it might seem like overkill—just a simple string, right? But I assure you, this simple tool is the backbone of precise post placement. Early mistakes I made included neglecting to keep the string taut or failing to check the line from different angles, which threw off my measurements. Once I embraced the technique with proper tension and cross-checking, everything fell into place perfectly. If you’ve struggled with inconsistent post heights or crooked angles, learning how to use the String Line Move effectively could be a game-changer. Curious? Let’s dive into how you can master this method for your next project, whether you’re installing a pergola, railing system, or even designing a comprehensive deck upgrade.
Set Up Your Reference Line Clearly
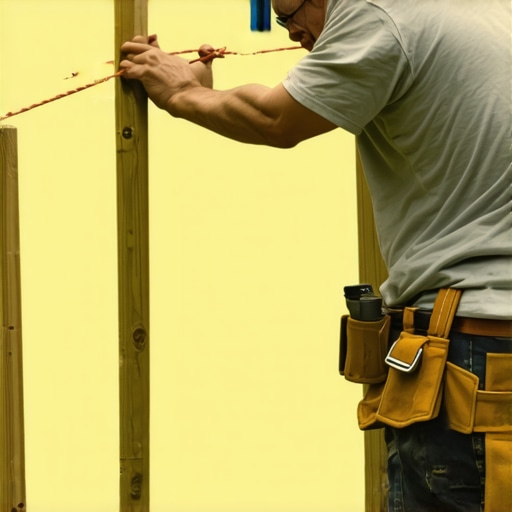
Begin by determining the exact location for each post using your site measurements and design plans. Stretch a long, durable string tight between two stakes or nails, aligning with your planned post positions. This line acts as a visual guide for height and alignment, helping you avoid the common mistake of eyeballing uneven posts. I once set up my string to mark the front post on my pergola, and when I checked the distance from my house corner to the string at multiple points, the measurements matched perfectly, saving me hours of correction later.
Ensure String Tension and Proper Placement
Keep the String Tight and Stable
Use clamps or anchor stakes to keep your string taut. A loose string can sag and lead to misaligned posts. While installing mine, I used a tensioner tool to tighten the line after each adjustment, which was crucial to maintain consistency across all posts. Think of it like tuning a guitar string—if it’s too slack, the notes are out of tune; if it’s just right, everything harmonizes.
Check from Multiple Angles
Inspect the string from different perspectives to ensure your line is straight and accurately aligned with your layout. I found that stepping back and looking at the line from the side and front helped me catch slight deviations I might have missed at close range, preventing crooked posts before digging commenced.
Transfer Line to Post Locations
Once your string is correctly tensioned and aligned, transfer its position onto the ground with spray paint or a marking tool at each desired post point. For height, set a temporary post stand or use a level to mark the desired post height at each point, referencing the string line. When I marked my pergola posts, I noticed a slight variation in height at one point—using a laser level afterward confirmed my initial markings. This step minimizes errors and ensures your pergola will be visually straight and structurally sound.
Double-Check Before Digging
Use a measuring tape and a level to verify the exact placement and height of each mark relative to your string line. Recheck distances between stakes and marks to catch any discrepancies. In my project, a quick measurement between the stakes and the marks revealed a ¼-inch deviation, which I corrected before proceeding, ensuring perfect alignment. This extra diligence prevents the frustration of realizing your posts are uneven after concrete set or framing is complete.
Apply the Technique to Diverse Projects
This method isn’t limited to pergolas. Whether you’re installing a new railing system—check out custom railing systems—or designing a deck to elevate your home’s curb appeal, mastering the string line move will make all your outdoor projects look professionally crafted. For inspiration on various deck styles, see innovative deck ideas.
Use the Right Tools for Perfect Results
Equip yourself with a good quality measuring tape, durable stakes or nails, a tensioning device, and a level. Avoid cheap tools, which can slip or give false readings. I once used a flimsy tape measure, causing my measurements to be off by a few inches—leading to misaligned posts and a lot of rework. Investing in reliable tools ensures your string line move achieves consistent, accurate results, elevating your overall project quality.
 While many believe that choosing high-quality materials guarantees a durable outdoor structure, the real challenge lies in understanding the subtle nuances that influence long-term performance. For instance, selecting pressure-treated wood over composite decking might seem foolproof, but neglecting proper installation techniques—like allowing for expansion gaps—can lead to warping or cracking.
A frequent misconception is that traditional methods, such as eyeballing levelness or relying solely on string lines, suffice for flawless installation. However, advanced projects demand more precise tools like laser levels and careful joint calculations to prevent uneven surfaces that can compromise both aesthetics and safety.
Curious about how to identify overlooked details? Focus on joint integrity and weatherproofing strategies. Often, contractors overlook the critical importance of flashings or proper sealing at connection points, which can cause water infiltration and rot over time. Implementing proper flashing techniques—such as those discussed here—can significantly extend your deck’s lifespan.
Professionals also recognize that climate considerations heavily influence material choices. For example, composite decking trending in popularity offers excellent longevity, but understanding the specific trends, like those covered here, ensures you select the best product for your environment.
In the realm of pergola design, one hidden nuance is the importance of proper drainage, especially for flat roofs. Neglecting this can cause water pooling and structural damage, a pitfall explained in detail here. Remember, what seems minor—like the angle of a beam—can make a huge difference over time.
Finally, don’t fall prey to the myth that more expensive tools automatically mean better results. The real key is understanding how to use these tools effectively, such as utilizing a reliable level or spacing jig to ensure consistent post spacing without unnecessary waste. For expert tips on this, check out this guide.
Have you ever fallen into this trap? Let me know in the comments, and let’s share how mastering these subtle details can elevate your outdoor projects to professional standards.
Keeping It Working: Essential Tools and Maintenance Strategies
Investing in the right tools is crucial for ongoing maintenance and ensuring your outdoor structures stand the test of time. Personally, I swear by a high-quality cordless oscillating tool for intricate tasks like sanding and cleaning tight corners on decking and railing systems. The versatility it offers means I can switch from removing debris to fine detailing without changing equipment, saving time and effort.
Another indispensable tool in my kit is a digital moisture meter. Regularly checking the moisture levels in wood and composite materials helps prevent rot and warping. For example, I use the moisture meter to ensure my decks stay dry and healthy, especially before staining or sealing projects. This proactive approach prolongs the lifespan of your decking and reduces costly repairs down the line.
When it comes to cleaning, I rely on a chemical-free, biodegradable cleaner designed specifically for composite decking. It effectively removes dirt and algae without damaging the material or harming the environment. Pairing this with a stiff-bristled deck brush ensures thorough cleaning without scratching, keeping your surface looking fresh year after year. Remember, routine cleaning is crucial—at least annually—to maintain aesthetic appeal and prevent deterioration.
How do I maintain my outdoor structures over time?
Consistent inspection is key. Check for loose or corroded fasteners, signs of water intrusion, and any structural shifts in your pergola or railing systems. Applying a protective sealant or stain every couple of years enhances resistance against weathering. I recommend using a penetrating sealant designed for your material—wood or composite—since it absorbs better and offers longer-lasting protection. Additionally, hardware like stainless steel or aluminum for fasteners and brackets prevents rust and corrosive damage, especially in humid climates.
Furthermore, scheduling routine maintenance tasks such as tightening bolts, reapplying sealant, and cleaning debris from drainage holes prevents minor issues from escalating into major repairs. Maintenance isn’t just about fixing problems; it’s about actively extending the longevity of your investments and ensuring safety and functionality for years to come.
Looking forward, technology trends are pointing towards smart maintenance solutions. Imagine using a drone equipped with thermal imaging to scan large decks for hidden moisture or weak spots without climbing ladders. As these innovations become more accessible, staying ahead with smart tools will redefine how we care for our outdoor spaces.
What’s the best way to keep your deck and pergola in top shape?
Implementing a scheduled maintenance routine using reliable tools like moisture meters and targeted cleaners is a smart start. Before your decking season peaks, take the opportunity to inspect all fasteners, apply weather-resistant sealants, and clean surfaces thoroughly. If you integrate smart monitoring devices in critical areas, you’ll receive alerts about potential issues before they become costly repairs. Think of maintenance as an investment—small, regular efforts now save big money later.
If you haven’t already, try applying a penetrating sealant on your deck or pergola this season. It’s an advanced but straightforward step that can significantly boost durability and minimize weather-related damage. With the right tools and consistent care, your outdoor sanctuary will remain beautiful and safe for years to come.
To get started, I recommend exploring the latest deck design innovations to inspire your maintenance upgrades. Remember, proactive care today leads to stunning outdoor spaces tomorrow!
What I Wish I Knew Before Perfecting My Pergola Layout
One eye-opening lesson was realizing that obsessing over tiny measurement differences can prevent big mistakes down the line. I once ignored the importance of tensioning my string line properly, which led to crooked posts and hours of rework. The moment I embraced taut, stable lines, everything aligned effortlessly, saving me time and frustration.
The Hidden Power of Proper Tools
Using basic tools like a good-quality laser level or a precise tensioner transformed my workflow. Trust me, cheap tools can introduce errors that compound over the course of a project. Investing in reliable equipment pays off through cleaner, more accurate results — and fewer headaches.
Listening to the Quiet Signals of Your Structure
Pay attention to subtle signs of misalignment or instability early—like uneven gaps or wobbly posts. These small cues are your friends, guiding you to make corrections before they turn into costly repairs. Developing this intuitive sense takes experience, but it makes all the difference in achieving a professional finish.
Curated Recommendations for Every Builder
Personally, I swear by the Ultimate Pergola Toolkit because it combines precision tools and clear guides—essential for any serious DIYer. The Complete Guide to Railing Systems opened my eyes to safety and style, showing how proper measurements are crucial for both. For inspiring ideas, Pergola Design Inspiration provided me with creative layouts that match my backyard’s personality. These resources have significantly elevated my outdoor projects, and I believe they can do the same for you.
Seize the Moment—Your Outdoor Oasis Awaits
Every successful pergola or deck project begins with a commitment to precision and patience. Now that you understand the importance of proper alignment and the right tools, there’s nothing stopping you from creating a stunning, long-lasting outdoor space. Don’t wait for the perfect weather—start applying these lessons today and turn your backyard into a personal sanctuary. Your future self will thank you for the effort and care you invest now.
What’s been your biggest challenge with aligning pergola posts or deck features? Share your experience below—I’d love to hear and help troubleshoot!
,