
I remember standing on my cedar deck back in 2018, sweat stinging my eyes and a sinking feeling in my gut. I had just finished installing thirty balusters on the main staircase, and when I stepped back to admire my work, I saw it: the ‘drunken baluster’ look. Not one of them was perfectly plumb. From a distance, the railing looked like a row of uneven teeth. I had spent a small fortune on high-quality materials, following all the latest composite decking trends, only to have the entire project look amateur because I thought I could freehand drill into the top rail. It was a humiliating moment that forced me to realize that in deck building, close enough is never actually good enough. We have all been there, haven’t we? You think your eye is sharp, your hand is steady, and then the level tells a different, heartbreaking story. Today, I am going to show you how to avoid that walk of shame by using a simple jig that ensures every single hole you drill is dead-on straight.
That Wobbly Walk of Shame Ended My DIY Pride
Early in my career, I made the classic mistake of overconfidence. I assumed that a steady hand and a sharp drill bit were all I needed to secure a railing. I was wrong. When you are working with railing systems for safety and style, even a two-degree deviation at the base of a hole turns into a glaring half-inch lean at the top of the baluster. It is not just about looks, either. According to the North American Deck and Railing Association (NADRA), railing failures are a primary cause of deck-related injuries, often stemming from poor structural connections or improper spacing. If your holes are angled, your fasteners aren’t biting into the wood correctly, and you are essentially building a ladder for a future accident. I learned the hard way that you need to stop guessing. Using a jig isn’t ‘cheating’; it is the only way to ensure you are following the 4-inch gap rule for safer deck railing construction without losing your mind.
Is a specialized drilling jig actually worth the drawer space?
I know what you are thinking because I thought it too: ‘Do I really need another plastic or wooden block taking up space in my toolbox?’ The short answer is yes, and the long answer is absolutely yes. When you are trying to figure out how to space railing balusters without ever using a tape measure, a jig is the mechanical brain that prevents human error. It removes the physical fatigue of trying to maintain a perfect 90-degree angle while leaning over a deck edge. I once ruined a beautiful piece of capped composite because my bit skated across the surface before biting. That one mistake cost me more than the price of three jigs. Have you ever stepped back from a project only to realize your ‘perfect’ line was actually a zig-zag? If so, you understand why precision matters more than speed. We are going to solve that today by walking through the exact setup I use to get factory-level results on a DIY budget.
Turn a Scrap Block Into a Precision Tool
Think of your jig as a sniper’s bipod; it takes the shaky human element out of the equation. You do not need a factory-made metal guide to win this battle. In 2019, I was working on a high-end project where I had to mix wood and metal for a modern railing look, and I was terrified of scratching the expensive powder-coated finish. I took a 6-inch piece of 2×4, drilled a perfectly vertical hole through it using a drill press in my shop, and then screwed a ‘fence’ to the side so it would hug the railing perfectly every time. That humble scrap piece ensured all 48 balusters sat perfectly plumb. If you are working with tougher materials, precision is mandatory because metal or composite does not ‘forgive’ a crooked hole like soft pine does.
Stop the Bit from Wandering Before It Starts
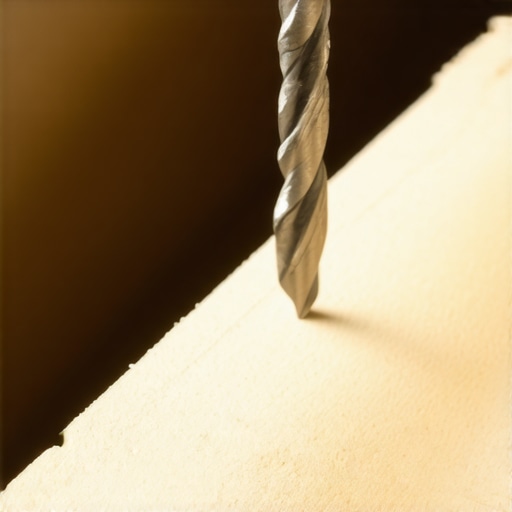
One of the biggest mistakes DIYers make is using a standard twist bit on a finished rail. These bits are designed for metal and love to ‘skate’ across the surface of your wood or composite before they actually bite. Instead, use a brad-point bit. It has a sharp center spur that sticks into the material exactly where you marked it, preventing that ugly ‘drunken’ travel. This is the drill bit trick for splinter-free wood railing installs that professionals swear by. Even when following composite decking secrets for a lasting deck, a clean entry point is the difference between a high-end finish and a hacked-together mess.
Secure Your Rail Before You Ever Pull the Trigger
I cannot stress this enough: clamp your jig. If you try to hold the jig with one hand and the drill with the other, you are asking for a trip to the urgent care clinic or, at the very least, a ruined rail. When you use a jig, you are effectively turning your hand drill into a portable drill press. By clamping the guide firmly, you ensure the bit enters the material at a true 90-degree angle every single time. This stability is critical when you are trying to figure out how to fix a wobbly top rail without removing the balusters, as a secure connection starts with a straight hole. If your bit is even slightly off, the screw will pull the baluster to one side, creating tension that eventually leads to those annoying rattles and wobbles. For those using capped materials, remember to also use the specific screw type that prevents composite board mushrooming to keep the surface around your holes smooth and professional.
The Secret to Measuring Without the Headache
Layout is where most people lose their minds. Instead of fighting with a tape measure that flops around, I use a story pole—a simple strip of wood marked with my baluster spacing. This works perfectly alongside the 20 dollar tool that makes deck board spacing perfect. By transferring the marks from the story pole to the rail, you ensure the spacing is identical on the top and bottom. I once spent four hours on a staircase only to realize my bottom rail marks were shifted an inch to the left of the top rail. It looked like a parallelogram. Now, I always align my jig with the marks on both rails simultaneously before I even think about making a hole.
The Rigidity Myth That Actually Weakens Your Deck
People often tell me that if you bolt a post down hard enough, it will never budge. That is a dangerous half-truth that often leads to expensive repairs. In my two decades of building, I have seen more railings fail from being too rigid than from being too loose. When you are working with metal, you must respect thermal physics. On a scorching summer afternoon, a long run of railing can expand significantly. If you have not left room for that movement, those ‘rock-solid’ connections will eventually shear the heads off your lag bolts or buckle the rail itself. This is a massive concern when you realize why black aluminum railings get hotter than you think; they act as solar sinks that put immense stress on every fastener they touch.
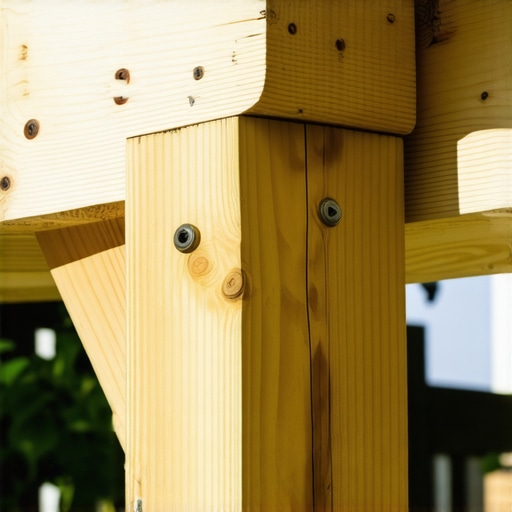
The biggest ‘trap’ I see even seasoned DIYers fall into is sticking with 4×4 posts for every project. While they meet the minimum code in many areas, they are often the source of that annoying ‘flex’ people hate. There is a structural reason why your pergola posts need to be 6×6 minimum for stability, and that same engineering logic applies to high-end deck railings. A 4×4 post has a higher oscillation frequency, meaning it vibrates and moves more under load. Over time, this micro-vibration acts like a hammer on your wood fibers, slowly enlarging the bolt holes until the post becomes a safety hazard. I always opt for 6×6 posts or structural steel inserts to kill that vibration before it starts.
Why does my railing still rattle even though every screw is tight?
It usually comes down to ‘fastener fatigue’ or the natural shrinkage of your framing. According to structural guidelines from the American Wood Council, the connection between the post and the rim joist is the absolute weakest link in any deck. If you are only using two bolts, you are creating a pivot point, not a rigid mount. I always recommend using the double nut secret for rock-solid railing posts. This ensures that as the wood dries—and we know why pressure-treated wood still warps under composite decking better than most—the connection remains under constant tension. If you ignore this, you might eventually discover the specific reason your railing post is cracking the concrete or splitting the rim joist is simply a lack of adjustable tension. Have you ever fallen into this trap where ‘tight’ just wasn’t enough? Let me know in the comments.
The Invisible Force That Pulls Rails Apart
When you are designing for longevity, you have to think like a mechanical engineer. One of the most overlooked nuances is the ‘leverage ratio’ of your balusters. If your top rail is too high without a middle support, the lateral pressure exerted by someone leaning on it can exceed 200 pounds of force—the minimum requirement set by the International Residential Code (IRC). This is why I always suggest the 3-second push test for wobbly railing systems as part of your annual maintenance. It is not just about aesthetics; it is about preventing the structural pull-out that happens when fasteners are repeatedly stressed to their limit. By understanding these advanced dynamics, you move from just ‘building a fence’ to engineering a permanent outdoor structure.
If you want to move from ‘weekend warrior’ to ‘master craftsman,’ you have to stop thinking about your deck as a finished product and start viewing it as a living machine. Wood moves, metal expands, and the weather is a patient enemy. The single best thing I ever did for my builds was embracing the joist tape secret for doubling your decks life. By applying a butyl-based flashing tape to the top of every joist before the decking goes down, you prevent the ‘wicking’ effect that turns your structural framing into mulch within ten years. This is especially vital when you maximize outdoor living with low-maintenance composite decking; the boards might last thirty years, but if the wood underneath rots, you are in for a catastrophic failure. According to the American Wood Council’s DCA 6 documentation, specifically the ‘Prescriptive Residential Wood Deck Construction Guide,’ the fastener patterns for ledger boards aren’t just suggestions—they are the engineering math that keeps your house from separating from your outdoor space.
Stop the Rot Before It Destroys Your Investment
The biggest mistake I see homeowners make is the ‘set it and forget it’ mentality. I personally set a calendar reminder every six months to perform a structural sweep. I use the flashlight trick for finding hidden joist rot at night. When the sun is down, the shadows cast by a powerful beam will reveal the slightest fungal growth or water staining that you would miss in the midday glare. If you notice even a hairline crack in a post, you need to address it before it expands. This is particularly true for pergolas, where the overhead weight is constantly fighting gravity. If you notice a dip in the middle of a span, you might need to learn how to fix a sagging pergola beam without replacing the whole structure before the winter snow load turns a minor sag into a major collapse.
How can I ensure my railing and pergola stay pristine over time?
Maintenance isn’t just about cleaning; it is about moisture management. For wood railings, avoid the temptation to just slap on a new coat of stain every year. Over-application can actually trap moisture inside the wood fibers, leading to internal decay. Instead, follow composite decking secrets for a lasting deck and use a breathable sealer. For those with aluminum systems, a simple wash with mild soap and water once a year will prevent the salt and pollutants from pitting the finish. I also recommend checking your cable tensioners every spring. Metal naturally stretches, and a sagging cable is a safety violation waiting to happen.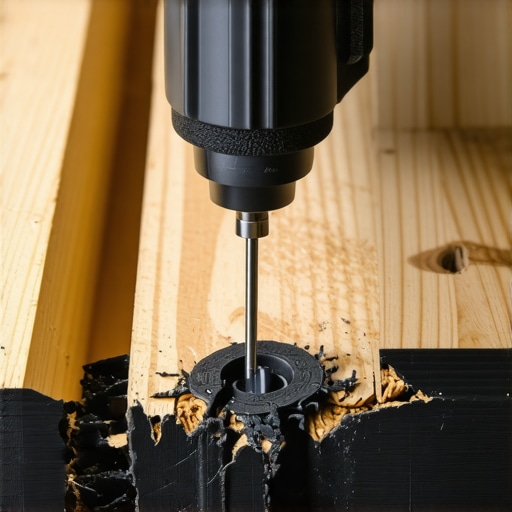
The Impact Driver is My Secret Weapon
I don’t leave my house without my M12 Fuel impact driver. Unlike a standard drill, the tangential impact allows you to drive long structural screws into pressure-treated lumber without stripping the heads or snapping your wrist. I combine this with a set of high-torque torx bits. If you are still using Phillips head screws for deck framing, you are living in the dark ages. Torx bits provide six points of contact, meaning zero cam-out and a lot less frustration when you are working ten feet up on a ladder. This tool is essential when you are trying to figure out the specific way to brace a tall deck for zero sway. A standard drill often lacks the punch to fully seat those heavy-duty structural fasteners into dense rim joists.
The Future of Decks is Smarter Than You Think
As we move forward, I see innovative deck design ideas for 2025 leaning heavily into ‘smart’ integration. We aren’t just talking about LEDs anymore; we are seeing the rise of built-in load-sensors that can alert your smartphone if a structural connection loses tension or if moisture levels in the joists exceed a safe threshold. The line between architecture and technology is blurring. We are entering an era where your deck will tell you when it needs maintenance before you even see the problem. Next time you are at the hardware store, grab a roll of butyl joist tape and apply it to just one small section of your framing. You will see immediately how it creates a waterproof seal around your screws, and I promise you will never build without it again.
Lessons the Job Site Taught Me About Structural Integrity
Over the years, I’ve realized that thermal expansion is the silent killer of even the most expensive railing systems for safety and style. If you do not leave room for the material to breathe, the shifting forces will eventually tear your fasteners right out of the wood. I have also learned that a plumb line is your only true friend in the field; your eyes will lie to you after eight hours in the sun, but gravity remains a constant. Never skip the pre-drilling phase when working near the ends of your boards, or you will face the heartbreak of a split grain just as you are finishing the job. These small moments of patience are what separate a DIY attempt from a professional masterpiece.
The Non-Negotiables in My Tool Trailer
#IMAGE_PLACEHOLDER_E#
If you are serious about achieving a pro-level finish on your project, there are a few items you simply cannot do without. First, stop using Phillips head screws for structural work immediately. High-torque Torx bits are the industry standard for a reason—they virtually eliminate cam-out and ensure every fastener is seated perfectly without stripping. I also swear by Butyl Joist Tape. Truly understanding why your deck joists need tape to prevent rot changed my entire approach to construction; it is the single most effective way to turn a ten-year frame into a thirty-year foundation. Finally, toss the floppy tape measure when it comes to layout and use a story pole made from a scrap 1×2 to ensure every baluster is spaced with mathematical precision.
Go Build Something Your Neighbors Will Envy
Building a deck is a legacy project, a place where your family will gather for years to come. By incorporating these innovative deck design ideas for 2025 and focusing on the structural nuances most people ignore, you move from being a weekend warrior to a genuine craftsman. Do not let the perceived complexity of modern railing systems or high-end composite materials intimidate you. Take the process one hole at a time, rely on your jigs, and remember that the effort you put into the hidden details today will pay dividends in safety and beauty for decades. What is the one specific part of deck building that always makes you second-guess your measurements? Let me know in the comments below!