
I’ll never forget that crisp March morning. I’d just finished my first cup of coffee and stepped out onto the deck to admire the sunrise, only to realize my expensive, modern cable railing looked like a row of wet noodles. The tension was gone. What was supposed to be a sleek, high-end feature now looked like a series of drooping laundry lines across my beautiful composite decking. It was embarrassing. It was frustrating. Most of all, it felt like a massive waste of money. I’d spent weeks researching the perfect railing system, yet here I was, looking at a sagging mess that barely kept my dog from slipping through. Every time the wind blew, those cables rattled against the posts like a ghost in the attic. I had promised my wife that this deck would be maintenance-free, and within six months, I was already failing.
Stop the Sag Before the Snow Hits
We often think of stainless steel as indestructible. While it’s tough, it isn’t immune to the laws of physics. When the temperature drops, materials contract. When they warm up, they expand. This constant breathing of your deck structure puts incredible pressure on every single component. If you didn’t use the secret to installing cable railings without losing tension, your posts likely bowed inward just enough to let that cable go limp. According to technical data from ASM International, 316-grade stainless steel has a thermal expansion coefficient that differs significantly from treated lumber. This means your deck frame and your cables are essentially pulling at different strengths all winter long. I made a classic rookie mistake during my first install: I didn’t account for post deflection. I thought the 4×4 posts were solid as a rock. They weren’t. As I tightened the cables, the wood subtly compressed. Then, the first heavy snowfall added weight, the wood absorbed moisture, and the tensioners simply gave up. Today, I’m going to break down the 3 mistakes that make your cable railing sag every winter so you don’t have to spend your spring with a pair of pliers and a disgruntled look on your face. We’ll look at the structural bones of your deck design and ensure those posts can actually handle the thousands of pounds of pull required to keep those lines straight.
Is cable railing actually worth the maintenance hassle?
You might be wondering if you should have just gone with a standard wood or aluminum setup. It’s a fair question. Cable is beautiful because it preserves your view, but it demands respect for the tension it carries. If you’re tired of the see-saw battle with your hardware, you aren’t alone. I’ve been there, staring at a turnbuckle that won’t turn any further, wondering where I went wrong. Have you ever stepped outside after a storm only to find your railing looking like it’s given up on life? Drop a comment or message me; I’d love to hear if your deck is currently winning or losing the battle against the elements. Setting up a railing system for safety and style shouldn’t mean a lifetime of tightening bolts every few months. I eventually learned that the problem wasn’t the cable itself, but how I anchored it. Once I adjusted my approach to the framing, everything changed. Let’s get into the nitty-gritty of why your hardware is failing you and how to brace for the next big freeze.
Strengthen the Skeleton First
To fix the sag once and for all, you have to look beneath the surface. I remember a humid July afternoon when I found myself crawling under my neighbor’s deck because his modern railing was shaking like a leaf. He’d followed a basic tutorial but ignored the physics of tension. We discovered the corner posts were literally being pulled toward each other by the sheer force of the stainless steel cables. I spent four hours installing the hidden bracing move for rock-solid corner posts, which involves adding internal blocking between the rim joist and the second joist. This creates a rigid box that refuses to budge. Without this structural rigidity, even the most expensive railing systems will eventually fail as the wood compresses under the load. #IMAGE_PLACE_HOLDER_B#
Avoid the Wood Compression Trap
Most homeowners assume the cable is stretching over time, but usually, it is the wood that is giving way. Because why pressure-treated wood still warps under composite decking is a fundamental reality of organic building materials, your posts are essentially moving targets. You need to use 6×6 posts or heavily reinforced 4x4s for cable runs. If you are working with a composite decking surface, the relative softness of the boards can actually allow the post base to tilt slightly inward. I always recommend using a structural post base that anchors directly to the frame rather than just the surface boards to maintain a vertical plumb line.
Use Hardware That Actually Holds
Once your frame is stiff, you need to address the tensioners themselves. Most DIYers tighten the nut until the cable is taut and then hope for the best. I learned the hard way that vibration from heavy wind and constant foot traffic will slowly back those nuts off. Now, I always use the double nut secret for rock-solid railing posts. It is a simple mechanical lock that prevents the cable from losing its grip over years of seasonal cycles. If you are seeing your cables go limp every winter, check your hardware for signs of microscopic slippage. This is especially vital for the longevity tips for a lasting deck that most high-volume builders forget to mention during the sales pitch.
The Final Tensioning Sequence
Do not just start at the top cable and work your way down to the bottom. This is the fastest way to warp your posts and create uneven pressure. You should start in the dead center of the post and alternate—middle, then one up, then one down. This distributes the load evenly across the vertical span of the post, preventing that bow-and-arrow effect that ruins the sleek aesthetic of your railing system. When I finally applied this alternating sequence on a large-scale project last year, the difference was night and day. The cables felt like guitar strings, and they stayed that way through a brutal January freeze without needing a single turn of the wrench in the spring.Most pros will tell you to just ‘crank it tighter’ when a cable looks loose. In my experience, that is the quickest way to ruin your structural integrity. Over-tensioning creates a massive lateral load that most residential decks aren’t built to handle. If you’ve ever noticed your corner posts leaning inward, you’ve likely exceeded the wood’s fiber stress limit.
The Myth of Infinite Tension
Everyone thinks the tighter the cable, the safer the railing. That’s a dangerous trap. According to technical documentation from the USDA Forest Products Laboratory, wood has a specific ‘modulus of elasticity’ that dictates how much it can bend before permanent deformation occurs. When you over-tighten, you aren’t just straightening a line; you are turning your deck frame into a bow. This is often why composite boards feel spongy near the perimeter—the frame itself is under too much stress. Have you ever fallen into this trap of over-tightening only to see the wood crack? Let me know in the comments. 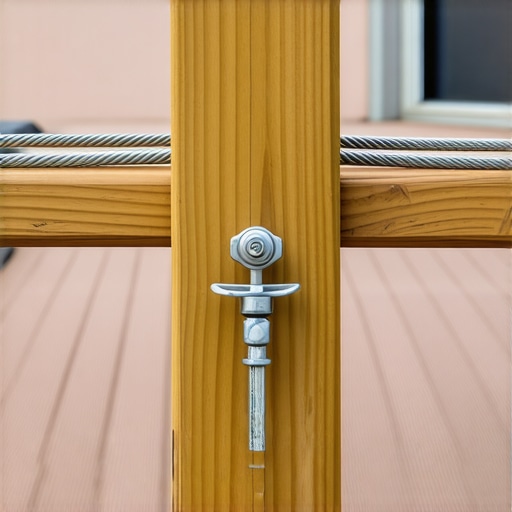
Why does the tension shift even when the hardware is locked?
The answer usually lies in the thermal dynamics of your materials. If you are using composite decking trends like dark, sleek colors, you have to account for heat absorption. I’ve seen 20-foot runs of dark decking expand by nearly half an inch in direct sun. This expansion can subtly push against your railing posts, momentarily loosening the cables. If you tighten them while the boards are hot, the cables will be under catastrophic tension once the boards cool and contract. This is exactly why dark composite boards need extra expansion space to breathe without wrecking your hardware.
Avoid the Hidden Hardware Trap
Another sophisticated mistake I see is the improper use of fasteners in high-stress zones. While they look great, hidden fasteners fail on high-traffic areas or near heavy railing anchors because they lack the sheer strength of a traditional through-bolt. If your railing feels ‘crunchy’ when you lean on it, the fasteners are likely rubbing against the substructure. It’s the same logic we apply to overhead structures; if you are looking at pergola trends, you’ll notice the shift toward heavy-duty structural screws over standard nails. The same applies to your cables. I once spent a whole weekend replacing ledger flashing because the tension from a poorly braced railing pulled the deck just enough to break the waterproof seal against the house. Don’t let an aesthetic choice become a structural nightmare.Once you’ve mastered the structural side, the longevity of your build comes down to the gear you keep in your truck. I’ve seen guys try to use standard pliers for cable installs, but if you want that high-end look, you need a manual hydraulic swaging tool. This tool applies thousands of pounds of pressure to the terminal end, ensuring the cable never slips out under load. I personally use a 10-ton hydraulic crimper because the cheaper hand-squeezed versions often leave microscopic gaps that lead to the exact sagging we discussed earlier. While you’re at it, don’t forget the string line method for perfectly level deck surfaces. It’s a low-tech tool that beats any laser when you’re dealing with a 40-foot run of composite decking. 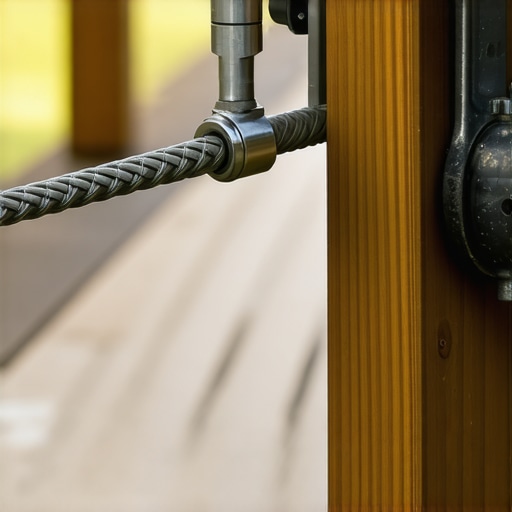
Why a Cheap Swager Will Ruin Your Railing
Beyond the crimping tool, you have to be obsessive about the hardware you drive into your frame. The American Wood Council’s National Design Specification (NDS) for Wood Construction emphasizes that fastener withdrawal capacity—the strength keeping your railing posts attached to the joists—is highly dependent on the moisture content and density of the wood. If your frame is soggy, your railing will fail. This is why I swear by the joist tape secret for doubling your decks life. It prevents moisture from sitting on the top of the wood and softening the area where your most critical bolts live.
How can I keep my deck looking pristine year after year?
The secret isn’t just in the cleaning; it’s in the repair. If you have kids or a heavy grill, you’re going to get scratches. I always tell my clients how to fix scuffs on dark composite boards with a heat gun. Gently warming the surface allows the polymer to ‘heal’ and blend the scratch back into the texture. Additionally, when you’re installing those boards, make sure you use the specific screw type that prevents composite board mushrooming. Nothing ruins a sleek surface like little rings of displaced plastic around every screw head.
The Next Wave of Outdoor Tech
I predict that within the next five years, we will see integrated tension sensors in high-end railing systems that alert your smartphone when a cable drops below safety standards. For now, we rely on good old-fashioned physics and the right composite decking secrets and longevity tips. If you’re also planning an overhead structure, check out these pergola designs that turn your garden into a sanctuary to complete the look. I highly recommend trying the double-nut locking method on your next tensioning check; it’s the smallest change that yields the biggest long-term result.
Hard Truths from the Deck Building Trenches
After years of fixing saggy lines and leaning posts, I have realized that the biggest mistake isn’t in the hardware choice—it’s in the assumption that wood is static. It isn’t. When you are planning your innovative deck design ideas that elevate your homes curb appeal, remember that wood is a living sponge. Here are the lightbulb moments that changed how I build:
- Wood compression is the real enemy. If your cables feel loose, 90% of the time it is because your posts have slightly bowed or the wood fibers have crushed under the washer.
- Pre-tensioning is a myth. You cannot just pull hard once and walk away. You need to perform the 3-second push test for wobbly railing systems every season for the first year until the structure settles.
- Hardware grade matters more than price. Cheaper 304-grade steel will tea-stain and rust in months if you live near the coast, ruining the aesthetic of your cable railing. Always insist on 316-grade marine stainless.
My Non-Negotiable Gear for a Flawless Finish
If you want to move beyond the DIY look and achieve pro-level results, you need the right kit. I never step onto a job site without a 10-ton manual hydraulic swaging tool; hand crimpers simply don’t provide the mechanical bond needed to resist high-tension loads over time. To ensure my frame lasts as long as the steel, I always apply the joist tape secret for doubling your decks life before the first board goes down. For spacing, skip the ruler and learn how to space railing balusters without ever using a tape measure using custom-cut blocks. This ensures total symmetry across the entire perimeter, which is the hallmark of a high-end build.
Build a View That Lasts a Lifetime
Your deck is more than just a platform; it is your gateway to the outdoors. Don’t let the fear of maintenance stop you from choosing a sleek, modern look. By focusing on structural rigidity and using the locking techniques we discussed, you can maximize outdoor living with low-maintenance composite decking and a cable system that stays drum-tight for decades. It takes a little extra effort on the front end, but the payoff of a clear, unobstructed view is worth every second of preparation. Have you ever struggled with getting your cable railing perfectly tight? Let me know your biggest frustration in the comments below!