
It was a humid Tuesday evening when I finally snapped. I had just finished installing what I thought was a foolproof hidden gutter system for keeping under-deck spaces dry, but the slow, rhythmic drip-drip-drip onto my new outdoor sofa told a different story. I felt like a failure. I’d spent hours reading up on innovative deck design ideas and invested in the best materials, yet my “sanctuary” was more of a splash zone. I tried the garden hose method, but water just runs everywhere and masks the actual entry point—plus, you end up soaked yourself. That’s when I saw my cordless leaf blower sitting on the workbench. A crazy thought struck me: if I can’t see where the water goes in, maybe I can feel where the air comes out. It sounds a bit “mad scientist,” I know, but when you’re desperate to save your low-maintenance composite decking investment, you’ll try anything.
Stop Guessing Where the Water Is Getting In
[image_placeholder_1]
We usually wait for a thunderstorm to diagnose a leaky deck, standing underneath with a flashlight like some amateur plumber. It’s frustrating, messy, and honestly, pretty ineffective because once the wood is saturated, the water travels along the joists before it actually drips. By the time you see a leak, the source might be ten feet away. This is exactly where I went wrong. I assumed the leak was directly above the puddle, but I was actually dealing with a ledger gap fix issue that started at the house wall. The “Leaf Blower Test” flips the script. Instead of waiting for gravity to do its thing, you use positive air pressure to find the gaps before the next clouds roll in. It’s about being proactive rather than reactive, a lesson I learned the hard way after my first attempt at under-joist flashing ended in a moldy mess. I remember thinking I could just “eye-ball” the seals, but water is a relentless detective; it finds every mistake you try to hide. Using air pressure lets you be the detective first.
Is a leaf blower really powerful enough to find a tiny gap?
You might be skeptical. I was too. I thought, “There’s no way a standard handheld tool is going to show me a hairline crack in a seam.” But here’s the thing: air is much thinner than water. If air can whistle through a gap, water will eventually find its way through via capillary action. According to the experts at the Building Science Corporation, managing bulk water is the most critical step in protecting any wood-framed structure, and air leakage is a primary precursor to moisture intrusion. By blowing air from the top side of the deck down into the drainage troughs, you can feel for the “breeze” from underneath. It’s an immediate, dry way to pinpoint exactly where your sealant failed or where a screw pierced the membrane. Have you ever spent a fortune on a dry-deck system only to find yourself reaching for a bucket every time it rains? It’s a gut-punch, but I promise this trick will save your sanity. We’re going to dive into the specific way to set this up without damaging your boards or your eardrums.
Clear the Deck and Prep the Surface
Before you even touch that blower, you need a clean slate. I learned this the hard way when I tried to find a leak while my heavy patio set was still in place. The weight of the table was actually pinching the low-maintenance composite decking enough to hide a gap that only opened up when people walked nearby. Move everything off. Once the surface is clear, use a standard broom to get rid of any debris. Leaves and pine needles act like tiny dams in your gutter system, and they will rattle around and distract you once the air starts moving. You are looking for a clean, unobstructed path for the air to travel from the top of the board down into the drainage trough. It is a lot like checking a bike tire for a puncture; you need a controlled environment to see the results.
Seal the Exits to Build Pressure
This is the secret sauce of the whole operation. If you just blow air into the gaps, it will dissipate immediately into the atmosphere. You need to create a temporary pressure chamber. Grab some painter’s tape or even some old rags and plug the ends of the gutter troughs where they normally drain into the downspouts. When I first did this, I forgot to seal the house-side connection, and the air just escaped through the ledger gap without ever reaching the leak. By blocking the main exits, the air is forced to find the path of least resistance—which happens to be the exact hole where the water is getting in. It is an incredibly effective way to see if your drip edge trick for protecting deck ledger boards is actually working or if the flashing has pulled away over time.

The Two-Person Air Detection Method
You cannot be in two places at once, and trust me, you do not want to be. I once tried to duct-tape my blower to the deck and run underneath to feel for air, only to have the blower vibrate itself right off the edge and nearly take out my railing. Get a helper. Have one person run the leaf blower on a medium setting, moving the nozzle slowly along the seams of the deck boards. The person underneath should move their hand along the joists. When you hit a leak, you will not just feel a breeze; you will feel a sharp, concentrated jet of air hitting your palm. This is where the joist tape secret for doubling your decks life becomes apparent. If you feel air whistling through a screw hole, you have found your culprit. It is usually a misplaced fastener or a piece of under-joist flashing that did not quite overlap enough. Mark these spots with a crayon immediately because once the blower stops, they become invisible again.
Check the Critical Connection Points
Do not just focus on the middle of the boards. Most leaks happen where the deck meets the house or where the gaps between composite boards and your house have not been properly sealed. I have seen beautiful decks where the builder used the string line method for perfectly level deck surfaces but completely ignored the pitch for the gutter system. As you move the blower near the ledger board, pay extra attention. If you feel air blowing back toward the house siding, you have a major problem that could lead to rot. This method is also great for checking the integrity of your railing mounts. If air is escaping from the base of a post, water is definitely getting into the structural framing. It is better to know now than to find out when pressure-treated wood still warps under composite decking because it has been sitting in a hidden puddle for three seasons.
Once you have marked those leak points using the blower method, you might think the hard work is over. But here is the uncomfortable truth: many of those leaks are just symptoms of a larger, systemic misunderstanding of how modern materials behave. We are often told that buying into low-maintenance composite decking means we can ignore the structure for twenty years, but that is a dangerous myth. In my experience, the more ‘advanced’ a system is, the more sensitive it becomes to small installation errors. For instance, many homeowners insist on hidden fasteners because they want that clean, screw-free look. However, why hidden fasteners fail on high-traffic areas is a topic most contractors won’t bring up until the boards start to rattle. If your deck spans a main walkway, the constant micro-vibrations can loosen those clips, turning your quiet sanctuary into a percussive instrument every time the dog runs outside.
The Hidden Flaw in Your Maintenance-Free Dream
The industry likes to market composite as ‘bulletproof,’ but I have seen more failed composite decks than traditional wood ones lately. The culprit is almost always thermal expansion. While wood swells with moisture, composite grows and shrinks with temperature. If you are working with trendy, deep charcoal or chocolate hues, you have to realize that why dark composite boards need extra expansion space is not just a suggestion—it is a physical requirement. A study by the Forest Products Laboratory (FPL) highlights that synthetic materials can experience significant linear expansion, which, if not accounted for, will buckle your boards and rip your joist tape right off the wood. Most DIYers tighten their fasteners too much, leaving no room for the deck to ‘breathe.’ This leads to the boards ‘mushrooming’ or, worse, snapping the heads off your expensive stainless steel screws.
Why do my composite boards still look wavy even though I followed the manual?
[image_placeholder_c]
If you have noticed a ‘wave’ in your deck surface, it is rarely the boards themselves that are at fault; it is usually the substructure. Even if you used the string line method for perfectly level deck surfaces, standard pressure-treated joists can crown or bow as they dry out. This is why I always advocate for why your deck joists need tape to prevent rot. It provides a small buffer that can dampen sound and protect the wood from the water that inevitably gets trapped between the board and the joist. Another ‘oops’ factor I see constantly is the over-tightening of railing posts. People think more torque equals more safety, but the specific reason your railing post is cracking the concrete or splitting the rim joist is often the lack of a proper shim or the failure to use the double nut secret for rock-solid railing posts. You want a connection that is firm but doesn’t crush the wood fibers, which eventually leads to rot-inducing pockets.
Stop the Squeak Before It Starts
If you are already dealing with a finished deck that sounds like a haunted house, do not panic. You can often implement the simple DIY solution for squeaky composite boards by adding blocking from underneath. The key is to stop the vertical movement. Most people think they need to add more screws from the top, but that just creates more entry points for water. Instead, look at your the structural reason your deck needs a mid-span beam; if your joists are over-spanned, no amount of leaf-blower testing or sealant will save you from the eventual ‘bounce’ and the leaks that follow. Have you ever fallen into this trap where you prioritized aesthetics over the physical expansion of the boards? Let me know in the comments. We have all been there, and catching it early is the only way to save your investment.
Moving from the frustration of a leak to the satisfaction of a rock-solid build requires more than just grit; it requires a specific toolkit that most ‘weekend warrior’ guides ignore. I used to rely on a standard circular saw and a prayer, but after watching a pro-grade framing hack for building curved deck perimeters, I realized I was bringing a knife to a gunfight. If you want to scale your project from a basic platform to a high-end architectural feature, you need to stop eyeballing your measurements. I personally swear by a digital angle finder for every 10-degree miter cut that stops pergola water traps. It’s the difference between a joint that stays tight for twenty years and one that opens up the first time the sun hits it.
The One Power Tool That Saves a Failed Weekend
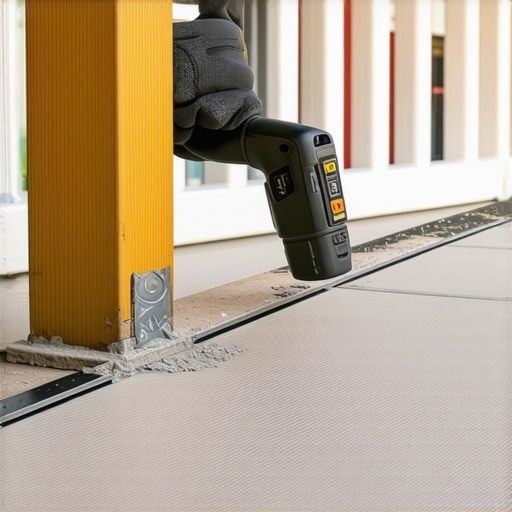
If you don’t own an oscillating multi-tool, you are making your life twice as hard. When I’m implementing the PVC trim move for protecting exposed deck joist ends, a standard saw simply cannot reach those tight interior corners without scarring the surrounding boards. This tool allows for surgical precision when you need to notch a post or trim a piece of fascia that’s already installed. I use it constantly to clean up the edges where gaps between composite boards and your house start to look uneven. It is the ‘eraser’ for carpentry mistakes. According to the North American Deck and Railing Association (NADRA), structural failure often begins at these small, poorly fitted joints where moisture finds a home. By using precision tools to ensure tight fits, you aren’t just being a perfectionist—you are preventing rot.
Dial in Your Railing Tension Without the Guesswork
Railing systems are the most touched part of your deck, yet they are often the most neglected during the maintenance phase. Most people wait until a guest points out a wobble before they reach for a wrench. Instead, I use a dedicated tension gauge once a season, especially for cable setups. This prevents the dreaded 3 mistakes that make your cable railing sag every winter. If you aren’t measuring the actual PSI of those cables, you’re likely over-tightening them, which puts massive lateral stress on your end posts. I’ve seen 4×4 posts bowed like archer’s bows because someone thought ‘tighter is always better.’ If you’re struggling with a shaky top rail, try how to fix a wobbly top rail without removing the balusters by using stainless steel shims rather than just cranking down on the screws.
How can I keep my deck looking new for decades?
Long-term results aren’t about one big cleaning session; they are about small, tactical interventions. Every spring, I do a walkthrough specifically looking for ‘mushrooming’ around fasteners. If I see a board starting to lift, I use the specific screw type that prevents composite board mushrooming to reset the connection. For the surface itself, skip the power washer. I’ve seen more low-maintenance composite decking ruined by high-pressure water than by actual foot traffic. Use a soft-bristle brush and a pH-neutral cleaner. And for heaven’s sake, remember why you should never use bleach on composite decks—it can break down the UV inhibitors in the capping, leading to premature fading that no amount of ‘restorer’ can fix.
The Future of High-Performance Outdoor Living
We are moving toward a world where our decks are as smart as our kitchens. I’m already seeing a trend toward integrated sensor systems that sit beneath the boards to alert homeowners of moisture buildup before it becomes rot. In the next few years, I predict we’ll see pergola trends shifting toward automated louvers that sync with local weather apps to close the moment a raindrop is detected. For now, the best ‘smart’ move you can make is to master the basics of structural integrity. I challenge you to go out this weekend and perform the 3-second push test for wobbly railing systems on every post you have. If there’s even a millimeter of play, it’s time to stop reading and start tightening.
Hard Truths About Deck Longevity That Only a Failed Build Can Teach
After years of getting my hands dirty, I realized that composite isn’t a ‘set-it-and-forget-it’ miracle; it’s a high-performance material that requires technical respect. If you don’t account for the thermal expansion of those boards, nature will eventually buckle your hard work. I also learned that the smallest gaps are often the deadliest. A massive leak is easy to find, but it’s the slow, hidden moisture entry—like the one we pinpointed using the leaf blower—that causes structural rot while you’re busy admiring the surface finish. Most importantly, I’ve found that composite decking secrets for longevity often come down to what happens under the boards. Protecting your joists is non-negotiable if you want the structure to match the lifespan of the decking.
Tools and Resources That Actually Earn Their Keep
I don’t recommend products lightly, but a few things have saved my projects from total disaster. First, the Oscillating Multi-tool is my absolute ‘desert island’ tool; it’s the only way to surgically fix a bad joint without ruining a whole section of low-maintenance composite decking. Second, I constantly refer to the NADRA Deck Safety Manuals for structural baselines. For aesthetic inspiration that doesn’t compromise on drainage, I suggest looking at pergola designs that turn your garden into a sanctuary. Finally, a high-quality digital angle finder is essential for those complex miter cuts that prevent water traps in your railing joints and pergola beams.
Your Outdoor Space Deserves the Extra Effort
Building and maintaining a deck is a marathon, not a sprint. It’s easy to get overwhelmed by the technical details, but remember why you started: to create a space for family memories and quiet morning coffees. By taking the time to perform a proactive leaf blower test or checking for how to fix scuffs on dark composite boards properly, you are protecting the integrity of your sanctuary. Don’t let a small drip or a slightly wavy board dampen your enthusiasm. With the right approach and a bit of ‘mad scientist’ ingenuity, your innovative deck design ideas will stand the test of time and weather. Have you ever found a surprise leak in a spot you were certain was sealed tight? Let me know in the comments below!