
I was standing on my brand new deck last summer, ice-cold lemonade in hand, feeling like I’d finally conquered the suburban dream. Then I looked down. Right there, wedged between my beautiful stone pavers and the siding, was my outdoor AC unit. It was loud, it was rusted, and it looked like a giant gray wart on my home’s face. I’d spent thousands to maximize outdoor living with low-maintenance composite decking, only to have the whole aesthetic murdered by a rattling HVAC box. I tried hiding it with tall grasses once—they turned brown within a month from the constant heat blast. I tried a cheap wooden lattice—it warped and looked like a shipwreck by the following spring. That’s when the lightbulb went off: if I loved my composite deck so much, why wasn’t I using those same durable slats to build a custom shroud that actually matches?
Stop Letting Your AC Unit Ruin Your Backyard Vibe
Look, we all need air conditioning, but nobody wants to stare at the machinery. I’m going to show you how to build a sleek, ventilated enclosure using composite slats that won’t rot, peel, or require a paintbrush every season. We’re solving two problems today: the eyesore factor and the durability nightmare of traditional wood. When I first started experimenting with this, I actually made the rookie mistake of building the screen too tight against the unit. I thought “the more I hide it, the better it looks,” right? Wrong. I ended up with an emergency service call because the compressor was overheating from zero airflow. It was an expensive lesson in physics that you don’t have to repeat.
Is a decorative screen actually going to kill my AC unit?
This is the big one. People worry that by “hiding” the unit, they are essentially suffocating it. It’s a valid fear. According to the U.S. Department of Energy, restricted airflow can significantly reduce your unit’s efficiency and lifespan—sometimes by as much as 15% if you don’t leave enough clearance. However, by using a slat-based design, you can maintain the necessary “breathing room” while still blocking the unit from your line of sight. It’s all about the gap. I’ve learned that the spacer hack for perfectly aligned pergola slats works just as well for AC screens to ensure consistent airflow without sacrificing the look. You get the privacy you want and the ventilation the machine needs.
Why Slats Beat Every Other Hiding Spot I Tried
I’ve seen neighbors try everything from plastic lattice to heavy shrubs. Plastic looks cheap after one season in the sun and eventually cracks under the UV pressure. Shrubs die from the hot air exhaust. Composite is the “Goldilocks” material here. It handles the constant temperature swings of an HVAC cycle without cracking or expanding wildly. Plus, you can match the colors to current composite decking trends so the whole project looks intentional, not like an afterthought. I’ll be honest: have you ever looked at your AC unit and thought about just painting it? Don’t. Trust me, I tried that too, and the peeling was a nightmare within weeks. Instead, let’s talk about how to build a privacy screen that doesn’t block the breeze but specifically for your mechanical equipment. It changed my backyard entirely, and I promise it’s easier than you think. Have you ever tried to hide your AC unit and ended up making it look even worse? Tell me I’m not the only one who has struggled with this eyesore.
Give Your Machine Room to Breathe
The first rule of AC fight club is that you do not choke the intake. Think of your outdoor unit like a marathon runner; if you wrap them in plastic, they’re going to collapse. I follow a variation of the 3-foot rule for planning your outdoor kitchen layout when I’m positioning my screen. You need at least 24 to 36 inches of clearance on the intake sides. Anything closer and you’re basically asking for a compressor failure. I start by marking my post holes with a simple layout. You aren’t building a fortress; you’re building a veil. If your unit is in a corner, an L-shaped screen works best. If it’s against a flat wall, go for a U-shape. This allows you to walk behind the screen if a technician ever needs to pull the panel off.
Set the Posts for Maximum Stability
Don’t just stick some 2x2s in the dirt. Even a small screen catches wind like a sail. I recommend using 4×4 pressure-treated posts as the skeleton. While why your pergola posts need to be 6×6 minimum for stability applies to heavy overhead structures, a 4×4 is more than enough for a decorative screen. Dig your holes about 18 inches deep, toss in some gravel for drainage, and set the posts in fast-setting concrete. Make sure they are perfectly plumb. If the posts are crooked, your horizontal slats will look like they’re sliding off a cliff.
Build a Framework That Wont Rot Away
Since this screen is going to live in a high-humidity, high-heat zone, the framework is the most vulnerable part. Even though you are using composite for the exterior, the interior wood posts will rot if they are constantly blasted with hot, moist exhaust air. This is where why your deck joists need to be tape to prevent rot becomes a lifesaver. I wrap the tops and the front faces of my pressure-treated posts with butyl joist tape before I ever touch a composite board. This creates a waterproof barrier that keeps the wood dry and the screws tight for decades.

Installing Slats Without the Headache
Now comes the fun part: the skin. To get that high-end look, you need perfectly even gaps. This isn’t just for aesthetics; it’s for the air movement we talked about. I’ve found that the spacer hack for perfectly aligned pergola slats is the only way to do this without losing your mind. I use 3/4-inch plywood scraps as my spacers. Place your bottom slat first, level it, screw it in, then rest your spacers on top and set the next board. It’s like stacking Legos. I highly recommend using why solid core composite is worth the extra bulk for these slats. Thinner, hollow-core boards tend to vibrate and rattle when the AC unit kicks on, which can drive you crazy if the unit is right outside your bedroom window.
Avoid the Dreaded Mushroom Effect
I’ll never forget the first time I built one of these. I used standard wood screws because I was in a rush and didn’t want to drive to the store. Within ten minutes, I had what I call the “Great Mushrooming Incident.” Composite is dense; when a standard screw head tries to push its way in, it displaces the material upward, creating a nasty, raised ring around the screw. It looked like the screen had a skin disease. Learn from my arrogance and use the specific screw type that prevents composite board mushrooming. These screws have reverse threads at the top that pull the material back down into the hole, leaving a clean, flush finish. It’s the difference between a DIY project that looks like a weekend accident and one that looks like it was professionally installed by a crew that knows how to build a privacy screen that doesn’t block the breeze correctly.
I’ve seen dozens of DIYers get lulled into a false sense of security by the label “maintenance-free.” Here is the reality: your composite boards will last for 25 years, but the pressure-treated lumber holding them up might not make it to ten if you aren’t careful. While why professional builders prefer capped composite over wood is a fact for the surface, the skeleton remains organic. This is the biggest “oops” factor I see. People spend thousands on high-end boards but skip the small investment in protecting the frame. I always tell my clients that the joist tape secret for doubling your decks life is the single most important step for any outdoor structure, especially an AC screen that deals with localized heat and condensation.
Expansion Gaps Are Not Optional
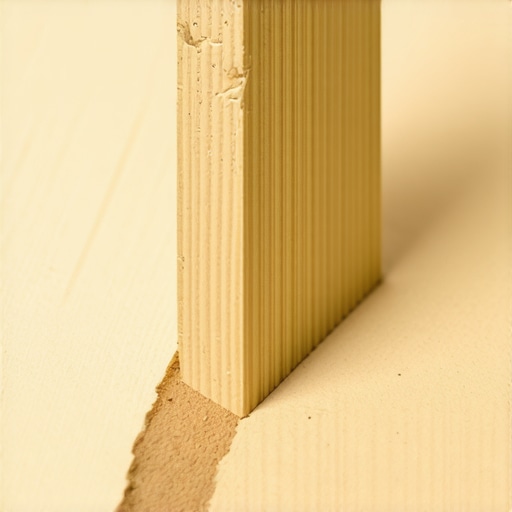
Then there’s the issue of thermal expansion. Most people think composite is like stone. It isn’t. In fact, a standard board can expand or contract significantly depending on the temperature. If you butt those boards tight against a post in July, they will buckle or pull your screws out by January. Research from the North American Deck and Railing Association (NADRA) highlights that structural failures often stem from ignoring these environmental stressors rather than the material itself. This is exactly why dark composite boards need extra expansion space compared to lighter shades—they absorb more UV heat and move more aggressively. If you don’t account for this, your perfectly straight screen will look like a wavy mess after one full season.
Why does my rot-proof screen feel wobbly after two winters?
It usually comes down to the soil and the post-depth, not the boards themselves. If you didn’t dig below the frost line, the ground is literally pushing your project out of the earth. I’ve learned the hard way that why your pergola posts are sinking and how to shore them up applies even to small-scale privacy screens. When the ground freezes, the water in the soil expands and heaves the concrete footings upward. Without proper depth or a gravel base for drainage, that “permanent” screen becomes a tilting eyesore. Have you ever fallen into this trap? Let me know in the comments.
Pick the right tools for a cleaner finish
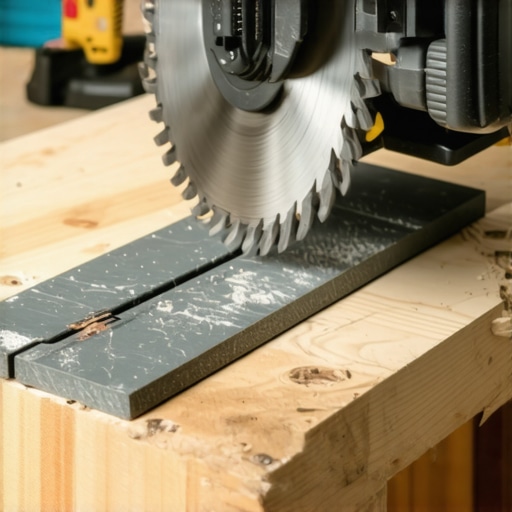
Building a screen is one thing, but making sure it doesn’t look like a science project in five years is another. I swear by my 12-inch sliding miter saw with a high-tooth-count carbide blade. If you use a standard wood blade, you’ll get those nasty burrs on the edges of your composite boards that catch every piece of lint and cat hair in the neighborhood. I also keep a heat gun in my bag. Why? Because accidents happen during installation. If you accidentally scrape a board while moving the heavy AC unit, you can learn how to fix scuffs on dark composite boards with a heat gun rather than tearing the whole structure apart. I also rely heavily on a speed square. It’s not just for 90-degree angles; it’s my constant guide for checking that my expansion gaps haven’t shifted as the sun moves across the yard. Professional installers often refer to the AZEK Building Products Technical Guide, which specifies that the type and depth of your fastener directly impact the board’s ability to resist ‘thermal creep.’ If you find that your boards are starting to shift, the simple DIY solution for squeaky composite boards often comes down to re-securing those hidden fasteners that have backed out slightly.
Stop the rot before it starts
Maintenance is a bit of a misnomer with composite. You aren’t sanding or staining, but you are definitely cleaning. Leaves and pollen love to settle in those 3/4-inch gaps we worked so hard to create. If you let them sit, they turn into a damp paste that holds moisture against your wood frame. This is how the secret to preventing leaf rot between deck boards applies here too: I use a leaf blower once a week to clear the gap between the unit and the screen. It takes thirty seconds but saves the frame from premature failure. And please, why you should never use bleach on composite decks is something you need to memorize. Bleach can permanently discolor the capped layer of your boards, leaving you with a blotchy mess that no amount of scrubbing can fix.
How do I maintain composite structures over time?
Beyond the weekly leaf-blowing, you should do a deep clean every spring. I use a soft-bristle brush and a specialized composite cleaner—never a pressure washer on a high setting, which can etch the surface. If you had a summer party and a guest spilled something, knowing how to clean red wine stains off composite decking fast can save your sanity and your screen’s aesthetic. I also suggest doing a quick ‘push test’ on your posts once a year to ensure the frost hasn’t compromised your footings.
Where backyard design is heading in 2026
I’m already seeing a shift toward ‘smart enclosures.’ Imagine a screen where the slats automatically tilt based on the HVAC unit’s exhaust temperature or integrated LED strips that change color if the unit is struggling with airflow. We’re moving toward a world where innovative deck design ideas that elevate your homes curb appeal include integrated sensors and automated ventilation systems. My best advice for right now? Try the ‘flashlight test’ tonight. Take a high-powered light and shine it through your screen gaps while the AC is running. If you see swirling dust being sucked aggressively against the boards, your gaps are too small and you’re choking the unit. Widening them now by just an eighth of an inch could save you a three-thousand-dollar compressor replacement later this summer.
The Hardest Lesson I Learned About Airflow and Aesthetics
When I first built my enclosure, I didn’t realize how much the color of the boards mattered beyond just matching the siding. I quickly found that why dark composite boards need extra expansion space is a rule you ignore at your own peril; my black slats bowed like a wet cardboard box in the August sun because I didn’t leave enough room at the ends. Another lightbulb moment? Always build in a ‘removable’ panel. AC units need servicing, and if you’ve screwed everything down permanently, your HVAC technician is going to charge you by the hour to dismantle your hard work. Finally, remember that composite decking secrets longevity tips for a lasting deck apply here too: even though it’s a small screen, it needs a solid foundation to prevent that sagging ‘DIY look’ over time.
My Essential Toolkit for Custom Screen Projects
To get professional results, I never start a project like this without a few non-negotiables. First, a sliding miter saw is a must for clean cuts on those composite slats. Second, I always keep a roll of butyl tape handy—seriously, the joist tape secret for doubling your decks life is the only way to ensure your wooden frame doesn’t rot while your composite boards stay perfect. I also recommend checking out innovative deck design ideas that elevate your homes curb appeal for inspiration on how to blend these utility screens into your overall landscape. If you have leftovers, how to use scrap composite boards to build custom planters is a great way to use those expensive cut-offs to flank your new AC screen with some greenery.
Your Backyard Deserves This Transformation
You don’t have to live with a noisy, rusted eyesore ruining your view. By taking a few hours this weekend to build a ventilated, durable enclosure, you’re not just hiding a machine; you’re finishing the story of your outdoor living space. It’s about taking control of the details that make a house feel like a curated home. Whether you’re matching a new pergola or just cleaning up a side yard, these small projects are what truly maximize outdoor living with low-maintenance composite decking. Go grab your drill and get started. Which part of your backyard equipment is the biggest eyesore for you right now—is it the AC unit, the pool pump, or the trash cans? Let me know in the comments below!