
You know that moment when you’re relaxing on your deck, enjoying a cool drink, only to realize there’s nowhere handy to set it down without risking a spill? I’ve been there more times than I can count, and it always feels like a missed opportunity to truly maximize my outdoor living space. That lightbulb moment hit me hard: why not upgrade my existing wood railing with a simple, stylish drink rail? It seemed so obvious in hindsight, yet I hadn’t seen many practical guides on the matter.
Revamping Your Railing: Why a Drink Rail Could Be the Game-Changer
Adding a drink rail isn’t just about convenience. It elevates the entire experience of your deck, patio, or pergola area. A well-designed drink rail provides a dedicated spot for glasses, cans, and even small plates, keeping them within easy reach and preventing accidental spills that can damage your deck or create slip hazards. Plus, it adds a touch of style—think of it as the jewelry for your railing.
From personal experiments, I learned that the key is working with what you already have. If your existing wood railing is sturdy, extending its functionality with a drink rail can be simple and cost-effective. And the best part? You can customize the height, material, and style to match your outdoor aesthetic.
If you’re torn about whether your current railing can handle this upgrade or worried about how much effort it requires, don’t fret. I was skeptical at first too. But after a bit of practical research and some trial-and-error, I found that a drink rail can be a straightforward addition that promises a significant boost in usability.
Before diving into the installation, it’s worth noting that selecting the right materials and design not only ensures durability but also complements your existing deck style. For inspiration, check out some stunning deck design ideas that can integrate seamlessly with your new railing addition.
Now, if you’ve faced the frustration of trying to balance drinks on unstable rails or felt your deck lacks that finishing touch, you’re not alone. Fortunately, with just a few tools and some know-how, you can add a functional, attractive drink rail that makes outdoor entertaining more enjoyable and less stressful. Let’s explore how to make this happen step-by-step.
Prepare Your Materials and Workspace Efficiently
Start by gathering all necessary tools—drill, saw, measuring tape, level, and screws—and materials like weather-resistant wood or composite for durability. Clear your deck area of furniture and debris to ensure a safe, uncluttered workspace. I once launched into this project without organizing beforehand, only to realize midway that I was missing crucial screws; it caused unnecessary delays, so prep thoroughly.
Measure and Mark the Railing Spot Precisely
Determine the desired height for your drink rail, typically around 36-42 inches from the deck surface, depending on your preference and existing railing height. Use a measuring tape and carpenter’s level to mark a straight line around the existing railing. When I did my first measurement, I used a chalk line to ensure a perfect straight edge—this little step saved me from a crooked install that I would have regretted later.
Cut the Support Rails Accurately
Cut your support supports to length, ensuring they match your marking line. For curved or uneven rails, take multiple measurements at different points and cut them slightly longer than needed, trimming to fit. I once underestimated the length required and had to re-cut my supports, which added an hour to my project, highlighting the importance of precise measurement and cautious cutting.
Secure Supports to Existing Railing
Attach the support rails to your existing railing using corrosion-resistant screws, ensuring they are level and spaced appropriately for stability. Pre-drill holes to prevent splitting. During my own installation, I used a helper to hold supports in place while I drilled, which helped maintain accuracy and prevented missed holes.
Attach the Drink Rail and Reinforce it
Place your chosen top rail material onto supports and secure it with screws, ensuring it’s flush and level across all sections. For extra strength, add brackets or metal supports underneath. I found that securing the top rail tightly prevented wobbling, making the drink rail sturdy enough for glasses and snacks. 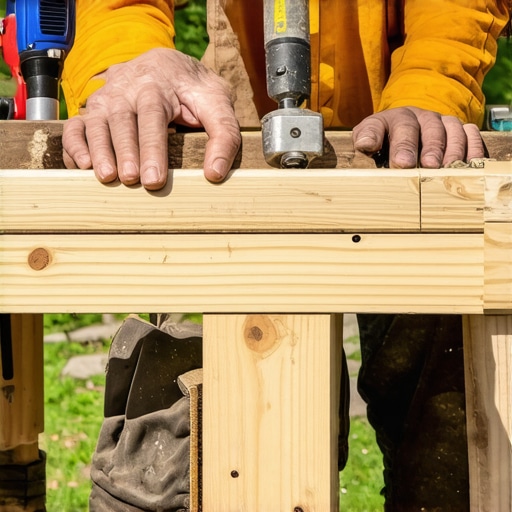
Finish with Sealing and Comfort Enhancements
Apply a weatherproof sealant suitable for outdoor furniture to protect your wood or composite from the elements. If desired, sand rough edges for a smooth finish and add padding or decorative caps for a polished look. I once neglected sealing, and within months, my wood showed signs of weather damage, a reminder to prioritize protective finishes.
Many homeowners and even seasoned DIYers often fall prey to misconceptions when designing outdoor spaces like pergolas, railing systems, and composite decks. One prevalent myth is that all composite decking is created equal—**but the truth is, many overlook critical factors like UV resistance and board density**, which directly impact longevity and appearance. For instance, some products claim to be maintenance-free, yet neglect to mention that certain brands are prone to fading or warping under direct sunlight, undermining their supposed durability. To truly optimize your outdoor investment, it’s essential to differentiate between superficial features and those that ensure lasting performance. An advanced mistake I see is choosing railing systems based solely on appearance, without considering **how they respond to wind and environmental stressors**, which can cause rattling or wobbling over time. External expert insights recommend scrutinizing fastening mechanisms and material flexibility; for example, consulting studies from the American Wood Protection Association reveals that proper anchoring and corrosion-resistant hardware significantly extend system lifespan. Don’t be lured by trendy designs alone; understanding these nuances can save you headaches and money in the long run. Want to elevate your deck with smarter choices? Review our article on [how to select the perfect railing system for every deck](https://deckforgebuilders.com/how-to-select-the-perfect-railing-system-for-every-deck). Moreover, many overlook that **building codes and safety standards evolve**, and what was acceptable ten years ago might no longer comply—so staying updated prevents costly revisions later. When designing a pergola, for example, neglecting to incorporate proper drainage or wind bracing can transform a beautiful feature into a liability. This point is often missed when following beginner tutorials; advanced planning is key. For those looking into comprehensive solutions, exploring [pergola trends that combine style and resilience](https://deckforgebuilders.com/pergola-trends-crafting-shade-elegance-in-your-outdoor-space) can provide valuable insights. Remember, the devil is in the details—skipping nuanced considerations can result in structures that not only underperform but also compromise safety. So, next time you plan an outdoor project, ask yourself—are you considering all these hidden factors? Have you ever fallen into this trap? Let me know in the comments.Maintaining your outdoor deck, pergola, and railing systems requires reliable tools and a clear approach to ensure long-term durability and aesthetic appeal. Over the years, I’ve refined my toolkit to include specific equipment that simplifies repairs, cleaning, and upgrades. For example, a high-quality cordless impact driver has become indispensable for fastening hardware quickly and securely, especially when working with composite materials that require precise torque. Additionally, a digital moisture meter helps me monitor wood moisture levels, preventing issues like warping or rot—key to preserving your investment. When sealing or staining, I rely on a 3-inch foam brush for detailed coverage and an airless sprayer for larger surfaces, which saves time and ensures even application. I also recommend investing in a good set of multi-bit screwdrivers and cordless drills with adjustable torque settings; they adapt to various fasteners and material densities, reducing strip-outs and damage. For cleaning, a power washer equipped with a variable pressure nozzle allows me to remove dirt and mold without harming delicate surfaces like composite decking. For ongoing maintenance, I use rust-resistant stainless steel fasteners and hardware designed specifically for outdoor environments—these prevent corrosion and maintain structural integrity over years. Looking ahead, innovations like smart sensors are emerging that can alert you to moisture build-up or structural shifts in your deck’s framing, paving the way for even smarter maintenance routines. To keep everything working smoothly, I suggest developing a regular inspection and cleaning schedule, focusing on joints, fasteners, and sealant integrity. Learning to identify early signs of deterioration can save you significant money and effort later on. Want to extend the life of your deck and pergola? Try applying a multi-layered sealing process with high-quality weatherproof sealant, followed by a protective UV coating—this combination is proven to extend the lifespan of your materials. For instance, experts from the American Wood Protection Association recommend reapplying sealant every 2-3 years, depending on exposure levels, to prevent moisture penetration and surface degradation. Remember, investing in the right tools isn’t just about convenience; it’s about ensuring that your outdoor space remains a safe, beautiful retreat for years to come. Incorporate these precise tools into your maintenance routine, and you’ll thank yourself later. Have you tried any of these tools before? What’s your go-to equipment for outdoor upkeep? Let me know in the comments or visit our contact page to share your experience.
Uncovering Hidden Truths in Outdoor Living
One of the most eye-opening lessons I encountered was realizing that many homeowners overlook the importance of material longevity when designing their outdoor spaces. I once chose a trendy, inexpensive railing without considering how environmental stressors like wind and sun might affect it over time. The result? Wobbling, fading, and a need for early replacement. This lightbulb moment taught me to prioritize durability and to consult credible sources like the composite decking longevity tips. It’s not just about aesthetic appeal but ensuring your investment withstands the test of time.
My Toolbox for Outdoor Success
Through trial, error, and advice from industry leaders, I curated tools that transformed my maintenance routine. A high-quality cordless impact driver became my go-to for fastener installation, especially with composite materials, which demand precision. For sealing projects, I rely on a 3-inch foam brush for detailed coverage and an airless sprayer for larger surfaces, streamlining the process efficiently. Moreover, a digital moisture meter was invaluable in preventing hidden rot—something every deck and pergola owner should have. Interested in my full toolkit? Check out the deck design ideas for additional insights on sustaining your outdoor features.
Your Next Move Starts Here
Empowering yourself with knowledge and the right tools can dramatically change your outdoor living experience. Don’t hesitate to experiment with materials, styles, and maintenance routines. Every project is an opportunity to learn, improve, and create a space that truly reflects your vision while standing the test of time. Remember, the secret lies in paying attention to detail—from selecting corrosion-resistant hardware to sealing every joint properly. Are you ready to take your backyard to the next level with smarter upgrades and resilient designs? Share your plans or questions below—I’d love to hear about your journey toward a more beautiful and durable outdoor space.