
It was a sweltering summer afternoon when I finally realized my outdoor space was missing the one thing I really wanted—a privacy screen that didn’t turn my backyard into a greenhouse. I had spent hours researching and designing, only to discover that many privacy solutions either blocked the breeze or created a stuffy enclosure. My first attempt was a clunky wooden panel that looked good from the outside but turned my garden into a windless zone, making it uncomfortable and stifling the very atmosphere I loved. The moment I felt the oppressive stillness, I knew I had to find a better way.
Keeping the Breeze While Gaining Privacy: The Challenge and the Promise
Building a privacy screen that offers seclusion without sacrificing airflow isn’t just a matter of choosing the right materials—it’s about understanding the delicate balance between blockading sightlines and allowing the wind to flow freely. If you’ve ever layered your deck with bulky screens that turn your outdoor living into an oven or opted for flimsy fabrics that flutter away at the slightest breeze, you know the struggle is real. But here’s the good news: based on my experience and what I’ve learned from seasoned outdoor designers, it’s entirely possible to create a structure that provides privacy and maintains that refreshing breeze.
What You Should Be Skeptical About
Many beginners fall into the trap of thinking that to block the view, they need to completely seal off their outdoor space. I made this mistake early on—covering my pergola with solid panels, only to realize my backyard turned into a windless void. It was a hard lesson in how blocking the breeze can lead to a stale, uncomfortable environment. According to a study published by the University of California, well-designed outdoor structures that incorporate strategic openings can significantly improve airflow while still offering privacy, making your space more enjoyable overall.
The goal is to **strike a balance**—and trust me, it’s worth the effort. Next, I’ll guide you through practical ideas and personalized tips on how to build a privacy screen that keeps prying eyes out but invites the breeze in, transforming your outdoor area into a true sanctuary. If you’re tired of sacrificing air circulation for privacy, keep reading—because what worked for me might just work for you too.
Establish Your Structural Framework
Start by deciding on the size and placement of your privacy screen. Use stakes and string to outline the perimeter, ensuring it’s level and aligned with existing features. For example, I built mine along the edge of my deck, marking where I wanted the panels to go, which kept things organized and precise. Once the outline is set, install sturdy posts—preferably pressure-treated lumber or composite—anchored securely into the ground or attached to your deck framing. Use a level to make sure each post stands straight; a misaligned post can make the entire structure wobbly. For a clean look, consider hidden fasteners and brackets that make connections neat and sturdy.
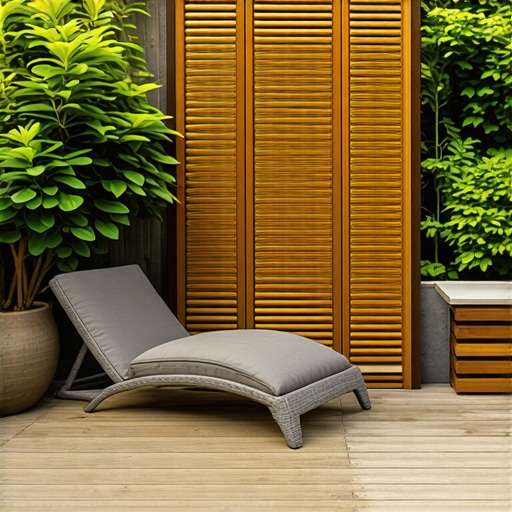
Create Openings that Balance Privacy with Ventilation
Instead of solid panels, opt for slatted designs with gaps—similar to a picket fence but taller and more enclosed. Space the slats about 2-3 inches apart—this allows wind to pass while blocking direct sightlines. I experimented with different spacing during my project; initially, I used 1-inch gaps, but the wind caused the slats to flutter too much. Increasing to 3 inches struck the right balance, letting the breeze flow without sacrificing privacy. Attach these slats securely to your posts using composite deck screws, ensuring they’re spaced evenly—this avoids gaps that are too wide or uneven. Use a spacer block or a screw gauge trick (like the spacer block method described here) to maintain consistent gaps throughout.
Incorporate Tailored Lattice or Decorative Panels
For added privacy or style, attach decorative panels or lattice with a pattern matching your aesthetic. Make sure these panels are lightweight but durable—composite panels or fiber cement options are excellent for outdoor resilience. When attaching, leave slight gaps or gaps with decorative slats, which enhance airflow. During my build, I used a simple geometric fascia pattern, which offered both privacy and an artistic touch. Secure panels with corrosion-resistant screws and consider adjustable brackets that let you fine-tune the position over time.
Choose Materials that Play Nice with Breeze and Sun
Use materials that won’t warp or expand excessively. I learned the hard way that solid wood can warp over time, especially in direct sunlight and humidity. Instead, opt for composite decking materials—check out the latest composite decking secrets—which resist warping, fading, and weathering. They also require less maintenance, so your privacy screen remains beautiful with less upkeep. For framing, composite or metal posts are less prone to rot and rust, offering longevity and stability. Ensure your posts are anchored correctly, especially if your screen is tall or spans a wide area.
Fine-Tune for Breeze and Privacy
After assembly, sit back and test your creation during a windy day. Adjust slat spacing or panel angles if needed. Small tweaks—like angling slats slightly downward or increasing gaps at the bottom—can dramatically improve airflow. Remember, the goal is a space that feels open but private, airy but secluded. During my initial test, I noticed the wind was pushing leaves through the gaps; adding a row of climbing plants or outdoor fabric on the backside can help fill small gaps without blocking airflow entirely. Once satisfied, seal any wooden parts with an outdoor-grade sealant or paint for extra weather resistance.
While many homeowners believe that choosing the right composite decking material alone guarantees durability and style, there’s a nuanced layer of considerations that often go unnoticed. A common myth is that all composite materials expand and contract equally under temperature fluctuations, but in reality, variations in formulations can lead to uneven warping or gaps over time. According to a study by the Wood Plastic Composites Research Group, understanding the specific expansion rates of your chosen composite is crucial for long-term performance. Many fail to account for these subtle differences, resulting in costly repairs or aesthetic issues.
Another widespread mistake involves the installation of railing systems. Homeowners often overlook the importance of proper spacing and anchoring techniques, which can compromise safety and stability. For instance, installing balusters too close can hinder airflow and create an enclosed feeling, defeating the purpose of a well-designed outdoor space. Conversely, excessively wide gaps may not meet safety codes and can be hazardous. An advanced tip is to use the “spacer block” method during installation to ensure consistent spacing, a trick recommended by seasoned deck builders.
When it comes to pergolas, many assume that a simple post-and-beam approach suffices. However, without considering the nuances of wind load and soil conditions, structures can sway or settle unevenly. The key lies in precise footing and anchoring methods tailored to your environment. Incorporating diagonal bracing or adjustable joints can mitigate sway and extend the lifespan of your pergola. For detailed insights, explore the latest trends in innovative deck design, which emphasize structural resilience alongside aesthetics.
Make sure not to fall into the trap of selecting materials solely based on appearance—durability, compatibility with climate, and installation nuances are equally vital. For example, composite decking options that resist fading and warping, like those discussed in [this guide](https://deckforgebuilders.com/composite-decking-secrets-longevity-tips-for-a-lasting-deck), can make a significant difference in maintenance. Additionally, pay attention to how railing systems are assembled; improperly secured posts or incompatible hardware can lead to safety hazards and diminish your outdoor enjoyment.
Understanding these hidden nuances isn’t just about avoiding mistakes; it’s about elevating your project from good to outstanding. By paying attention to these advanced details, you ensure your outdoor space remains beautiful, functional, and safe for years to come. Have you ever fallen into this trap? Let me know in the comments and share your experience—your insight might help someone else avoid the same pitfalls.Maintaining the beauty and functionality of your outdoor deck and pergola over time requires more than just initial careful construction; it hinges on the right tools, routine maintenance, and understanding the evolving trends in outdoor materials. One of the most valuable tools I rely on is a high-quality cordless impact driver. Its power and precision make installing fasteners and adjusting components straightforward, especially when working with composite decking boards that demand specific torque levels to avoid mushrooming or cracking. I prefer models with brushless motors, like the Makita XDT12, because they offer longer battery life and less wear over repeated use, which is crucial for extensive projects or periodic upgrades. Additionally, a good set of bit drivers ensures you don’t strip screws or damage finishes, saving time and frustration in the long run.
For measuring and alignment, a digital angle finder or a laser level is indispensable. These tools allow for precision in setting the correct slopes for drainage and ensuring your railing and decking are perfectly aligned, which is vital for safety and aesthetics. I regularly use the Bosch GLM 50C laser distance measurer, which combines ease of use with high accuracy, making it quick to verify measurements without crawling around on the ground or leaning over edges.
Keeping your structures protected and looking pristine involves routine upkeep, and that’s where specialized cleaning and sealing tools come into play. A power washer with adjustable pressure settings is essential to remove dirt, mold, and algae from composite decks without damage. I recommend setting the washer to a max of 1500 PSI and maintaining a proper distance to prevent etching the surface. After cleaning, a sprayer designed for sealants helps in evenly applying coats of weatherproofing products. For composite decking, I prefer using sealants that resist UV fading and moisture intrusion, ensuring long-term durability. Brands like Coolaroo and Behr offer reputable options with proven effectiveness, as noted in the [composite decking secrets](https://deckforgebuilders.com/composite-decking-secrets-longevity-tips-for-a-lasting-deck).
Anticipating future trends, I see smart technology becoming integrated into outdoor structures—think sensors that monitor moisture levels or automatic retractable awnings controlled via apps. While the tech is still emerging, investing in modular, adaptable hardware now means smoother upgrades when these innovations become more affordable and widespread. Moreover, focusing on low-maintenance composite materials and corrosion-resistant fasteners will continue to be the backbone of durable outdoor design, reducing ongoing costs and effort.
How do I maintain composite decking and structures over time?
Consistency is key. Regularly clearing debris, inspecting fasteners, and applying protective sealers are essential steps to extend the lifespan of your deck, pergola, and railing systems. For example, I schedule a thorough clean every spring, followed by a reapplication of sealant every few years, depending on exposure. When choosing tools, I lean toward ergonomic, battery-powered options that facilitate these routine tasks—saving time and reducing fatigue. Keeping a detailed maintenance log helps me stay on top of any potential issues before they escalate. Over time, this proactive approach safeguards your investment and ensures your outdoor space remains inviting and functional for years to come. If you want to learn more about enhancing your outdoor structures, consider reaching out through our [contact page](https://deckforgebuilders.com/contact-us), and I’ll be happy to share customized advice tailored to your project. Remember, the right tools and regular upkeep are your best allies in keeping your composite decking and outdoor features in tip-top shape.
Over the years, I’ve learned that designing an outdoor space with both privacy and airflow is an art that requires patience, experimentation, and a keen eye for detail. One of the most profound lessons I’ve embraced is that fewer choices often lead to better results—opting for slatted panels instead of solid walls transformed my backyard into a breezy sanctuary. I discovered that strategic spacing, rather than complete blockage, is the secret to enjoying fresh air without sacrificing seclusion, a revelation that has saved me from countless uncomfortable afternoons.
A mistake I often see homeowners make is focusing solely on aesthetics without considering how materials behave over time. Choosing composite decking with the right expansion characteristics has been crucial to maintaining a flawless look, especially in changing weather conditions. I now understand that understanding material science isn’t just for engineers—it’s key to longevity, and diving into resources like composite decking secrets has been invaluable.
The most impactful insight came from realizing that structural integrity is about strategic reinforcement. Using diagonal bracing and proper anchoring has made my structures resilient against wind sway and shifting soil. Investing time and effort into these hidden yet vital details has paid off, making my outdoor spaces safer and more inviting for years to come.
Insider Wisdom Into My Outdoor Projects
- Less is More When Privacy Matters: Overbuilding can kill the breeze. I learned that elegant, simple slatted panels provide the privacy I need without turning my yard into a brick fortress.
- Materials Matter More Than They Seem: Selecting high-quality composite and rust-resistant hardware has prevented warping and corrosion, saving costs and headaches in the long run. Check out these tips for more insights.
- Strategic Reinforcement Is the Unsung Hero: Diagonal braces and secure anchoring have shielded my structures from storms and soil shifts, ensuring safety and durability.
- Testing and Tweaking Lead to Perfection: Sitting in my yard during a windy day and adjusting slat spacing or angles has become a favorite pastime—each small change brings me closer to the perfect balance of privacy and breeze.
My Essential Tools and Resources for Outdoor Design
- Impact Driver: A cordless impact driver with a brushless motor, like the Makita XDT12, has made assembly easier and more precise. It’s an investment that pays dividends in quality and efficiency.
- Laser Level: I trust the Bosch GLM 50C for ensuring my posts are perfectly aligned, preventing future headaches and safety issues.
- Sealing and Cleaning Equipment: Regularly cleaning with an adjustable power washer and applying weatherproof sealants protect my decks and pergolas from the elements—use recommendations from this resource.
- Monitoring Tech: As technology advances, I foresee smart sensors and automated controls simplifying maintenance, making outdoor living even more enjoyable in the future.
Challenge Your Outlook and Build Smarter
Ongoing maintenance and carefully selected materials are steps toward a resilient and beautiful outdoor space. Remember, the key isn’t just in construction but in understanding how your structures evolve. If you’re ready to elevate your backyard, explore options like low-maintenance composite decking and innovative railing systems. Sharing your experiences or questions below can spark invaluable insights—your journey might just inspire someone else to start theirs with confidence. Happy building!