
I remember the moment when I first realized my backyard’s slope was more than just a minor incline—it was a challenge. I had dreams of a beautiful pergola perched beautifully atop that uneven terrain, but every attempt left me with a crooked structure that made me want to give up altogether. Have you ever faced a similar frustration, where your outdoor project seemed to mock your efforts with its imperfections?
Understanding how to install a pergola on a slope without it appearing crooked is a common dilemma for homeowners with uneven yards. It’s tempting to think that the only solution is to level out the entire landscape or settle for a wonky structure. But I promise, there’s a smarter, more practical approach that preserves the natural beauty of your yard while ensuring your pergola stands proud and straight.
Why Sloped Landscapes Present a Unique Challenge
Installing a pergola on level ground is straightforward—just follow a few simple measurements, and you’re set. But when the ground slopes, it’s a different story. The irregular terrain can make your pergola appear tilted or uneven, which not only affects aesthetics but can also impact stability and safety. Early in my project, I made the mistake of assuming I could just build the pergola on the slope as I would on flat terrain. That resulted in a crooked structure that looked unprofessional and worse, could wobble or shift over time.
Fortunately, through a mix of trial, error, and advice from seasoned DIYers, I learned that the key lies in smart framing and post installation techniques. Addressing the slope at the planning stage can save you headaches and create a standing structure that looks intentionally designed—because it is!
Before diving into the step-by-step instructions, consider that the right approach will depend on the degree of your slope. Whether it’s a gentle incline or a steep decline, adjusting your techniques accordingly will make all the difference. Curious if your backyard’s slope is manageable without major grading? [Here’s a helpful guide on assessing your yard’s terrain](https://deckforgebuilders.com/pergola-trends-crafting-shade-elegance-in-your-outdoor-space).
Now, let’s explore how you can approach this challenge head-on, ensuring your pergola looks beautifully level and stable—no matter the terrain. A well-installed pergola on a slope not only boosts your home’s curb appeal but also provides a functional space for outdoor gatherings. Ready to transform that uneven yard into a stunning outdoor oasis? Let’s get started.
Frame Your Patio and Mark Post Locations
Begin by measuring the desired pergola footprint on your slope. Use a string line to outline the perimeter, ensuring it’s straight and consistent. When marking post locations, account for the slope by planning to level the tops of the posts rather than the ground—this creates a visually level structure despite uneven terrain. I used spray paint to mark where each post would go, which helped keep my measurements accurate as I moved around the yard.
Cut and Install Level Post Supports
Next, cut adjustable post brackets that can accommodate varying ground levels. Excavate holes for the footings, ensuring they’re deep enough to provide stability. Pour concrete into each hole and set your posts with adjustable brackets before the concrete cures. For my project, I used a laser level to confirm the tops of the posts would be flush—this is critical for the pergola beams to sit even without wobbling.
Install the Posts with a Spacer System
Use a spacer or shims to align your posts precisely. Insert shims between the post and the support bracket to achieve a perfectly vertical position. Secure all hardware tightly. I found that adjusting shims during the curing process allowed for micro-leveling, preventing any tilt in the final structure. Remember, the goal is to keep the top of all posts at the same height even if the ground below varies.
Lay Out and Attach the Beams
Once posts are secure, measure and cut the crossbeams. Use a carpenter’s level and the string line to ensure the beams are level along the entire pergola width. Position beams on the posts, and temporarily secure them. Check for any minor discrepancies and adjust shims accordingly. I used a level to confirm every beam was flat—this prevents the pergola from looking crooked once completed.
Secure the Rafter Tails and Add Final Touches
Attach the rafters, spacing them evenly using spacers or templates. Cut rafter tails with a saw to ensure consistent overhangs, and fasten securely. Completing the framing with corner braces and clean mounting hardware will enhance stability. For aesthetic consistency, I used a miter saw to angle the rafter ends properly, creating a polished look.
Integrate Design Elements for Aesthetic Balance
Finally, incorporate design touches such as decorative trim, lighting, or a retractable canopy. These details will unify your pergola’s appearance with the rest of your backyard. If you want to explore more modern or classic styles, check out pergola design ideas for inspiration.
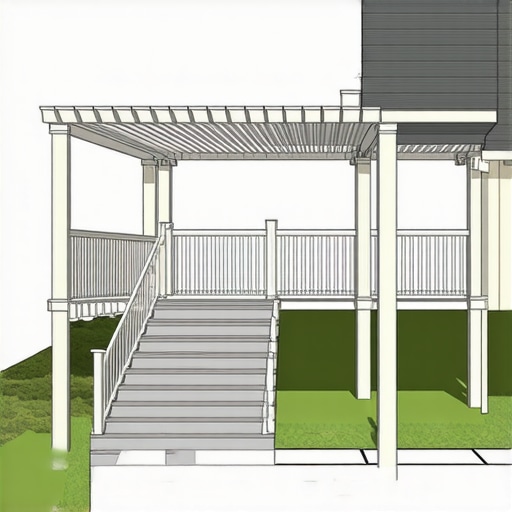 When it comes to composite decking and pergola construction, many enthusiasts believe they’ve grasped the essentials, yet beneath the surface lie critical nuances that often go unnoticed. Contrary to popular belief, selecting the most expensive materials doesn’t guarantee a long-lasting or aesthetically perfect structure. In my experience, the *hidden trap* is ignoring the expansion and contraction properties of composite materials. Overlooking this can lead to warping, buckling, or unsightly gaps over time. For example, many assume that standard spacing is sufficient, but high-quality composite decks demand precise expansion gaps—usually around 1/8 inch—to accommodate thermal movement. Failing to account for this results in a deck that feels tight in summer and loose in winter, causing stress on fasteners and joints. This oversight isn’t just cosmetic; it compromises structural integrity.
How do thermal expansion differences affect the longevity of composite decking systems?
Experts like the [North American Deck and Railing Association](https://deckforgebuilders.com/composite-decking-secrets-longevity-tips-for-a-lasting-deck) emphasize that understanding the material properties is vital. Unlike wood, composite materials have a different coefficient of expansion, which makes proper installation techniques indispensable. A common myth is that you can ignore seasonal movements, but advanced builders know that meticulous planning and correct spacing are key to avoiding costly repairs later. Additionally, many forget to install proper drainage systems beneath the structure, which can lead to moisture entrapment and promote mold or degradation—issues that undermine both safety and appearance. Always ensure your design respects the nuance of moisture management, especially when integrating pergolas and railing systems.
Another overlooked aspect is the importance of correctly anchoring pergolas on uneven terrain. Many assume that using adjustable brackets is sufficient, but neglecting to verify the stability of footings with tools like the water level or laser level can lead to instability. For those seeking a sleek, modern aesthetic, coupling your pergola with innovative railing systems is essential, but beware of the compatibility issues—some systems don’t accommodate structural deviations, leading to gaps or misalignments. To master these intricacies, consult expert resources or professional advice, especially if your yard’s slope exceeds gentle inclines. Proper attention to these details transforms a simple outdoor structure into a resilient, beautiful feature that stands the test of time. Don’t forget, aligning your pergola and deck design with nuanced construction practices enhances safety, style, and longevity. Have you ever fallen into this trap? Let me know in the comments.Maintaining your composite decking and railing systems is crucial for long-term durability and aesthetic appeal. Investing in the right tools ensures precision and efficiency, ultimately saving you time and money. One indispensable tool I personally rely on is a high-quality cordless drill with adjustable torque settings. It allows me to install fasteners accurately without overdriving, preventing damage to composite material. Additionally, a speed square and a chalk line are essential for marking cut lines and ensuring straight, clean cuts on deck boards and framing. Using a circular saw equipped with a blade designed for composites helps achieve smooth edges and minimizes splintering.
For upkeep, a magnetic sweeper is invaluable for quick debris removal from between deck boards, preventing mold and decay. I also recommend a dedicated power washer with a low-pressure nozzle for periodic cleaning—direct high pressure can damage the surface, so adjustable tips are a must. To address expansion gaps, I use a spacer tool that maintains consistent spacing during installation, accommodating thermal movement over seasons.
Looking ahead, automated maintenance systems and smart sensors might become standard, alerting homeowners to issues like moisture buildup or hardware loosening before visible signs appear. This proactive approach enhances safety and extends your deck’s lifespan.
How do I maintain my composite deck and pergola over time?
Regular cleaning with gentle detergents and periodic inspection of fasteners and structural supports are key. Applying a protective sealant designed for composite materials can help resist staining and fading. Remember, tools like a digital level and laser distance meter can assist in detecting subtle misalignments that may develop with shifting temperatures, allowing you to address issues early. Incorporate these practices into your routine to keep your outdoor oasis sturdy and stunning for years to come. If you’re interested in exploring advanced techniques, try using a spacer tool during your next deck board installation to achieve flawless expansion joint spacing, ensuring your deck remains beautiful and stable across seasonal changes. For more detailed guidance on tool selection, visit our comprehensive resource on [composite decking trends](https://deckforgebuilders.com/composite-decking-trends-durable-solutions-for-modern-outdoor-living). Remember, a little effort now pays off with a long-lasting, safe, and attractive outdoor space.
Designing a pergola on uneven terrain taught me that embracing the natural landscape with thoughtful techniques results in a more cohesive and resilient outdoor space. Instead of fighting the slope, I learned to incorporate it into my design, creating a picturesque and functional feature that seamlessly blends with my yard’s character.
Secrets the Pros Keep Under Wraps for Perfect Pergola on Sloped Ground
- One lightbulb moment was realizing that micro-adjustments during post installation can prevent long-term tilt issues, saving headaches down the line.
- Using flexible support systems allowed me to adapt to unexpected ground shifts, highlighting the importance of versatile hardware over rigid solutions.
- Planning the visual level of the pergola top rather than the ground itself creates an illusion of straightness, making the structure appear intentionally styled rather than improvised.
My Go-To Tools and Inspirations for Outdoor Success
- The laser level became my best friend, ensuring that posts and beams lined up perfectly even on tricky terrain—trust me, it saves a lot of manual guesswork.
- I rely on [pergola design inspiration](https://deckforgebuilders.com/pergola-design-inspiration-from-modern-to-classic-looks) to keep my projects fresh and match my yard’s style with current trends.
- Investing in adjustable brackets and spacer systems, such as [these innovative solutions](https://deckforgebuilders.com/spacer-trick-for-consistent-composite-expansion-gaps), ensures a professional finish and enduring stability.
Embrace the Challenge—Your Outdoor Oasis Awaits
Building a pergola on a slope may seem daunting at first, but with patience, ingenuity, and the right tools, you can craft a stunning addition that elevates your outdoor living experience. Remember, every project is an opportunity to learn and grow, turning obstacles into beautiful outdoor features.
What was your biggest lesson learned when tackling an uneven yard? Share your story below—I’d love to hear how you turned challenges into triumphs!