
I remember the first time I built a deck and realized my frame wasn’t quite square. I’d measured, double-checked, and even swore I was following all the guidelines. Yet when I laid the decking boards, everything looked crooked, and I felt that familiar sinking feeling in my chest. Turns out, I had overlooked a simple yet powerful tool—The 3-4-5 Triangle Rule—that could have saved me hours of guesswork and frustration.
Why Tiny Mistakes Can Ruin Your Deck’s Perfection
Deck framing is as much about precision as it is about aesthetic. A deck that isn’t square not only looks off but can also lead to structural issues down the line. When I first started, I was tempted to rely on visual alignment alone, which is a surefire way to end up with uneven results. Thankfully, I discovered the 3-4-5 Triangle Rule, an age-old method that makes squaring your frame foolproof and straightforward. With just a few measurements, it helps ensure your deck is perfectly square, no matter how tricky the terrain or how experienced you are. Want to avoid the headache I had? Keep reading, because I’ll walk you through how this simple trick can elevate your deck-building game and turn a potential flop into a stunning outdoor space.
Do You Fear Your Deck Will Never Be Perfectly Square?
I’ve been right where you are—doubting if that crooked frame can ever be corrected. Early on, I mistakenly used just a tape measure to check angles, which often led to inaccuracies. That mistake cost me time and materials, not to mention the disappointment. Trust me: avoiding common pitfalls like these is easier when you understand proven techniques. Incorporating the 3-4-5 Triangle Rule is one of those game-changers that real professionals swear by. Want to see how it works and why it’s become my secret weapon? Stick around—I’ll help you master this principle with simple steps and references to trusted sources, like the comprehensive guides on deck framing available at Deck Forge Builders.
Ready to transform your shaky plans into a perfectly aligned masterpiece? Let’s dive into the practical steps to make this happen!
Establish Your Baseline First
Begin by setting a reference point for your deck frame using a reliable laser level or string line. When I built my own deck, I marked the perimeter with stakes and ran chalk lines to ensure straight edges. This initial step acts as your guiding framework, making subsequent measurements more accurate. Remember, a stable baseline prevents cascading errors that could ruin your entire project.
Apply the 3-4-5 Triangle Method Correctly
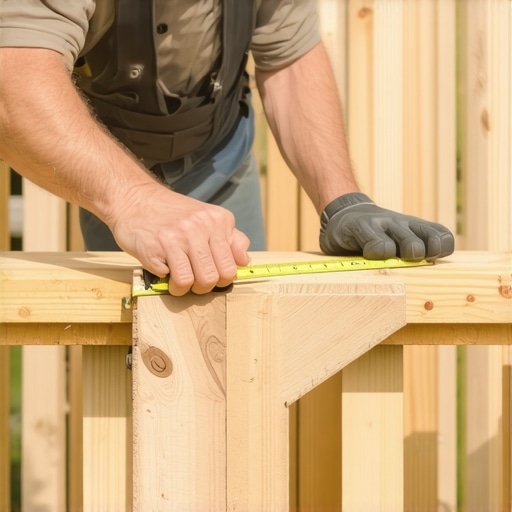
Next, measure out 3 feet along one side from your corner and mark it. Then, measure 4 feet along the adjacent side, marking that point as well. Use a measuring tape and ensure your marks are precise. Finally, measure the diagonal distance between these two points—if it equals 5 feet, your corners form a perfect right angle. I once misread the measurements and had to redo the entire corner, but double-checking saved me hours of rework. This simple step is the cornerstone to achieving a perfectly square frame.
Double-Check Your Measurements
Always verify your measurements multiple times. When I first tried this method, I confirmed the 3-4-5 measurement three times before proceeding. Small discrepancies can lead to a wonky deck, especially over larger spans. Use a framing square or digital angle finder as a secondary check, especially when building large or complex designs.
Repeat the Process for Every Corner
Apply the same 3-4-5 test to all corners of your deck frame. Don’t assume one corner is correct; verify each one independently. During my project, I found that one corner was slightly off, causing unevenness down the line. Correcting it early saved me from having to reframe the entire deck later. Consistency here is key to a professional finish.
Integrate the Technique Into Your Workflow
Make this measurement your standard step whenever you frame a deck. Incorporate it before and after adjusting each corner. I recommend creating a checklist for your project, with a step dedicated to the 3-4-5 test. This habit not only ensures accuracy but also builds confidence in your build quality. For further design ideas and inspiration, visit this resource.
When it comes to composite decking, many homeowners and even some seasoned builders fall prey to misconceptions that can undermine their projects’ longevity and aesthetic appeal. One prevailing myth is that all composite materials are created equal, leading many to choose based solely on price. In reality, the quality varies significantly, especially when considering factors like fiber content and resin matrix, which can impact durability and resistance to fading or staining. To truly select the best composite decking, it’s advisable to consult detailed guides such as this comprehensive resource which highlights critical longevity considerations.
What Advanced Factors Influence the Lifespan of Your Deck
A common oversight is ignoring the importance of proper drainage and ventilation around composite boards. Even the most durable material can degrade prematurely if water tends to pool or if the deck’s structure traps moisture. Many assume that a deck’s lifespan is solely determined by the material’s inherent qualities, but installation details, like ensuring adequate airflow beneath the frame, are equally crucial. This nuanced understanding can significantly extend your deck’s life, and professionals emphasize these points in studies such as those published by the National Coreless Materials Association.
Similarly, with railing systems, there’s a misconception that vinyl or aluminum options are universally superior because they require less maintenance. While true in some climates, in colder regions, aluminum railings are often more durable against snow and ice buildup, especially if selected with a powder-coated finish. Garage-style thinking can lead to poor choices; for a detailed comparison, explore this guide which illustrates how different materials perform under varying conditions.
Is There a Secret to Preventing Railing Rattles?
One often overlooked nuance is the way railing fasteners are installed. The common mistake is to tighten fasteners without considering thermal expansion or contraction, which in turn causes rattling and loosening over time. Using specific hardware like adjustable fasteners or incorporating gaskets can mitigate these issues effectively. For an advanced tip, look into the techniques outlined at this resource.
Pergolas and shade structures are frequently designed without accounting for local wind loads, which can lead to sagging or even failure over time. A common trap is to assume that a design that looks good on paper will hold up in real-world conditions. Modern engineering standards recommend detailed wind load analysis, especially for large or open structures. Implementing these advanced design principles can make your pergola both beautiful and resilient, as discussed in this inspiration guide.
In terms of overall deck design, many overlook the importance of integrating lighting, drainage, and plantings into a cohesive plan. A mistake is treating these features as afterthoughts. The secret lies in holistic planning, which enhances functionality and aesthetics simultaneously. For tips on mastering this approach, review this article that introduces innovative design strategies.
Understanding these hidden nuances can elevate your outdoor projects from ordinary to extraordinary. It’s not just about picking the right material but about mastering the details that ensure durability, safety, and beauty. Have you ever fallen into this trap? Let me know in the comments, and let’s discuss how to avoid these pitfalls together.
Keeping It Working: Essential Tools and Techniques
Maintaining a beautiful and durable deck, railing system, or pergola requires the right tools and consistent effort. Over the years, I’ve refined my toolkit to include several high-precision instruments that make ongoing maintenance easier and more effective. One must-have is a digital moisture meter, like the Protimeter MM4, which helps monitor wood moisture levels inside the frame, preventing rot before visible damage occurs. For cleaning and refinishing, I rely on a cordless oscillating multi-tool equipped with a sanding attachment; it’s perfect for getting into tight corners or stripping old paint from railing posts without damaging the material.
When it comes to protecting your investment, a quality sealant applicator, such as a Wagner Flexio paint sprayer, allows for smooth, even coating over large surface areas. This is especially helpful for finishing pergola beams or treating composite decking to enhance longevity. For inspecting structural integrity, a borescope camera can be invaluable—it enables you to check hidden areas for signs of decay or pest infiltration without dismantling parts of your structure.
Software and Planning for Long-Term Success
Beyond physical tools, planning software like SketchUp or Trex’s free design tools can help visualize future modifications or expansions of your outdoor living space. I especially recommend using 3D modeling to simulate scaling projects, such as adding new deck sections or extending a railing system—this foresight minimizes costly mistakes and helps coordinate materials and permits efficiently. Regularly updating your digital plans ensures you stay aligned with safety standards and aesthetic goals, especially when considering future deck trends that emphasize sustainability and low maintenance.
How to Keep Your Deck and Pergola in Prime Condition Over Time
One common question is how to sustain the beauty and safety of these features long-term. Routine inspections, at least twice a year, are key. Use a flashlight to look for loose or rusted fasteners, signs of wood decay, or cracks in the composite boards. I also recommend applying a protective coating or oil every few years—this small investment can significantly extend the lifespan of your wood components, especially in harsh climates. For example, applying a decking-specific penetrating oil, like Penofin Hardwood and Deck Oil, helps repel water and UV damage, keeping wood looking fresh and new.
Additionally, I’ve found that upgrading to durable, long-lasting hardware significantly simplifies ongoing maintenance. Heavy-duty stainless steel fasteners and adjustable galvanized brackets resist corrosion and allow for easy adjustments as your structure ages or expands. Incorporating these smart hardware choices prevents many issues before they occur, like railing rattles or loose posts, which can compromise safety.
Ready to Extend Your Deck’s Life? Try This Advanced Maintenance Hack
One technique I swear by involves periodically reapplying a high-quality, silicone-based lubricant on all moving fasteners and hinges—especially on pergola louver systems or adjustable railing sections. This simple step prevents rust buildup and ensures smooth operation over many seasons. The difference it makes in maintaining effortless functionality is remarkable. For detailed application tips, consult the comprehensive resources at this guide. Take the initiative today and see how a small tweak can keep your outdoor spaces in top shape for years to come. Want more expert advice? Reach out via this contact page.
Lessons from My Deck Building Blunders
- I once relied solely on visual cues when squaring my deck, only to discover hours later that my measurements were off, leading to uneven boards and headaches. The realization that a simple 3-4-5 triangle could have prevented this was an eye-opener.
- Thinking that durable composite decking eliminates the need for detailed drainage planning almost caused premature deterioration in my first project. Now, I understand that proper airflow and water runoff are equally essential for longevity.
- I’ve learned that choosing railings based solely on appearance can overlook crucial factors like material behavior in different climates—aluminum may outperform vinyl in colder regions, but understanding the specifics saves a lot of trouble down the line.
- Patience and double-checking measurements have saved me from redoing entire sections. It’s tempting to rush, but the long-term payoff of precision is truly worth the effort.
My Trusted Tools and Guides for Outdoor Living Success
- The Protimeter MM4 moisture meter has been a game-changer for monitoring hidden wood moisture, preventing rot and structural issues before they become visible. I trust it because it provides accurate readings even in tight spaces.
- The Trex and SketchUp design tools helped me visualize complex layouts, avoiding costly mistakes and ensuring my project met my aesthetic and functional goals. Their intuitive interfaces make planning a pleasure.
- Books like “Ultimate Guide to Deck Framing” and online resources from Deck Forge Builders have offered me insights into advanced construction techniques, ensuring my builds are not only beautiful but durable and code-compliant.