
I’ll never forget the moment I stepped outside to enjoy my backyard oasis only to find the waterdamaged, rotting beams of my cherished pergola. The culprit wasn’t just bad luck; it was a tiny mistake I made early on that cost me dearly—forgetting to tilt those beams slightly away from the house. That lightbulb moment led me down a path of discovery about a simple yet powerful trick that can make a world of difference: the 5-degree cut.
Why Ignoring Proper Beam Slope Might Be Your Worst Backyard Mistake
Many DIYers and even seasoned builders overlook this small detail, thinking it’s insignificant. But trust me—every single cut counts when it comes to protecting your investment. A slight tilt—about 5 degrees—is enough to ensure water runoff, preventing moisture from pooling and seeping into the wood. This tiny adjustment can dramatically extend the life of your pergola beams, save you from costly repairs, and keep your outdoor space safe and beautiful longer. Studies show that proper drainage significantly reduces rot and mold growth, helping your beautiful pergola stand tall for years to come (source).
Is the 5-Degree Cut Actually Worth the Hype?
Early in my project, I made a common mistake—using perfectly straight cuts without considering water flow. I thought a level cut was best, but that led to water pooling and, eventually, decay. The truth is, tiny details like this can make or break your project’s durability. Don’t let a small oversight turn into big problems. Keep reading, and I’ll show you exactly how to ensure your beams shed water properly.
If you’ve faced similar issues or want to avoid rot and extend the life of your pergola, you’re in the right place. Implementing this simple technique can be a game-changer, and I’ll guide you through it step by step. Ready to learn how to make every cut count? Let’s dive into the practical steps that will keep your outdoor structure beautiful and structural for years to come—starting with mastering that crucial 5-degree tilt.
Marking the Correct Angle with Precision
Start by measuring the length of your beam and identifying the desired tilt angle—about 5 degrees. Use a digital angle finder or a protractor attached to a T-bevel to mark the cut line accurately. For my recent pergola project, I clamped a piece of scrap wood at the beam’s end, set my angle tool to 5 degrees, and traced along the edge to ensure consistency across all beams.
Set Up Your Saw for an Accurate Cut
Adjust your miter saw or circular saw to the 5-degree angle. Double-check with your angle finder to prevent any slip-ups. A precise setup ensures every cut sheds water properly. I always test on a leftover piece first—better to waste a little wood than ruin your main beams. If you’re using a miter saw, remember that it’s much easier to control the cut angle and avoid splintering.
Positioning and Cutting the Beams
Place the beam securely on your work surface or sawhorses, ensuring it won’t shift during cutting. Mark the cut line clearly to guide your saw’s blade. When making the cut, maintain steady, even pressure. For my project, I clamped the beam down to prevent any movement—this also minimized splintering by keeping the cut aligned with the blade’s rotation.
Checking the Cut and Ensuring Water Shedding
After cutting, verify the angle with your angle finder. Hold the beam against the others in your pergola frame to confirm uniformity. Lay the beam on the structure temporarily—water should flow away, not pool. I found that a slight tilt ensures rainwater automatically runs off, preventing pooling that accelerates rot.
Installation and Final Adjustments
Install the beams with the beveled side facing away from the structure for optimal drainage. Use appropriate fasteners, and apply waterproof sealants where necessary. During installation, I noticed that slight adjustments to the beam angle made a significant difference in water runoff. Remember, consistency across all beams is key to effective drainage and long-term durability.
Document Your Process for Future Projects
Keep notes of your measurements and angles for reference. This practice accelerates future projects and ensures accuracy. My last pergola project was a success thanks to meticulous marking and cutting—every beam’s tilt contributed to a longer-lasting, rot-resistant structure. If you want to explore more on decking and pergola design, check out pergola ideas that boost your outdoor space.
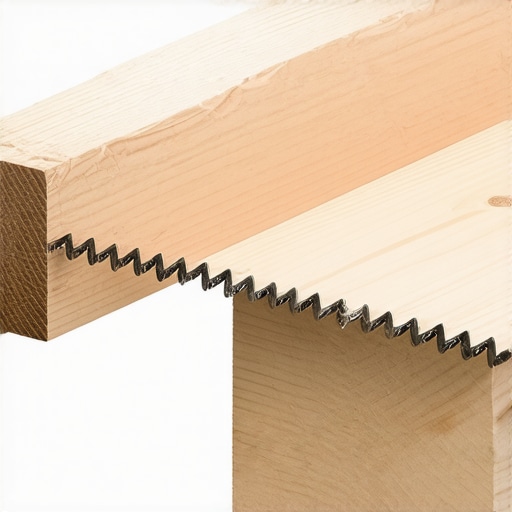 While most homeowners focus on choosing stylish railing systems or eye-catching deck patterns, few realize the nuanced pitfalls that can compromise longevity and safety.
Why Do So Many People Overlook the Small Details That Matter Most?
There’s a common misconception that minor design choices, like the spacing of balusters or the material of pergola beams, are purely aesthetic. But in reality, these details can secretly undermine your entire outdoor setup. For example, using unsupported fasteners or ignoring proper moisture management can lead to rot, rust, or structural failure over time. Expert builders emphasize precision in these elements, referencing studies from structural engineering that show even slight imperfections can cause long-term damage (source).
One widespread myth is that composite decking needs no maintenance, making it ‘completely worry-free.’ However, without proper installation—such as addressing expansion gaps and ensuring adequate drainage—even the best composites can warp or develop mold. The sneaky trap here is to assume maintenance isn’t necessary, which can accelerate wear and reduce lifespan. As noted by industry experts, overlooking these nuances costs homeowners more money in repairs and replacements than anticipated (learn more about durable composite trends).
Are Wider Gaps in Railings Safer or Riskier Once You Look Closer?
Wider baluster spacing might seem like a good idea for aesthetics or to keep unobstructed views, but it opens a hidden risk. If gaps exceed safety standards, they can pose choking hazards for children or pets, and they often violate building codes. Beyond legality, wider gaps can also allow debris or even pests to enter the deck structure unnoticed, leading to hidden rot or pest infestations. It’s critical to measure and confirm that spacing adheres to local safety codes and practical considerations—don’t just rely on visual appeal. For a comprehensive guide on selecting the right railing system that balances safety and style, visit this detailed resource.
Advanced builders understand that the intricacies of deck and pergola design go beyond surface-level choices. It involves deliberate planning of moisture control, mechanical fasteners, material compatibility, and even subtle angles to prevent long-term issues. For instance, incorporating proper drainage channels and using corrosion-resistant hardware can dramatically increase lifespan. Don’t fall for oversimplified solutions; dig deeper into the technicalities. Have you ever fallen into this trap? Let me know in the comments.
Maintaining your outdoor structures like decks and pergolas requires the right tools and a strategic approach to ensure longevity and safety. Over the years, I’ve refined my toolkit to focus on equipment that offers precision, durability, and efficiency — essential qualities for any serious DIYer or professional contractor. In this article, I’ll share specific tools and methods I rely on, along with insights into how they can help you achieve long-term results and scale your projects smoothly.
Why Using the Right Measuring and Cutting Tools Makes All the Difference
Accurate measurements are the backbone of a durable, well-constructed outdoor feature. I personally use a digital angle finder when marking bevels for drainage slopes on beams, like the 5-degree tilt I previously discussed. This device eliminates guesswork—I’ve found that an angle finder with adjustable locking mechanisms not only improves accuracy but also speeds up the process, especially on larger projects. Pair this with a high-quality carpenter’s square for checking right angles on framing, ensuring your deck or pergola maintains perfect alignment over time.
When it comes to cutting, I prefer a sliding compound miter saw equipped with a fine-tooth blade. The adjustability and clean cuts it provides are crucial, particularly when making precise bevels or angled cuts for drainage and aesthetic reasons. I always set the saw to the specific angle I’ve marked, double-check with my digital gauge, and make test cuts on scrap before finalizing the main beams. This approach minimizes material waste and ensures every component fits perfectly, reducing the chance of water pooling or structural wobbling.
Power Tools for Long-Term Maintenance and Scaling Projects
For ongoing maintenance and larger builds, investment in reliable power tools pays off. An oscillating multi-tool, equipped with various blades, becomes invaluable for scraping off old sealants, cleaning tight joints, or smoothing out imperfections. The versatility of this tool helps me perform quick maintenance tasks, like resealing screw holes or removing debris from tight spaces, extending the lifespan of components.
Additionally, a cordless impact driver with high torque makes fastening or unfastening stubborn screws straightforward. Consistent torque application prevents overdriving fasteners, which can cause wood splitting or compromised joints over time. I also recommend a good cordless drill with adjustable clutch settings for delicate tasks, such as installing composite decking where over-tightening could cause damage. This multi-tool approach allows for scalability — whether you’re performing small repairs or constructing a full-scale pergola, having the right equipment ensures every job is done right the first time.
Embracing Software to Plan and Monitor Your Projects
Beyond physical tools, digital software has become a game-changer in maintaining accuracy during design, measurement, and project management. I personally use CAD (Computer-Aided Design) programs to visualize my deck layouts, optimize angles, and simulate drainage before making any cuts. These tools help me identify potential issues—like water pooling or uneven load distribution—long before pouring concrete or installing beams. As technology advances, integrating 3D modeling and project tracking apps can streamline maintenance schedules, set reminders for sealant reapplications, and monitor structural health over time.
Looking Ahead: Trends That Will Shape Maintenance Strategies
With the rise of IoT (Internet of Things) sensors and smart home integration, future projects will likely incorporate sensors that monitor moisture levels, structural vibrations, or fastener integrity in real-time. This proactive approach to maintenance—detecting issues before they become visible—will revolutionize how we care for outdoor structures. Investing in such technology now can help you scale responsibly and preserve your outdoor investments for decades.
How do I maintain my railing and pergola systems over time?
Regular inspections combined with precise tools, such as moisture meters and impact drivers, ensure these structures remain safe and attractive. I recommend checking fasteners for corrosion, applying sealants to vulnerable joints annually, and cleaning surfaces with appropriate products to prevent mold and debris buildup. For composite decking, avoiding power washing with too high pressure preserves the finish, while sealing around fasteners helps prevent water ingress—an insight supported by industry research (see how to extend composite deck lifespan). By adopting a methodical maintenance plan and the right tools, you’ll enjoy your outdoor spaces year after year without unexpected repairs.
If you’re ready to elevate your maintenance game, try incorporating a digital angle finder or impact driver into your toolkit. These small upgrades can significantly improve precision and efficiency, ultimately saving you time and money. For more expert tips on tool selection and project execution, visit our contact page.
The Hardest Lesson I Learned About Railing Systems, Deck Design, Composite Decking, and Pergolas
One of my most valuable insights came from a mistake made early in my outdoor projects: neglecting the importance of small angles and precise cuts. Over time, I realized that seemingly minor details—like the 5-degree slope on pergola beams—can have profound effects on durability. This lightbulb moment taught me that excellence in outdoor construction demands attention to the tiniest elements, otherwise your efforts might crumble over time.
Tools That Changed My Approach to Outdoor Maintenance and Building
Investing in a quality digital angle finder and a reliable miter saw transformed how I plan and execute structural cuts, ensuring water drains correctly and structures last longer. I trust these tools because they deliver consistent precision, minimizing guesswork and material waste. For anyone serious about long-lasting outdoor features, these tools are worth the investment, and exploring this resource can deepen your understanding of material care and longevity strategies.
Keep Moving Forward: Your Outdoor Space Awaits*
The journey to creating durable, beautiful outdoor structures is continuous and rewarding. Every small adjustment, like the 5-degree cut for water runoff, is an act of investment that pays dividends over time. Whether you’re building a pergola, railing system, or deck, remember that mastery comes through meticulous attention to detail and the right tools. Don’t let hesitation hold you back—embrace each challenge as an opportunity to learn and improve. Your backyard oasis is waiting; take action today and watch your expertise grow.