
Walking out onto my newly built deck, I was excited to enjoy the sunshine. But as I stepped forward, my heart sank. The deck’s boards seemed just a little off — not enough to ruin the project entirely, but enough to irritate every time I looked at it. Then I realized — I had made the classic mistake many homeowners do: a chalk line error that threw off the entire layout.
Straight Lines, Perfect Layouts, and Why It Matters
If you’ve ever tried to install decking or railing and noticed it doesn’t sit quite right, you’re not alone. This mistake, often subtle but hugely impactful, can make your beautiful backyard haven look unprofessional or uneven. It’s a common problem, and honestly, I felt frustrated that I’d overlooked such a simple step—yet it’s often overlooked because we’re eager to see results instead of focusing on the foundation.
The good news? Once you identify the root cause, fixing it is straightforward. I’ll guide you through the mistake I made early on, how to avoid it in your project, and practical tips to ensure your deck looks as flawless as you envisioned. Our goal is a deck that’s not just functional but visually perfect — and a crucial step is avoiding this chalk line slip-up.
Is the Chalk Line Error Really Wrecking Your Deck’s Look?
Here’s a truth that might surprise you: studies show that most outdoor projects with crooked lines are due to initial layout errors — often as simple as a misaligned chalk line. Early on, I thought I could eyeball the measurements or trust my tape measure alone. But the truth is, a single misstep in marking the layout can cascade into crooked decking and railing installations, making the entire project look unprofessional. Even worse, these errors can be hidden until the very end, requiring some serious correction or rework.(source: [This Old House](https://www.thisoldhouse.com/)); so catching it early is vital.
Now, let’s delve into how to sidestep this common pitfall and ensure your project lays out perfectly from start to finish. Whether you’re a weekend warrior or a seasoned DIYer, understanding and avoiding this mistake will save you time, money, and headaches in the long run. Ready to get it right? Keep reading and discover my tried-and-true tips for flawless deck layouts and lines.
Start with Accurate Measurements and Clear Markings
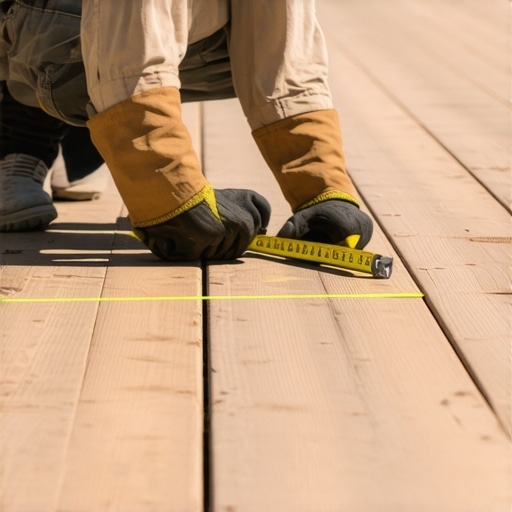
Begin by investing in a quality tape measure, chalk line, and a carpenter’s square. Before making any cuts or laying out your boards, double-check your dimensions. I remember a project where I measured twice and cut once—only to realize later that my initial measurement was off by half an inch. To prevent this, always use a reliable square to draw your baseline and ensure your measurements are consistent across the entire perimeter.
Establish Your Baseline and Reference Points
Identify a fixed point—like the corner of your house or a predetermined landmark—as your reference. Snap a chalk line along this point, ensuring it’s perfectly straight by aligning it with a string pulled taut or a level. This line acts as your starting edge for all subsequent measurements. During my first attempt, I made the mistake of eyeballing the straightness, which resulted in crooked boards that only became apparent after installation. Using a laser level or long straightedge can help maintain accuracy over longer distances.
Employ the 3-4-5 Method for Square Corners
This classic technique guarantees right angles essential for a flawless layout. Measure 3 feet along one line, and from that point, measure 4 feet perpendicular to it. Adjust the corner until the diagonal connecting these two points measures exactly 5 feet. I applied this method on a recent deck build—initially, I struggled with getting the square just right, but after practicing this simple check, all corners aligned perfectly, preventing deck boards from skewing.
Use Blocking and Bracing for Stability During Layout
Temporary bracing or stakes can hold your layout in place as you mark and measure. When I was working alone, I cut stakes and pounded them into the ground at key measurement points. This prevented movement as I snapped chalk lines. Similarly, installing diagonally placed braces tied back to your main points ensures your measurements stay true while you work on other sections.
Verify and Cross-Check Measurements Frequently
Don’t trust your first measurement blindly. Constantly double-check distances between points and compare them with your plans. In my experience, stepping back and visualizing the layout from different angles helps identify irregularities early. For example, I once found a misaligned corner by sighting down the chalk line—a quick correction saved hours of rework later.
Account for Material and Saw Kerf When Marking
Remember that saw blade width (kerf) can influence your cuts. When marking boards, ensure your measurements consider the thickness of the saw blade to avoid dimensional mismatches. On one project, I neglected this detail and ended up with gaps between boards, which I corrected by adjusting the measurements mid-project—demonstrating the importance of precision from the start.
Adjust and Fine-Tune Your Layout Before Finalizing
Once your measurements are set, lay out your boards on the deck frame to visualize the final product. Make small adjustments as needed rather than forcing measurements to match. I prefer to use scrap pieces of decking material to simulate actual boards, ensuring fit and alignment before committing to permanent fasteners. This step prevents errors that are much harder to fix after installation.
Leverage Alignment Tools for Tight Gaps and Perfect Spacing
Utilize spacers or specialized deck tools to keep consistent gaps between boards. During my last installation, I used plastic spacers to maintain even spacing, which made the deck look professionally finished. Consistent gaps are crucial not just for aesthetic appeal but also for drainage and longevity, especially when working with composite decking systems.
Final Checks and Preparation Before Fastening
Before screwing down the boards, perform one last set of measurements and visual inspections. Confirm that all boards are aligned, gaps are even, and the layout remains square. I always walk the deck’s length, checking for any irregularities, and make correction adjustments. Proper planning and verification at this stage save significant time and prevent costly rework later on.
By following these precise measurement and marking techniques, your deck will have a professional, clean look. Integrating tools like laser levels, measuring squares, and spacers—along with consistent verification—can dramatically improve your construction quality, ensuring every board is perfectly placed and aligned for maximum durability and visual appeal.
 While many homeowners focus on selecting the right materials for their deck or railing, there’s a frequent misunderstanding that can lead to costly mistakes: the belief that aesthetics alone determine quality. In reality, understanding the nuanced specifications of composite decking, railings, and pergolas is crucial. For example, many assume all composite boards are equally resistant to UV damage, but in truth, only premium formulations contain stabilizers that prevent color fading over time — as detailed in the latest trends discussed here.Maintaining your outdoor structures requires the right tools and a disciplined approach. One of my go-to gear is a lithium-ion cordless impact driver. I prefer models like the Makita XDT16, because they deliver consistent power without the bulk of corded units, making it easier to fasten decking and railing components securely. Additionally, I highly recommend investing in a high-precision laser level, such as the Bosch GLL 55, which ensures your deck and pergola beams stay perfectly aligned over time — a critical factor in long-term durability, as highlighted in professional decking standards.
When working on composite decking systems, I swear by a pneumatic finish nailer like the Paslode Impulse for installing hidden fasteners. It produces less vibration and helps avoid misdriven nails that can cause surface imperfections. For more complex projects involving pergolas, I use a cordless angle grinder fitted with a diamond blade to quickly shape and remove excess material, saving hours during the customization phase.
Where do I see this trend heading?
As tools become more intelligent, I predict a surge in integrated measurement systems combining laser levels with digital angle sensors, giving builders real-time feedback and reducing errors significantly. Furthermore, the development of solar-powered, smart fasteners that alert you to corrosion or loosening could revolutionize long-term maintenance practices. Being proactive with these innovations can dramatically extend the life of your projects and reduce future repair costs.
How do I maintain my decking and pergola over time?
Regular inspections of fasteners and structural components are essential. I suggest scheduling seasonal checks to tighten any loose bolts and verify alignment with your laser level. Applying a weather-resistant sealant, especially on wooden elements, prevents moisture ingress that causes warping or rot. For composite decking, periodic cleaning with a low-pressure washer (avoiding high-pressure to prevent traipsing out surface fibers) keeps surfaces looking fresh and prevents buildup of debris that accelerates wear. A deep clean with an eco-friendly composite cleaner like the one specified here will restore its appearance and prolong its lifespan.
In my experience, mastering tools like a quality impact driver and laser level — paired with scheduled maintenance — makes a tangible difference in how long your deck or pergola remains a beautiful and functional part of your backyard. I encourage you to try integrating a laser level into your next project; it’s a game-changer for ensuring perfect alignment and long-term stability, especially when working on large spans or multiple sections.

To see the latest in deck system tools, check out the innovative designs and tech trends that can elevate your craftsmanship — visit here.
What I Wish I Knew Before Starting My Deck Journey
One of the most eye-opening lessons I’ve learned is that even small mistakes in layout, like misaligned chalk lines, can cascade into major visual and structural issues. It’s tempting to rush through measurements, but patience and precision are your best friends—take your time to double-check everything. Sometimes, I overlooked the importance of high-quality tools, realizing later that investing in a laser level or a good square saved me countless hours and headaches. Remember, your deck’s beauty isn’t just about materials; it’s about the care and attention you give during every step of the process.
Tools and Resources That Transform Deck Building
Over the years, I’ve curated a toolkit that’s become indispensable: a reliable laser level like the Bosch GLL 55, which ensures everything aligns perfectly; a impact driver such as the Makita XDT16 for fast, secure fastening; and a selection of spacers for even gaps—details that make a significant difference. I also trust authoritative sources like composite decking trend reports and pergola design galleries to inspire and guide my projects. Having the right tools and trusted information accelerates your learning curve and elevates your craftsmanship.
Taking Action: Make Your Vision a Reality
If you’ve been hesitant to take on a deck or pergola project, now is the perfect opportunity to start. Embrace the learning process, and remember that every mistake is a step toward mastery. Use the detailed measurement and layout techniques shared here to ensure your project stands tall and proud—for years to come. Whether it’s your first build or your tenth, investing in precision and quality will differentiate a good deck from a truly exceptional one. Ready to turn your outdoor dreams into reality? Share your plans or challenges below, and let’s navigate this journey together!