
It was a sunny Saturday morning when I realized my latest deck project was starting to look more like a crooked jungle gym than a sleek outdoor haven. The culprit? Misaligned deck boards that threw off the entire aesthetic. I had spent hours measuring, marking, and double-checking, but no matter how careful I was, those stubborn gaps and uneven lines persisted. That frustrating moment led me to a simple yet powerful technique that transformed my approach: the chalk line trick for perfectly parallel deck boards.
Why proper alignment is the secret sauce in deck building
When it comes to creating a beautiful and functional deck, every detail counts. Properly aligned boards not only look polished but also ensure safety and longevity. But achieving that visual perfection can be tricky, especially when working with large spans or uneven surfaces. Trust me, even a small misalignment can become a glaring eyesore — and a headache to fix later.
Early on, I made the mistake of relying solely on tape measures and straightedges, which often led to cumulative errors. Over time, I discovered that visual guides like chalk lines could dramatically improve accuracy. It’s a game-changer that I now swear by. The best part? It’s simple, quick, and doesn’t require fancy tools. Just a roll of chalk, a straight edge, and a bit of know-how, and you’ve got yourself a deck that looks professionally built. This technique not only saves time but also boosts confidence in your craftsmanship. Curious how to master it? Keep reading, and I’ll walk you through the step-by-step process to nail that perfect line every time.
Is the Chalk Line Trick Worth the Effort?
Honestly, I used to doubt whether chalk lines could truly make that much difference in deck alignment. I feared it might be just another gimmick or a temporary fix. My mistake? I underestimated the power of a clear, visual guide. In fact, a common mistake I made early in my projects was assuming that eyeballing the boards would suffice, leading to uneven gaps and crooked edges that annoyed me every time I looked at the finished deck. For comprehensive tips on choosing the right railing systems to complement your project, I recommend checking out this guide to railing systems. Now, let’s get into the practical steps that will help you avoid my pitfalls and build a deck that’s both beautiful and structurally sound.
Marking Your Starting Line for Precision
Begin by choosing the edge of your deck where you want the first board to run perfectly straight. Use a long straightedge or a chalk line reel to draw a clear, continuous line across the joists. I recall a time when I accidentally jotted my chalk line too close to the edge, causing my first board to be slightly off. That small mistake propagated, making the entire layout look uneven. Learning from it, I adjusted my method to leave a margin of a few inches, ensuring better accuracy from the start.
Creating a Chalk Line That Won’t Fade or Crack
Next, stretch your chalk line across the deck, hooking or pinning one end securely. Pop the reel open and extend the string to the opposite side, keeping tension as you pull. Snap the line against the joists, leaving a crisp, visible guide. Remember, using extra chalk or a high-quality reel prevents fading after a few sunny hours, which can otherwise ruin your sightline. This step is crucial because it sets the reference for all subsequent boards, much like laying a foundation for a house.
Aligning Boards Using the Chalk Line as a Guide
Lay your first board along the chalk line, ensuring the edge is flush with the line. Clamp or temporarily secure it, then proceed to attach the rest of the boards, aligning each to the initial line. Once I nailed down the second or third board, I realized I didn’t need to measure each one individually, saving me valuable time. This technique works like stacking building blocks; each piece relies on the precise placement of the previous one, maintaining perfect parallelism throughout.
Fine-Tuning for Uniform Gaps
After installing the boards, check the spacing between them with a spacer or a gauge block, ensuring consistent gaps for aesthetics and drainage. A common mistake is to rely solely on visual judgment, which can be deceptive. I once noticed uneven gaps near the edges, which I fixed by inserting shims or adjusting fasteners. Remember, uniform spacing enhances the deck’s professional appearance and prevents water pooling issues.
Double-Checking Your Work and Corrections
Finally, step back and visually inspect the entire deck line for any deviations. Walk along the edge, and use a level or a string line to verify straightness. When I completed my deck, I used a laser level to confirm the edge was perfectly straight, catching a slight drift that I corrected immediately. These small attention-to-detail steps can make the difference between a good-looking deck and a stunning one that impresses everyone.
Implementing these precise steps, particularly the simple yet effective chalk line trick, will elevate your deck-building game. Remember, patience and attention to detail are your best tools. For additional insights into durable and stylish railing options that complement your aligned deck, check out this comprehensive guide. Keep those lines straight, and your outdoor space will look and function beautifully for years to come.
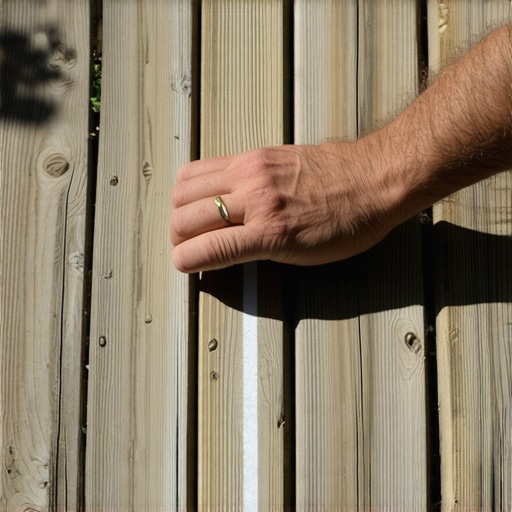
While many homeowners and DIY enthusiasts focus on the visible aspects of outdoor projects, such as choosing the right composite decking or designing an eye-catching pergola, there’s a wealth of nuanced details and misconceptions that can make or break the longevity, safety, and aesthetic appeal of your space. Let’s dig deeper into what most people overlook or misunderstand about these elements, and how mastering these intricacies can elevate your outdoor living design.
Why Railing Systems Often Get Overlooked but Are Critical
Many assume that all railing systems are created equal, but the devil is in the details. For example, some homeowners believe that choosing a DIY-friendly kit ensures safety, but this is rarely true without proper anchoring and reinforcement. An often-missed nuance involves the spacing and material compatibility; metal brackets used with composite decks must be corrosion-resistant and designed for outdoor conditions. Railing systems that don’t account for thermal expansion or contraction can develop rattles or loose posts over time—confusing aesthetics with safety. Understanding these intricacies helps prevent these costly mistakes.
Deck Design Myths That Could Cost You
A common misconception is that bigger decks are always better. The reality is that oversized decks without proper structural support can sag or develop uneven surfaces, especially if built on uneven ground or without considering load-bearing calculations. Many owners focus solely on visual appeal, neglecting hidden load zones, drainage pathways, and the importance of proper framing. Advanced builders know that implementing intermediate supports and using specific joist spacing—rather than the default 16 inches on center—can drastically improve durability. For proven strategies, check these deck design tips.
Perception Versus Reality in Pergola Construction
People often assume that a pergola is just an aesthetic add-on; however, the structural nuances can influence longevity and function. For instance, neglecting diagonal bracing might lead to rafter sway or tilting over time, especially in windy areas. Furthermore, many underestimate the importance of proper pitch in pergola rafters to facilitate water runoff, preventing wood rot. An advanced mistake is overlooking the compatibility of materials—using wood in coastal salt air without treated or stainless components can lead to premature deterioration. For inspiration on durable pergola design, visit these pergola ideas.
How do I balance aesthetics with durability in complex outdoor setups?
Achieving a harmonious blend requires understanding the specific environmental challenges of your location and selecting materials that meet both style and longevity needs. For example, composite decking is often marketed as low-maintenance, but some brands are more resistant to fading and mold than others—so research and choosing high-quality options is vital. Similarly, integrating lighting or decorative features into railing systems requires careful planning to avoid causing damage or corrosion over time. Consulting experts and leveraging detailed guides can make a significant difference—like those found at composite decking longevity tips.
Remember, understanding the hidden nuances and debunking myths about pergolas, decks, and railing systems isn’t just about aesthetics—it’s about creating a safe, durable, and stunning outdoor space that stands the test of time. Have you ever fallen into this trap? Let me know in the comments.
Keeping It Working: Tools and Maintenance Strategies
Building a durable pergola or deck isn’t just about the initial design and construction; maintaining it over time is equally critical. Having the right tools at your disposal ensures that you can address issues promptly, prolong the lifespan of your outdoor structures, and keep them looking pristine. One of my favorite investments is a high-quality cordless orbital sander. It allows me to quickly remove surface imperfections, clean up weathered wood, and prep surfaces before applying protective finishes. For example, when restoring a weathered pergola, I used a cordless orbital sander to refresh the wood before sealing, ensuring longevity against the elements.
Another indispensable tool is a moisture meter. This device helps me detect hidden water intrusion or high moisture levels within the wood, which could lead to rot or mold if left unaddressed. I rely on a pin-type moisture meter because it provides accurate readings, especially crucial when assessing composite decking or treated lumber for repairs or refinishing.
Investing in a good quality drill driver with various bits is essential for both assembly and ongoing maintenance. Over time, fasteners can loosen or corrode, especially in coastal environments. Using a drill with a torque setting allows me to tighten fasteners precisely without damaging the material, a practice recommended by structural experts like this detailed guide.
For long-term results, applying a high-grade sealant or stain periodically is crucial. I prefer a sprayer with a variable pressure control, which helps apply an even coat of protective finish across large surfaces like a sprawling deck or pergola roof. Remember, consistent upkeep dramatically improves durability, especially when combined with proper cleaning and inspections.
Predicting future trends, I believe embedded IoT sensors will start playing a more prominent role in outdoor structure maintenance. Imagine a smart system that monitors wood moisture, UV exposure, or structural stress, alerting you through an app before minor issues become major repairs. Staying ahead of these challenges requires familiarity with both traditional tools and emerging tech.
How do I maintain my outdoor structures over time?
Regular inspections are your first line of defense. Look for signs of weathering, loose fasteners, or surface cracking. Cleaning decks and pergolas with mild, environmentally friendly solutions prevents buildup of mold and algae, which can accelerate deterioration. Reapply protective finishes, like sealers or stains, every 2-3 years, depending on exposure and manufacturer recommendations. Keeping tools clean and stored properly ensures they operate efficiently when needed. Also, consider upgrading hardware to corrosion-resistant options, especially if your deck faces salt air or heavy rainfall. For tailored advice, consult with experts at our contact page. While many homeowners overlook this ongoing process, routine maintenance is the key to a long-lasting and beautiful outdoor space. Make it a habit to use a moisture meter before re-finishing, as suggested by technical guidelines, to assess wood health accurately—this small step can save you significant repairs down the line. Try integrating a semi-annual maintenance routine with these tools, and you’ll be amazed at how well your pergola or deck withstands time and weather.
What I Didn’t Expect About Outdoor Design Mastery
- It took me multiple tries to grasp that meticulous planning pays off. Rushing the layout led to misalignments, even with the chalk line trick. Patience isn’t just a virtue; it’s a necessity when creating a durable, beautiful outdoor space.
- Between choosing the right materials and understanding environmental challenges, I learned that there are no one-size-fits-all solutions. Tailoring your approach based on your location and climate saves headaches and money in the long run.
- Even seasoned DIYers underestimate the importance of ongoing maintenance. Regular inspections and timely repairs keep your pergolas and decks shining for years, transforming a transient project into a lasting legacy.
- The real magic happens when you combine simple techniques, like precise chalk lining, with advanced planning, including drainage and support structures. This synergy elevates your craftsmanship from good to exceptional.
Finding My Proven Tools for Outdoor Construction Success
- The cordless orbital sander has become indispensable for me; it handles weathered surfaces effortlessly, making repairs less daunting. I trust it because it saves time and ensures a smooth finish, especially when restoring old structures.
- A reliable moisture meter is my secret weapon. Detecting hidden water damage early prevents costly rot and mold issues, especially in coastal or rainy environments. I swear by its accuracy and ease of use.
- The right fasteners make all the difference; corrosion-resistant screws and anchors withstand the elements without fail. My favorite source is detailed in guides like these resources.
- Premium sealants and stains are worth every penny. Using a sprayer with adjustable pressure ensures even application, preserving the wood and composite for generations. My go-to brands are backed by experts and real-world tests.
When in Doubt, Build with Confidence and Care
Designing and maintaining an outdoor oasis isn’t just about tools and techniques — it’s about fostering a connection with your space. Every board you align, every gap you fill, and every finish you apply contributes to a sanctuary that reflects your dedication and care. Embrace the learning curve, lean on proven strategies, and remember: your outdoor space can become a treasured retreat with a little patience and a lot of love.
What’s the most surprising lesson you’ve learned from creating your outdoor haven? Share your story below and inspire others to improve their pergola, deck, or railing projects!