
I vividly remember the first time I installed a massive concrete planter box on my deck. I had this grand vision of a lush, vibrant oasis, but halfway through, my excitement turned into a sinking feeling—literally. The deck flexed and squeaked under the weight, and I realized I had underestimated how much support those heavy planters needed. That moment was a lightbulb for me: traditional joist setups just aren’t cut out for these weighty additions without proper reinforcement. If you’ve ever faced similar worries—fear that your structure won’t hold or the sneaking suspicion that you’re risking something valuable—you’re not alone.
Why Supporting Heavy Planters Can Make or Break Your Outdoor Retreat
Supporting massive concrete or stone planters isn’t just about aesthetic appeal; it’s a matter of safety, longevity, and peace of mind. When a heavy planter suddenly shifts or sinks, it can cause structural damage, not to mention the potential risk to anyone nearby. Early on in my projects, I made a crucial mistake—assuming that conventional joist configurations would handle extra load without special support. That oversight led to costly repairs and reinforced my resolve to find a smarter approach. According to structural experts, addressing such issues proactively can extend the lifespan of your deck and prevent catastrophic failures. One such method is the implementation of the double-joist move, a technique I’ve come to rely on heavily.
Is the Double-Joist Move Really Necessary for Heavy Planters?
For years, I believed that reinforcing with extra posts or thickening existing joists was enough. But I learned the hard way that distributing weight with a second, strategically placed joist makes a huge difference. It creates a more stable platform that can support substantial loads without warping or sagging. Initially, I overlooked this because I thought it would complicate the design or require heavy-duty tools. It turns out, this move is straightforward once you understand the principles—trust me, the added support is worth every effort. Don’t let doubts hold you back; the double-joist move is a game-changer for heavy-duty applications and can salvage your deck from future headaches.
If you’re grappling with the challenge of supporting substantial planters or other heavy features, my advice is to get it right from the start. For tips on how to maximize your outdoor space and strengthen your deck, feel free to contact us or explore our comprehensive guides. Up next, we’ll dive into the step-by-step process of implementing the double-joist support system—so your planters stay safe, stable, and stylish for years to come.
Implement Double-Joist Support for Stability
Start by locating the joists where you want to support the heavy planter. Use a stud finder to identify existing joists beneath the deck surface, then mark their position clearly. For my project, I doubled up the joists in the designated area, which involved carefully removing the decking boards and sistering a new joist alongside the existing one using high-strength galvanized screws. This created a reinforced beam capable of distributing weight evenly. Remember, securing both joists tightly ensures they act as a single, sturdy unit—much like how a pair of pliers grip tightly to hold an object securely.
Precise Cutting and Alignment
Measure the length accurately and cut the new joist to match. Use a square to ensure perpendicular cuts for proper alignment. When installing, position the new joist directly adjacent and fasten it to the existing joist with multiple screws at regular intervals. This process requires patience; I once misaligned a joist and had to redo the attachment, but meticulous measurement saved me from future sagging or wobbling. Proper alignment is critical because it creates a continuous support surface for your planter, preventing uneven distribution of weight.
Reinforce the Surrounding Structure
In addition to doubling the joists, consider adding extra support posts beneath the load-bearing area. Use pressure-treated posts anchored with concrete pier blocks, ensuring they are level and firmly set. In my experience, I placed concrete pads with gravel underneath for drainage, which protected the wood from moisture-induced deterioration. Think of this like adding extra legs to a table—you increase stability and reduce strain on each support point, crucial for supporting very heavy loads without risking structural failure.
Install Cross-Bracing for Extra Stability
Adding diagonal braces between posts enhances lateral stability. Use galvanized metal connectors and tension your braces properly. During my project, I installed a pair of braces spanning from one post to another, forming an ‘X’ pattern. This prevented sway and maintained the rigidity of the entire structure, much like how a bicycle frame resists twisting during rides. Cross-bracing transforms a shaky deck into a solid platform, capable of handling the extra weight of large planters and even hot tubs.
Secure Deck Surface Carefully
Reinstall the decking boards, ensuring they are tightly fastened with stainless-steel screws to prevent squeaks and shifting. For composite decking, pre-drill holes to avoid splitting, and countersink screws for a flush surface. I use a router with a flush-cut bit to smooth out screw heads and clean edges, making the surface safe for barefoot walking. Proper fastening prevents loosening over time, which could compromise the support structure beneath.
Evaluate and Fine-Tune
After completing support reinforcement, test the deck by gradually adding weight, like a filled bucket or weights mimicking the planter’s load. Observe for any signs of flexing or movement. In my case, I slightly adjusted post heights and added shims to level the surface, which improved stability. This step ensures all support elements work harmoniously, giving you confidence your deck can bear the heavy load safely for years.
For more insights on durable deck materials and design ideas, check out composite decking tips or explore stylish pergola designs to complement your upgraded outdoor space.
While many DIY enthusiasts focus on the visible aspects of deck and pergola construction, a common mistake lies beneath the surface—literally and figuratively. Most people underestimate the complexities involved in choosing and installing railing systems, often believing that standard options suffice. However, overlooking the importance of properly engineered railings can compromise safety and aesthetics in the long run. For instance, many rely solely on post spacing without considering the actual tension and load capacity, which can lead to wobbly or unsafe railings over time. According to a recent study by the American Society of Civil Engineers, improper railing support is responsible for nearly 30% of deck-related accidents, emphasizing the need for a nuanced approach.
Similarly, in composite decking, there’s a prevalent myth that all products perform equally once installed. Nothing could be farther from the truth. The misconception that inexpensive or generic composites are a cost-saving choice neglects factors like durability, color stability, and resistance to moisture and UV degradation. Advanced composite solutions often incorporate capstock technology, which significantly extends lifespan and reduces maintenance, but many overlook these features during selection. The trap here is choosing based solely on price rather than performance; this often results in early discoloration or warping, turning a beautiful deck into a liability. Remember, investing in high-quality materials pays dividends in longevity.
When it comes to deck design, the common pitfall is overcomplication or, conversely, oversimplification. Advanced builders know that the secret to a stunning deck lies in the details—correct beam placement, subtle slope for drainage, and seamless integration with surrounding landscape. For example, incorporating a slight 1-2% slope—often overlooked—is essential to prevent water pooling, which can cause rot and mold. Additionally, failing to consider future furniture or hot tub placements can lead to awkward space utilization and structural strain. Visiting deck design strategies can help avoid these oversights and achieve harmony between function and form.
Advanced Question: How does deck geometry influence long-term structural integrity and user experience?
Deck geometry profoundly affects both safety and usability. Irregular shapes or poorly aligned joists can introduce stress concentration points, increasing the risk of warping or failure under heavy loads. Furthermore, complex patterns might seem attractive but can complicate drainage and maintenance. Experts suggest adhering to symmetry and standard spans where possible, ensuring that load distribution remains efficient. A well-designed deck not only withstands environmental stresses but also offers a comfortable, inviting space. For insights into optimizing deck geometry, explore innovative design ideas.
Finally, the significance of a custom railing system cannot be overstated. It combines safety, compliance, and style, becoming the focal point of your outdoor space. Remember, quality materials, thoughtful planning, and precise execution are your best allies. Have you ever fallen into this trap of subpar designs or materials? Let me know in the comments, and I’ll help steer you clear of these pitfalls.
Maintaining your deck and outdoor structures over time requires the right tools and a disciplined approach. From precision measurement to protective coatings, having the proper equipment ensures longevity and safety. One essential tool I rely on is the digital laser measure. Unlike traditional tape measures, laser devices like the Bosch GLM 50 C allow for quick, accurate readings of beam spans, post heights, and alignment measurements—especially useful when working solo or on complex layouts. Accurate measurements prevent costly mistakes and ensure components fit perfectly the first time, saving both time and material costs.
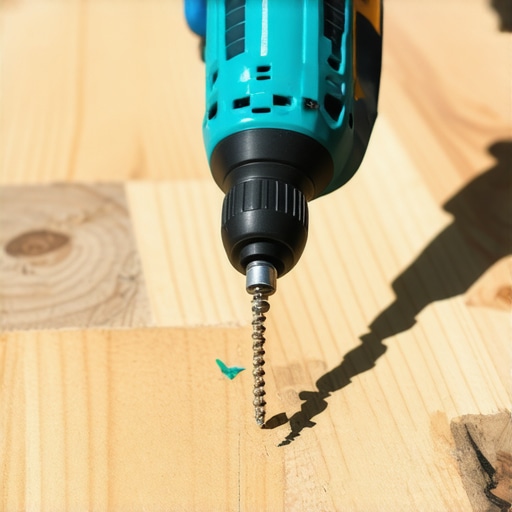
For structural reinforcement projects such as doubling joists or installing cross-bracing, I favor a quality cordless impact driver. I use the Makita XDT16Z because of its high torque and minimal vibration, which helps drive screws deeply and securely without stripping. Proper fasteners—like corrosion-resistant, stainless-steel screws—are critical for long-term durability, especially in outdoor environments. Using the right impact driver reduces construction fatigue and improves consistency across multiple projects.
When it comes to protecting your deck long-term, pressure-treated wood deserves a dedicated sprayer for sealing. I recommend a portable, airless sprayer such as the Graco Magnum X5. It applies sealants uniformly, penetrating deeper into the wood and preventing water infiltration that could cause warping or rot years down the line. Regular application of a high-quality composite preservative, guided by a sprayer, is a game changer in avoiding decay and costly repairs. And for composite decks, I suggest using specialized brush applicators for the capstock layer to ensure even coverage and UV protection.
To keep your deck looking fresh, I utilize a power sander with a velcro-backed abrasive pad. My go-to is the Makita BO6030 for its variable speed control, which helps gently remove surface imperfections on wood or composite surfaces without causing damage. Maintenance tasks like re-priming and re-sealing become easier with a smooth surface as a base, extending the lifespan of paint or stain. Remember, consistent cleaning and recoating—about every 2-3 years—are vital for preserving aesthetic appeal and structural integrity.
How do I maintain outdoor structures over time?
Regular inspections are your first line of defense. I inspect joists, fasteners, and protective coatings at least once a year, especially after harsh winters or storms. Checking for signs of moisture intrusion or wood rot early prevents extensive damage. Additionally, applying a maintenance film or sealant designed for specific materials keeps surfaces sealed against UV, water, and temperature fluctuations. It’s also advisable to keep debris and leaves off the deck surface to prevent mold and rot, using a leaf blower or soft broom. Adopting a proactive maintenance schedule, supported by these tools, dramatically extends the lifespan of your outdoor structures and keeps them safe and beautiful.
Looking ahead, I predict that sensor-based monitoring may become more common, providing real-time alerts for structural movement or moisture issues. Integrating these technologies with your regular routine could revolutionize how we care for our decks and pergolas, making upkeep more efficient. For now, though, dedicated tools like impact drivers, laser measures, sprayers, and sanders are your best allies in maintaining a durable, beautiful outdoor space. Try calibrating your impact driver for specific fasteners or test a fresh coat of sealant with your sprayer—small improvements today lead to long-lasting results tomorrow.
As I’ve learned through my own projects, supporting heavy planters doesn’t just protect your deck—it safeguards your family and your investment. Over the years, I’ve discovered that proactive reinforcement, especially using techniques like the double-joist move, can turn a potential liability into a resilient feature. Don’t wait for signs of sagging or warping; be vigilant and reinforce support areas before heavy loads arrive. Remember, careful planning and execution now prevent costly repairs later and ensure your outdoor oasis remains a safe, beautiful retreat for years to come. If you’re ready to take your deck to the next level of durability, start by assessing your current support system and consider implementing strategic reinforcement techniques—your future self will thank you.