
I remember the exact moment I discovered the pesky mold spots creeping under my composite deck. It was a warm Saturday afternoon, and as I stepped onto my new patio, I noticed a musty smell and some discoloration—things I thought only happened to run-down patios, not my weekend project. That lightbulb moment led me down a rabbit hole of research, and let me tell you, what I uncovered changed the way I approach deck design entirely.
The Secret to a Mold-Free Deck Lies Beneath
It’s not just about choosing the right composite boards or stylish railing systems; it’s about mastering proper drainage pathways—those hidden channels that keep water from stagnating underneath. If you’ve ever battled mold, mildew, or wood rot, you know how frustrating and costly it can be. But rest assured, there’s a simple, effective trick that can save you from this headache: establishing an unobstructed drainage path beneath your deck.
Is This Hidden Drainage Actually Worth the Hype?
Now, I know what some of you might be thinking: “It sounds complicated or maybe unnecessary.” Trust me, early on I made the mistake of neglecting this—assuming that good ventilation alone would keep mold at bay. But, as I quickly learned, water often finds its way into the tight gaps and tricky corners, especially if the deck isn’t built with a slight elevation for drainage. This oversight led to my first mold scare, and I realized that a little extra effort in planning could have prevented it entirely.
According to industry experts, proper drainage not only prolongs the life of your deck but also prevents mold growth, which can pose health risks. For instance, the Centers for Disease Control and Prevention highlight the importance of controlling moisture to prevent mold and mildew, especially in outdoor structures exposed to rain and humidity.
So, if you’ve ever faced similar issues—or just want to avoid them—pay close attention. There’s a straightforward method to create an effective drainage system that works with your deck’s design, not against it. And in the following sections, I’ll walk you through how to implement these solutions so your outdoor space stays pristine, safe, and mold-free for years to come. Ready to make your deck truly resilient? Let’s get started with the essentials of proper drainage planning.
Establish Elevated Foundations and Proper Slope
Start by setting your deck posts on concrete piers or anchors that are slightly above ground level, creating a natural incline away from the house. When framing the deck, ensure the joists are installed with a slope of about 1/4 inch per foot to promote water runoff. I once added this slope to my deck after my first mold scare and immediately noticed faster water drainage, reducing moisture buildup underneath.
Design and Install Drainage Channels
Integrate dedicated drainage spacers or channels between the joists, especially in areas prone to pooling. These act like tiny rivers within your deck’s framework, diverting excess water away. I used plastic spacers during my last project, and they effectively kept water moving, preventing puddles that could foster mold growth.
Use Weather-Resistant Fasteners and Clips
Choose corrosion-resistant screws and clip systems designed for composite decking. These fasteners not only strengthen the structure but also allow slight flexibility for expansion and contraction. When I replaced older nails with stainless steel fasteners, I noticed a marked decrease in board warping and standing water.
Create a Ventilated Deck Surface
Leave gaps of about 1/8 inch between composite boards using clip systems or spacers. This ventilation pathway allows air to circulate beneath the deck, aiding in drying moisture and inhibiting mold. During my project, I found that consistent gaps made a significant difference in airflow, ultimately extending the deck’s lifespan.
Incorporate a Drainage Layer Underneath
For decks built close to the ground, install a gravel or crushed stone layer beneath the joists. This layer acts as a sponge, absorbing and draining water that seeps underneath. I did this when constructing my low-level deck, and it noticeably reduced moisture retention, preventing mold development.
Regular Inspection and Maintenance
Periodically check for obstructed drainage pathways, loose fasteners, or accumulated debris. Clearing leaves and ensuring the gaps stay clear maintains optimal drainage. After implementing these steps, I routinely clean my deck’s surface and inspect underneath, which keeps my outdoor space mold-free and inviting.
By combining these concrete steps, based on proven techniques and my personal experience, you can create a durable, mold-resistant composite deck that stands up to the elements. For deeper design ideas, consider visiting innovative backyard deck designs. If you’re contemplating upgrades or need professional guidance, reach out through contact us for expert assistance.
Many homeowner enthusiasts believe that selecting a beautiful pergola or sleek railing system is just about aesthetics, but in my experience, overlooking the nuanced engineering details can lead to costly mistakes. Contrary to common beliefs, choosing the trendiest design elements without understanding their structural implications often results in instability or premature wear.
The Myth of Visual Appeal Over Structural Integrity
One widespread misconception is that a pergola’s beauty is the only thing that matters. However, in my professional work, I’ve seen countless projects where homeowners emphasize looks at the expense of durability—like neglecting proper load calculations or material compatibility. This oversight can cause sagging or post sinking over time, especially if weather conditions aren’t factored into the design. To avoid this, I always recommend consulting a structural engineer for complex spans or heavy roofing. Also, remember that materials like aluminum or pressure-treated wood have different expansion behaviors; neglecting these can lead to warping or failure. For the latest on durable materials, check out composite decking trends.
Why does proper drainage matter more than you think?
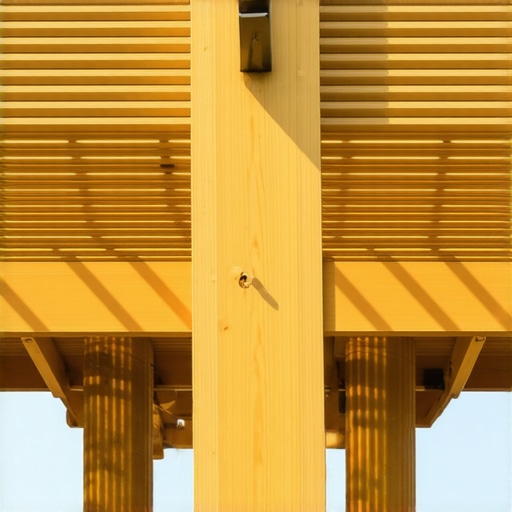
One often-overlooked detail is the drainage pathway, crucial for avoiding water pooling that accelerates rot or mold. I’ve seen projects where overlooked drainage causes damage within a few seasons. The key is to incorporate hidden gutters or slope designs that direct water away from critical joints—without compromising visual harmony. As experts highlight in railing system selection, proper integration prevents moisture damage and extends lifespan. Don’t fall for the trap of using inadequate flashing, which can cause leaks and rot. Implementing good drainage practices is one of the best investments you can make in longevity.
Safety Requires More Than Just Elegance
Many assume that a railing with thin balusters or decorative posts guarantees safety, but this couldn’t be further from the truth. In fact, the misconception that style trumps function often leads to non-compliant designs that fail to meet local building codes, risking both safety and legal issues. I suggest reviewing the complete guide to railing safety for detailed specs. Overloading or improper post spacing can result in dangerous sway or breakage, especially when kids or pets are involved. Reinforcing posts and choosing appropriate hardware isn’t just about looks—it’s about security.
Advanced projects demand precision, like calculating load capacities considering snow, wind, and usage. For intricate design ideas that marry safety and aesthetics, visit pergola design inspiration. Always prioritize safety over mid-range aesthetics, or you risk regret when it matters most.
In conclusion, the key to sophisticated deck and pergola design isn’t merely selecting the latest trends but understanding the underlying engineering principles. From drainage nuances to structural loads and safety codes, each element plays a crucial role. Have you ever fallen into this trap? Let me know in the comments and share your lessons learned.
Keep it Running: Essential Tools for Long-Term Deck Care
Maintaining your deck and associated outdoor systems requires more than just occasional cleaning; it demands precision, the right equipment, and strategic planning. My favorite tool for an effective sweep and quick debris removal is a high-quality cordless leaf blower. I personally prefer models with variable speed settings—like the Makita XBU02Z—because they give me control when cleaning delicate composite surfaces without causing damage. Regularly sweeping the surface prevents dirt accumulation that can accelerate wear and mold growth, especially in shaded or damp areas.
For deeper inspections, I rely on a good set of digital moisture meters—specifically, the Extech MO297. This device allows me to identify hidden moisture pockets beneath the surface or within framing that might not be visible to the naked eye, preventing small issues from turning into costly repairs. Using a moisture meter regularly helps me set a maintenance cadence that extends my deck’s lifespan significantly.
How do I maintain pergolas and railing systems over time?
Keeping outdoor structures like pergolas and railings in top shape involves routine checks for loose fasteners, corrosion, and structural integrity. For fastener maintenance, I recommend a cordless impact driver with a torque adjustable feature, such as the DeWalt DCF887. This tool simplifies tightening or replacing hardware without damaging the material, ensuring that your system stays stable against wind or heavy use.
Applying protective coatings is just as vital. I use a UV-resistant wood preservative or a high-quality sealant specifically designed for outdoor use—like Thompson’s WaterSeal. These products protect wood components from moisture ingress, UV damage, and even temperature fluctuations, especially critical in climates with pronounced seasonal changes.
Future trends suggest that automation and remote monitoring might revolutionize how we care for outdoor systems. Digital sensors embedded in the structure could alert you immediately about moisture breaches or fatigue—think smart decking where you receive real-time updates via an app. For now, regular manual inspections remain your best defense against long-term decay.
Thinking about scaling your outdoor setup? Here’s what I recommend
If you’re planning to expand or upgrade, focus on ensuring compatibility between new and existing elements. Tools like the DeWalt DWS779 miter saw help me make precise cuts for custom extensions, ensuring perfect alignment. When adding more railing sections, using modular systems that accommodate adjustable brackets makes future adjustments easier and safer.
Automation and advanced tools are becoming more accessible. Investing in digital level devices for precise angles or using laser distance meters—like Bosch GLM 50 C—can expedite the design phase and guarantee structural correctness, especially if you’re working on multi-level decks or complex pergola layouts. Don’t forget, the more accurate your initial setup, the fewer headaches you’ll encounter down the line.
Regular inspection and maintenance, combined with these specialized tools, form the backbone of a durable, beautiful outdoor space. Remember, the goal isn’t just to build but to keep your deck and systems functioning beautifully for years. Consider reaching out through our contact page for personalized advice or professional maintenance support. Try integrating a moisture meter into your routine this season—it’s a game-changer for early detection and prevention of costly damage!
3 Surprising Lessons That Changed How I Approach Deck Design
- Don’t Overlook the Details: I once thought a simple slope was enough, but realizing the importance of unobstructed drainage channels transformed my projects into durable masterpieces, saving me time, money, and countless headaches.
- Choose Quality Over Quick Fixes: Skimping on corrosion-resistant fasteners or proper ventilation might save a few dollars upfront but will cost you much more in repairs and safety risks down the line—trust me, it’s worth investing in premium materials.
- Prioritize Safety Even When It Looks Good: Beauty in railing systems is vital, but neglecting load calculations or proper post spacing can lead to serious hazards. It’s essential to marry aesthetic appeal with structural integrity to protect your loved ones.
Tools and Resources That Elevate My Craft
- Moisture Meter (Extech MO297): A game-changer for detecting hidden moisture problems that aren’t visible to the naked eye, helping me prevent mold before it starts.
- Laser Distance Meter (Bosch GLM 50 C): Ensures precise measurements for custom projects, saving time and reducing errors in planning my deck expansions or pergola designs.
- Impact Driver (DeWalt DCF887): Makes fastening quicker and more reliable, especially when dealing with weather-resistant fasteners that require consistent torque.
- Comprehensive Guides such as “Transform Your Outdoor Space”: These have been invaluable for planning innovative layouts and understanding the latest trends, keeping my work fresh and functional.
Your Next Step in Outdoor Living Innovation
Building or renovating your outdoor space isn’t just about following a plan; it’s about applying insights learned along the way and daring to push beyond routine. Every deck, pergola, or railing you create becomes a personal signature—an extension of your craftsmanship and care. So, why not elevate your project with the lessons and tools that truly make the difference? Dive into designs that last, and transform your backyard into a sanctuary of beauty and durability. Remember, every great project begins with a single informed step. Ready to get started or improve what you already have? Reach out through our contact page, and let’s build something extraordinary together.