
I remember the first time I built a deck and carefully laid the step treads, only to be disappointed by visible screws and uneven gaps. That lightbulb moment hit me hard — I realized there had to be a better way to achieve a clean, professional look. Since then, mastering the art of creating seamless deck step treads has transformed my outdoor spaces and saved me headaches during the process.
Why the Perfectly Invisible Screw Matters More Than You Think
When viewers walk onto my deck, the last thing they notice should be the hardware or gaps. Instead, I want their focus to be on the smooth, inviting surface. Achieving this aesthetic perfection isn’t just about looks; it’s also about safety, durability, and preventing water infiltration. After encountering some early mistakes, like misaligned screws and exposed fasteners, I learned that concealed fasteners create a more uniform appearance and longer-lasting structure.
Question: Is the Hidden Screw Trick Really Worth the Extra Effort?
At first, I was skeptical. It seemed complicated and time-consuming. But the payoff? Absolutely worth it. Not only do my stairs look far more polished, but I also avoid the common pitfalls of visible fasteners causing wood splitting and water problems. Plus, it’s satisfying knowing I’ve improved my craftsmanship after just a few straightforward tweaks. Just remember, the key is to use high-quality hidden fasteners and proper installation techniques. (According to the American Wood Protection Association, correct fastening practices significantly extend the life of your deck.)
In this guide, I’ll walk you through step-by-step how I’ve mastered the hidden screw method, helping you avoid the common mistakes and achieve stunning, seamless results. Ready to up your deck-building game? Let’s dive in and tackle these hidden screw secrets together!
.
Preparing for Flawless Installation
Start by selecting high-quality hidden fasteners compatible with your decking material. I once used generic fasteners, which led to stubborn gaps later. Opting for premium fasteners ensured easier installation and a cleaner look. Before beginning, double-check your measurements with a tape measure and chalk line to ensure uniform spacing—accuracy here prevents headaches down the line.
Marking and Drilling for Accuracy
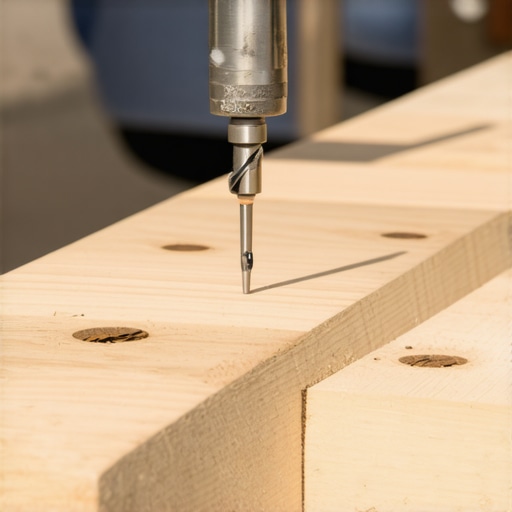
Use a pencil and square to mark where the fasteners will go. I vividly remember marking my first set of stairs—my lines were slightly crooked, making the fasteners misalign. To avoid this, I used a small drill bit to pre-drill pilot holes, easing the fastener insertion and preventing wood splitting. Pre-drilling is crucial for controlled fastener placement and consistent depth.
Aligning the Treads Precisely
Lay the first tread in position, then clamp it down temporarily. Measure from the edge to ensure it’s flush and square with the stringers. I once inadvertently misaligned a step, which became noticeable after finishing. Clamps hold your piece, giving you confidence to work without shifting. Regularly step back to observe alignment from a distance—this helps catch subtle deviations.
Inserting Hidden Fasteners Effectively
Hold the fastener at a 45-degree angle to the edge of the board, then screw it into the pre-drilled hole. Apply steady pressure to prevent slipping. During my first attempt, the fastener skidded, scratching the surface. I learned that a slow, deliberate turn with a power drill set to low torque minimizes slipping. Keep a scrap piece nearby to test your technique and prevent damage to your actual boards.
Maintaining Even Gaps for a Professional Look
Use spacers or a dedicated gap tool between the boards and the edge of the tread. I once neglected this and saw uneven gaps that detracted from the polished appearance. Consistent gaps ensure proper drainage and expansion. Regularly check with a ruler or a dedicated spacer to keep everything uniform—this small detail elevates the overall aesthetic.
Final Adjustments and Inspection
Once all fasteners are in place, walk across the steps and feel for any wobbling or looseness. I recall tightening a few fasteners after noticing some movement, which made the entire set feel solid. Use a screwdriver to tighten any loose fasteners, being careful not to over-tighten and cause the wood to crack. Finish by sweeping the surface to remove debris, revealing the seamless appearance achieved through concealed fasteners.
By following these concrete steps, you eliminate visible screws and create a deck with a sleek, professional finish. Remember, attention to detail during drilling and fastening techniques pays off in durability and aesthetic appeal. If you’re exploring more about deck accessories or want to ensure your railings are both safe and stylish, check out https://deckforgebuilders.com/transform-your-outdoor-space-custom-railing-systems-for-safety-and-style, which offers insights into enhancing your outdoor living areas efficiently.
Many DIY enthusiasts and even some professionals fall prey to misconceptions when it comes to modern deck design. One of the most persistent errors is believing that all railing systems are created equal, leading to choices that compromise safety, style, or longevity. For instance, some assume that any metal railing will automatically blend seamlessly into their design, but as an expert I know, the material choice and installation details are crucial for both safety and aesthetic harmony. Contrary to popular belief, not all composite decking offers the same durability—many brands still lack the UV resistance necessary for long-term performance, a nuance often overlooked until it’s too late. Check out this guide to understand what to look for in high-quality composite boards.
Are pergolas just decorative structures, or do they impact your outdoor experience more significantly?
Many think of pergolas as purely aesthetic options, but the wrong design can lead to issues like poor shade coverage or water pooling. An advanced mistake I often see is neglecting proper slope for pergola roofs, which can cause drainage problems and structural stress over time. Incorporating proper slope and drainage techniques not only extends the lifespan of the pergola but also enhances your comfort beneath it. For inspiring designs, explore this resource.
When it comes to deck design, one trap I urge you to avoid is miscalculating the spacing of balusters. Too wide, and safety is compromised; too narrow, and the space appears cluttered. It’s tempting to rely solely on code minimums, but an expert touch considers visual flow and function. For comprehensive tips, see this article.
Another often overlooked nuance is the importance of matching railing hardware and fasteners to your chosen materials. Using mismatched or low-quality fasteners can lead to premature corrosion or wobbling, which diminishes both safety and visual appeal. High-quality concealed fasteners, when installed correctly, can dramatically improve your project’s finish—avoiding the ‘Oops’ of loose or rusted components. For detailed guidance, visit this page.
Ensuring each component complements the others, from deck design concepts to railing styles, requires nuanced understanding. Remember, rushing through these choices can lead to costly mistakes or safety hazards. Let my experience guide you toward informed decisions that stand the test of time. Have you ever fallen into this trap? Let me know in the comments!
Keeping your outdoor space beautiful and safe requires the right tools and a proactive approach to maintenance. One of my key recommendations is investing in a high-quality cordless impact driver like the Makita XDT131 or DeWalt DCF887, which offer the power and precision needed for tightening fasteners without damaging your decking or railing components. These tools reduce fatigue and allow for more consistent application force, ensuring fasteners stay secure over time and preventing issues like loose railings or squeaky steps.
In addition, I always rely on a laser level—such as the Bosch GLL 55—to maintain perfect alignment during repairs or when installing new components like pergolas or deck lighting. Precision is crucial, especially when updating or scaling your deck, and a laser level simplifies the process by providing reference lines over long distances, reducing the chances of crooked posts or uneven surfaces.
To manage ongoing cleanliness and protect your materials, I recommend a good pressure washer. However, it’s vital to choose one with adjustable PSI, like the Sun Joe SPX3000, to avoid damaging composite boards or delicate railing finishes. Regular cleaning with a soft-bristle brush and appropriate cleaning agents extends the lifespan of your decking and railing systems, especially in harsh climates.
Considering long-term results, applying a high-quality sealant or protective stain every few years is essential. I prefer products specifically formulated for composite decking, like the Eagle Armor AR480, as they penetrate well and resist UV damage. Using the right applicator—such as a foam roller or soft brush—ensures even coverage and reduces waste.
Looking ahead, advancements in smart maintenance tools may simplify the upkeep of extensive deck systems. For example, sensors that monitor moisture levels or bracket stress are becoming more accessible to homeowners, helping detect issues early before structural damage occurs. Aligning with these innovations can significantly reduce long-term costs and enhance safety.
**How do I maintain my railing systems and composite decking over time?** Regular inspections are crucial. Check for loose fasteners and signs of corrosion, especially in areas exposed to moisture or salt air. Re-tightening fasteners with your impact driver prevents wobbling and maintains structural integrity. Remember, addressing minor issues promptly prevents larger, costly repairs later. Incorporating tools like a torque wrench can help ensure fasteners are tightened to manufacturer specifications, which is particularly important for safety-critical components.
For a comprehensive understanding of railing materials and installation best practices, I recommend reviewing this guide, which also discusses how to choose the perfect railing system for your needs. This knowledge helps you plan for future scaling or upgrades, ensuring your deck remains both beautiful and secure for years to come. Feel free to experiment with using a laser level for precise alignment during your next project—it’s a game-changer in achieving professional results.
What I Wish I Knew Before Tackling My First Deck
Early in my deck-building journey, I thought that following basic instructions would suffice, but I quickly learned that attention to hidden details—like concealed fasteners and precise measurements—truly elevates the final result. The lightbulb moment came when I realized that investing extra time in prep work saves endless headaches later. Those subtle tips, such as pre-drilling and using spacers, are what separate a good deck from a stunning one.
The Power of Small Tweaks That Make a Big Difference
Simple adjustments, like ensuring consistent gaps or using high-quality hidden fasteners, dramatically enhance the aesthetic and longevity of your deck. I found that upgrading my tools—adding a laser level or a quality impact driver—was as vital as choosing the right materials. These small but intentional improvements transformed my projects from DIY to professional-grade. Remember, the devil is in the details; a well-timed tweak can turn a mediocre deck into a masterpiece.
Curated Resources That Changed My Approach
- [Transform Your Outdoor Space with Custom Railing Systems](https://deckforgebuilders.com/transform-your-outdoor-space-custom-railing-systems-for-safety-and-style): A comprehensive guide that opened my eyes to the possibilities of tailored railing solutions, blending safety and style seamlessly.
- [Composite Decking Trends for Modern Outdoor Living](https://deckforgebuilders.com/composite-decking-trends-durable-solutions-for-modern-outdoor-living): This resource helped me select durable, UV-resistant materials that stand up to the elements for years to come.
- [Innovative Deck Design Ideas for 2025](https://deckforgebuilders.com/elevate-your-backyard-innovative-deck-design-ideas-for-2025): Inspiration that pushed me to think outside the box and incorporate modern aesthetics into my outdoor spaces.
- [Pergola Design Inspiration](https://deckforgebuilders.com/pergola-design-inspiration-from-modern-to-classic-looks): A treasure trove of ideas for creating functional and beautiful pergolas that complement my decks.
Your Adventure Awaits — Get Out There
Building a deck that combines durability, beauty, and safety is within your reach. By applying these insider lessons and utilizing trusted resources, you’ll elevate your outdoor spaces beyond expectations. Don’t let hesitation hold you back—start planning, measuring, and assembling with confidence. Your perfect deck is just a few thoughtful steps away, and the satisfaction of creating it yourself is unparalleled.
What’s the first improvement you’re eager to implement on your next deck project? Share your ideas below—I can’t wait to hear your plans!
,