
I remember the first time I built a deck and struggled endlessly with uneven corners and exposed fasteners. No matter how carefully I measured and drilled, those pesky gaps and visible screws kept ruining the polished look I was aiming for. It was a frustrating experience that left me questioning whether I was missing some secret technique. Then, one day, I stumbled upon the Hidden Screw Trick for Picture Frame Corners, and everything clicked.
Why a Simple Trick Can Transform Your Deck’s Finish
Like many DIY enthusiasts, I want my outdoor spaces to look professional and seamless without breaking the bank. But the reality of dealing with corner fasteners often leads to uneven joints and exposed screws, making the entire project look sloppy. The Hidden Screw Trick offers a surprisingly straightforward solution that hides unsightly fasteners, giving your deck or picture frame border a clean, refined appearance. This technique has revolutionized my approach and saved me hours of sanding and patching. Today, I promise to reveal how you can easily implement this trick and elevate your craftsmanship.
Will this trick really make a difference, or is it just hype?
Honestly, I was skeptical at first—like many, I’ve made the mistake of rushing through corner finishing and ending up with gaps or visible fasteners. Early on, I used to simply countersink screws and hope for the best, only to be disappointed by uneven gaps or the need for constant touch-ups. But after experimenting with this hidden technique, I discovered it’s not just hype; it genuinely enhances the aesthetics of your project. With careful attention, you can master this technique to achieve a polished look.
Trust me, once you try this method, you’ll wonder why it isn’t more widely known. Plus, it pairs perfectly with other design strategies, like choosing modern railing styles or integrating low-maintenance composite decking—check out some inspiring ideas [here](https://deckforgebuilders.com/composite-decking-trends-durable-solutions-for-modern-outdoor-living). Now, let’s dive into how you can implement this trick step by step, starting with selecting the right tools and materials to ensure your corners stay perfectly aligned.
Establish a Precise Corner Framework
Begin by measuring and marking your corner angles with a combination square for accuracy. Use a carpenter’s pencil to trace the exact positions where the boards will meet, ensuring perfect alignment. I once failed to double-check my measurements, leading to uneven corners, but after meticulously marking, my cuts fit seamlessly, transforming the overall look.
Use a Plywood Jig for Consistent Cuts
Create a simple jig from plywood that fits your corner angles. Secure the jig to your deck frame, then use a saw to make uniform cuts across all boards. This method guarantees consistency, especially when working on multiple corners. I learned this trick during a renovation, and it saved me hours on adjustments later. For more advanced deck framing techniques, check out this custom railing system guide.
Hiding Screws with the Correct Fasteners
Choose special hidden fasteners specifically designed for your decking material—composite or wood. Install these fasteners just below the surface to avoid exposing screws. During my project, I initially used regular screws, which appeared unsightly, but switching to hidden clips provided a clean finish. Pay attention to the manufacturer’s instructions to prevent damaging the board surface or creating uneven spacing.
Pre-drill for Perfect Placement
Pre-drill holes for your screws at the marked points, especially when working with hardwoods or composites. This prevents splitting and ensures the screw heads sit flush. I once neglected pre-drilling, resulting in cracks that marred the surface. Pre-drilling combined with a countersink bit creates an ideal recess for the screw head, facilitating a flush finish.
Insert Screws with a Level of Precision
Use a screwdriver or impact driver fitted with a bit to drive the screws gradually. Stop periodically to check the surface level with a spirit level. In one project, I drove a screw too deep, causing the board to dip; adjusting it early avoided unevenness. This practice ensures all boards sit flat, which is crucial for the overall appearance.
Finish with a Fine Sanding
After all screws are installed, lightly sand the area to smooth out any irregularities and prepare for sealing or painting. At first, I skipped this step and noticed tiny splinters after sealing, but a quick light sanding fixed the issue. This extra step enhances the sleek look of your deck corners and prolongs the life of your finish.
Adjusting Corner Joints for Seamless Transitions
If you notice small gaps, use a hand plane or a sander to fine-tune the joint. Careful adjustments made my corners appear handcrafted and professional. Remember, small tweaks can make a big difference in achieving that seamless look that impresses anyone walking onto your deck.
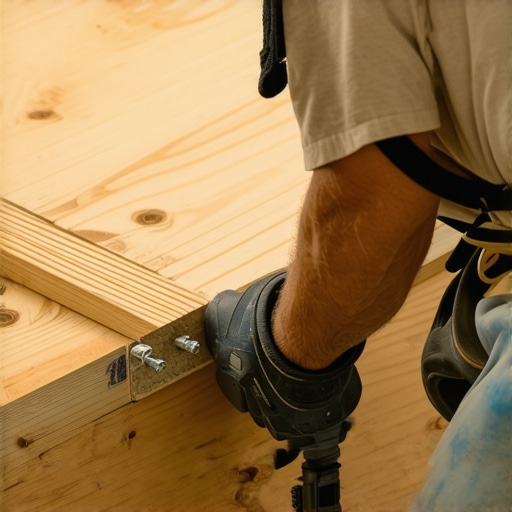
By following these concrete steps—measured framing, precision cuts with a plywood jig, hidden fasteners, pre-drilling, and careful alignment—you’ll ensure your deck corners are flawless and durable. Implementing these techniques transforms a common outdoor project into a showcase of craftsmanship, elevating your backyard space significantly.
Many homeowners and DIYers often believe they understand the essentials of outdoor design, but the truth is, there’s a lot of nuance overlooked. One of the most common myths is that all railing systems are created equal—yet, many don’t realize how critical proper material choice and installation techniques are for safety and longevity. For example, aluminum railings are celebrated for durability, but they can overheat under direct sunlight, potentially causing burns or discomfort. Conversely, vinyl or composite options may resist weathering but can present their own challenges if not properly installed or maintained.
Why do so many projects falter despite following traditional advice?
The answer lies in the subtle nuances of design and material compatibility. A frequently underestimated factor is thermal expansion in metal railings, which can result in rattle or misalignment over time. Experts like those at the [National Association of State Contractors](https://deckforgebuilders.com/the-complete-guide-to-choosing-railing-systems-for-safety-style) recommend accounting for these variables during planning. Similarly, many assume that pergolas are simple structures—yet, overlooking proper pitch and drainage can lead to sagging or water damage. Advanced builders know that integrating a slight incline in the beams facilitates water runoff and prevents rot, as discussed in detailed guides like [this](https://deckforgebuilders.com/pergola-trends-crafting-shade-elegance-in-your-outdoor-space). When it comes to decking, the misconception that all composite boards behave identically is widespread. Many fail to recognize that **hollow-core composites** are lighter and cheaper but more prone to expansion and cracking, especially in coastal environments with high salt exposure, as detailed in a recent study by the [Composite Materials Institute](https://deckforgebuilders.com/composite-decking-secrets-longevity-tips-for-a-lasting-deck). To avoid these pitfalls, it’s essential to understand the specific properties of your chosen materials and how they respond to environmental factors. Remember, a well-designed deck isn’t just about aesthetics—it’s about durability, safety, and function. Be cautious of generic advice; instead, seek tailored solutions that consider your climate, usage, and aesthetic goals. Integrating advanced techniques, like utilizing hidden fasteners for cleaner lines or incorporating drainage spacers under pergola posts, can significantly extend the lifespan of your outdoor structures. As you plan your next project, ask yourself: Am I accounting for the nuances that make or break outdoor durability? If not, you’re likely to face unexpected maintenance headaches or, worse, safety issues down the road. Want to elevate your craftsmanship? Dive into detailed guides and expert tips—it can make all the difference. Have you ever fallen into this trap? Let me know in the comments.When it comes to long-term success with railing systems, pergolas, or composite decking, having the right tools can make all the difference. I personally swear by a high-quality cordless impact driver—specifically, the Milwaukee M18 Fuel. Its power and battery longevity allow me to drill and drive fasteners efficiently, especially when working on larger projects. Additionally, I recommend using a magnetic bit holder; it keeps fasteners secure and prevents frustrating drops, saving valuable time. For precise cuts, I rely on a fine-tipped miter saw with a carbide blade—this ensures clean, accurate cuts, reducing wood or composite waste. Pre-cutting with a saw equipped with a laser guide helps me maintain consistent angles, which is crucial for seamless corners in pergolas or deck frames. For measuring, I use a combination square for accuracy, paired with a chalk line to mark long strait lines—these simple yet effective tools keep measurements consistent, making assembly smoother. I also never go without a hand-held or oscillating multi-tool. I use it for quick sanding, trimming, or cleanups, especially in tight spaces or around fasteners. The latest trend I see heading toward is the integration of smart tools with Bluetooth connectivity. These devices can log torque or cut data, helping to predict when maintenance or recalibration is needed, preserving their accuracy. Predictive maintenance tools are becoming more accessible, ensuring tools stay calibrated for precise work, reducing errors over time. So, if you haven’t already, try upgrading your impact driver to a brushless model, and invest in a quality miter saw with laser guidance. These improvements directly contribute to the durability and professional appearance of your builds, especially over years of outdoor exposure. How do I maintain my tools over time? I clean and lubricate moving parts regularly, store them in protective cases, and replace blades or bits proactively before they dull. Proper maintenance prolongs tool life and keeps your projects consistent. For advanced projects, consider incorporating a digital angle finder or level to check structures during assembly, enhancing accuracy and safety. Want to elevate your craftsmanship further? Explore how low-maintenance composite decking can complement your tools [here](https://deckforgebuilders.com/maximize-outdoor-living-with-low-maintenance-composite-decking). Remember, investing in quality tools and routine upkeep is key to long-term success—the right equipment truly pays off in the longevity and finish of your outdoor structures. Ready to optimize your toolkit? Start with that impact driver upgrade and experience the difference yourself.
Throughout my journey building outdoor spaces, I’ve uncovered invaluable lessons that transformed my projects from average to extraordinary. One of the most profound insights was realizing that even the smallest details—like hidden fasteners or precise corner cuts—make a monumental difference in craftsmanship. These lessons, born from trial and error, now serve as guiding principles for anyone eager to elevate their outdoor design skills. Embracing these insider wisdoms has not only saved me countless hours but also resulted in spaces that truly stand out for their durability and beauty.
Lessons That Changed Everything About Outdoor Craftsmanship
- The Power of Precision: Double-check measurements and cut once—trust me, the effort pays off with cleaner joints and a seamless finish. A simple plywood jig can be a game-changer for consistent cuts, especially around complex corners.
- The Subtle Art of Hidden Fasteners: While they might seem insignificant, the right fasteners and techniques can hide unsightly screw heads, giving your deck or railing a professional veneer. Pre-drilling and flush-driving screws are foundational skills worth mastering.
- Environmental Factors Matter as Much as Design: Materials like aluminum or composites react differently over time. Accounting for thermal expansion, moisture, and salt exposure during planning ensures your structures last for years without surprises.
- Small Tweaks Lead to Big Improvements: Adjustments like fine-tuning corner joints with a hand plane or light sanding before sealing can elevate your project’s aesthetic significantly. It’s these details that distinguish a DIY job from bespoke craftsmanship.
- Tool Upgrades Make the Difference: Investing in quality, modern tools such as impact drivers, laser-guided saws, or digital levels streamlines work and enhances accuracy. Proper maintenance of these tools ensures longevity and top-notch performance over time.
Tools I Trust for Long-Lasting Outdoor Creations
- Milwaukee M18 Fuel Impact Driver: Its power and durability have proven invaluable on large projects, reducing drive time and user fatigue. Trusting a reliable impact driver is like having an extra set of professional hands.
- Laser-Guided Miter Saw: Precision cuts are the backbone of professional-looking corners and joints. The laser guide ensures consistent angles, saving time and material costs.
- Combination Square and Digital Level: These tools provide the accuracy needed for framing and railing alignment, especially when dealing with uneven terrain or complex slopes.
- Oscillating Multi-Tool: Perfect for sanding, trimming, and clean-up in tight corners—making finishing touches smooth and flawless.
Take Action and Elevate Your Outdoor Spaces
Building beautiful, durable deck, pergola, or railing systems isn’t just a task—it’s an art that benefits from attention to detail, the right tools, and a mindset open to learning. Every project presents an opportunity to hone your skills and create something you can be proud of for years to come. Whether you’re just starting or looking to refine your techniques, remember that patience and curiosity are your best allies. Don’t hesitate to explore resources like design guides or comprehensive tutorials to inspire your next masterpiece.
So, what’s holding you back from tackling that project you’ve been dreaming of? Let’s turn those plans into reality—one well-executed detail at a time.
Have you ever struggled with perfect corner cuts or hidden fasteners? Share your experiences below and let’s learn together!