
I remember the moment clearly—my first outdoor deck build was supposed to be a weekend project, but it turned into a saga of frustrating squeaks, warping boards, and constant maintenance. I had read all the guides, bought the best materials, yet something still felt off. Then I stumbled upon a little-known trick involving joist tape, and honestly, it was a game-changer. It made me realize that the secret to a durable, long-lasting deck isn’t just about choosing quality materials but also about mastering the right installation techniques. Today, I want to share that secret with you, so your deck can withstand the test of time without all the unnecessary headaches.
The Hidden Power of Joist Tape That DIY Builders Overlook
Many homeowners and even some contractors miss a simple yet vital step during deck assembly—properly sealing your joists with the right tape. This small detail can significantly prevent moisture infiltration, which is the root cause of rot, mold, and structural weakening. I used to think that nailing down quality lumber was enough, but after dealing with warped joists within a few years, I learned better. The truth is, moisture seeping in through the gaps around joists is more common than most realize, especially in climates with high humidity or frequent rain.
What made me finally pay attention was reading a study from the University of Minnesota, confirming that proper moisture barriers can double the lifespan of wood structures [source: UMN Extension]. It sounds obvious in hindsight, but it was a wake-up call. The secret isn’t in expensive materials but in how we protect and seal what we already have.
If you’ve faced issues like warped deck boards or peeling paint earlier than expected, chances are moisture was the culprit. That’s why ensuring your joists are well sealed from the start makes all the difference. Plus, it’s a fairly simple step that I now prioritize on every build.
In the next section, I’ll walk you through how to choose the right joist tape and demonstrate how to apply it effectively. Trust me, mastering this small detail will save you from costly repairs and give your deck an edge in longevity. So, let’s get into the practical side of things—because a well-protected deck isn’t just a dream, it can be your reality.
Select the Right Joist Tape
Choose an high-quality, UV-resistant, waterproof joist tape designed for outdoor wood structures. I recommend using a butyl-based tape for maximum adhesion and moisture sealing. Remember, not all tapes are created equal—opt for brands with proven durability in weather-exposed conditions. I once made the mistake of using a cheaper tape, which peeled in just two seasons, exposing my joists to moisture and causing rot. Learning from that, I invested in a premium option, and it paid off.
Prepare Your Surface Properly
Before applying tape, ensure all surfaces are clean, dry, and free of dirt, dust, and old debris. Use a wire brush or power washer to remove any loose material, then let everything dry completely. This guarantees the tape adheres firmly and creates an effective moisture barrier. I once skipped this step on a rushed afternoon project, and the tape didn’t stick well, leading to moisture ingress that I later had to repair.
Apply the Tape Correctly
Start at one end of the joist and unroll the tape evenly, pressing it down firmly as you go. Overlap the edges by at least 1 inch to ensure seamless coverage. Pay attention to corners and any irregular surfaces, pressing out air bubbles and wrinkles with a squeegee or your hand. It’s crucial to create a tight, smooth seal that won’t lift over time. During my last deck build, I used a roller to smooth out the tape, which improved adhesion and durability.
Pay Attention to Overhangs and Seams
Seal all seams thoroughly, especially where two pieces of tape meet. Use a second strip to reinforce critical joints. Don’t forget to extend the tape beyond the ends of each joist by a few inches, wrapping it around the sides if possible, for extra protection. This extra layer prevented water from seeping into the unprotected wood underneath. I learned the hard way that ignoring these small overlaps can create future problems.
Secure the Tape During Application
Hold the tape taut as you press it into place to prevent bubbles and wrinkles, which can compromise waterproofing. Using a hand roller helps embed the tape firmly and remove trapped air. I recommend working in sections to maintain control and accuracy. This prevents the tape from shifting or lifting during the process, ensuring a perfect seal that lasts for years.
Inspect and Finalize
Once the tape is applied, walk around the deck and check all edges, seams, and overlaps. Press down any suspected areas and reapply tape if necessary. Double-check that the entire surface is sealed effectively. I always perform this last step to catch any missed spots and ensure peace of mind before proceeding with the rest of the decking process. Proper sealing now saves hours of repair later.
Additional Tips for Success
Work in mild weather—avoid applying tape in direct sunlight or extreme cold, which can affect adhesion. If working in cold conditions, warm the tape slightly or wait for warmer days. Use a utility knife to trim excess tape neatly, especially around fasteners and irregular edges. With practice, this step becomes quick and effortless, significantly extending the lifespan of your deck.
When it comes to designing an outdoor space, many homeowners rely on popular trends or simplified advice, but let’s dig deeper into some common misconceptions that can trip you up. A frequent myth is that all composite decking is maintenance-free—while it’s true that composite materials require less upkeep than traditional wood, not all products withstand harsh conditions equally. For instance, hollow-board composites may be more prone to cracking under heavy loads or temperature fluctuations, so choosing solid-core options can significantly extend your deck’s lifespan [learn more about durable composite options](https://deckforgebuilders.com/composite-decking-secrets-longevity-tips-for-a-lasting-deck).
Why do some railing systems outperform others in safety?
Many assume that any railing system with the highest picket spacing is the safest, but in reality, the key is the durability and proper installation—an overlooked nuance. Metal railings, for example, often provide superior longevity and resistance to wind stress, but only if anchored correctly with the right hardware. This critical detail is frequently misunderstood by DIYers eager to cut costs. Proper anchoring ensures the system complies with safety codes and withstands weathering, reducing the risk of failure over time. Consulting guides like [this comprehensive railing selection guide](https://deckforgebuilders.com/how-to-select-the-perfect-railing-system-for-every-deck) can help you avoid costly mistakes.
Builders also underestimate the impact of pergola design on overall harmony. Common mistake? Overlooking pitch in rafters, which can lead to water pooling and accelerated deterioration. Properly sloped beams not only shed water effectively but also enhance visual appeal—a small detail with outsized benefits. Interestingly, some homeowners believe big, elaborate pergolas are inherently better; however, minimalist, well-designed structures often yield more durability and versatility. To ensure longevity, consider incorporating these trending pergola styles that balance aesthetics and engineering.
One advanced mistake that even seasoned pros make involves transitions between different materials or design elements. For example, blending wood and composite decks without proper flashing or sealing creates a hidden failure point, risking rot and mold. A study from the University of Minnesota points out that improper flashing around ledger boards is a leading cause of deck failures [source: UMN Extension], emphasizing the importance of meticulous waterproofing. Remember, the devil is in the details; paying attention to subtle nuances can safeguard your investment for decades.
Thinking of optimizing your outdoor living? Ask yourself: Have you ever fallen into this trap? Let me know in the comments. Mastering these nuances ensures your deck not only looks great but endures the test of time.
Maintaining a beautiful, durable deck requires the right equipment and a proactive approach to upkeep. Over the years, I’ve refined my toolset to ensure each project is efficient and results in a long-lasting structure. One tool I swear by is a high-quality cordless impact driver, which allows me to quickly and securely fasten decking boards and railings without stripping screws or damaging materials. Its lightweight design and adjustable torque settings improve precision, especially when working on complex or large-scale projects. For cleaning and sealing, I rely on a commercial-grade pressure washer with adjustable settings to remove dirt and debris effectively, followed by a high-quality, biodegradable deck cleaner to prepare surfaces for sealing or staining.
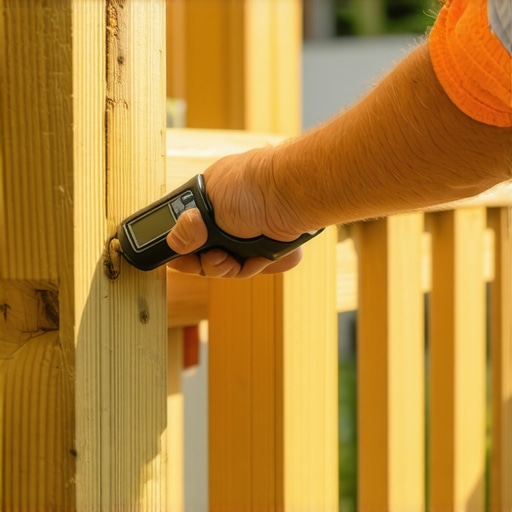
When it comes to inspecting and repairing, digital moisture meters have become indispensable. They help me identify areas where moisture infiltration could compromise the structure, especially around joints and ledger boards. This early detection enables targeted repairs, saving time and money in the long run. Additionally, I recommend investing in a quality railing template or jig, which simplifies the process of aligning balusters and ensures safety compliance when installing or modifying railing systems. This becomes especially crucial when working with intricate designs or custom configurations.
Projected Trends in Deck Maintenance Technologies
Looking ahead, I believe smart technology will play a bigger role in deck maintenance. Sensors embedded in the structure could monitor moisture levels, structural integrity, and even suggest maintenance schedules via smartphone apps. Innovations in durable, self-healing coatings will further extend the lifespan of decks, reducing the need for frequent repairs. As an example, recent developments in nanotechnology coatings have shown promise in creating surfaces that resist scratching, staining, and environmental damage—potentially revolutionizing how we care for outdoor structures.
How do I keep my deck working after initial setup?
Consistent inspection and timely maintenance are key. Regularly check for loose fasteners, peeling sealers, or signs of rot, especially after extreme weather events. Applying a penetrating sealant every few years protects the wood from moisture and UV damage; I prefer using a product like [a premium deck sealant](https://deckforgebuilders.com/maximize-outdoor-living-with-low-maintenance-composite-decking) designed for longevity and weather resistance. Also, addressing small issues promptly prevents them from escalating into major repairs. For example, if you notice a railing post wobbling, tighten or replace brackets immediately. Remember, keeping tools organized and accessible with a sturdy tool belt or storage system speeds up routine inspections, ensuring nothing gets overlooked.
Finally, I highly recommend trying out a moisture meter during your next inspection. Its quick readings can reveal hidden issues before they become visible, allowing you to act proactively. With the right tools and a regular maintenance schedule, your deck can remain safe, beautiful, and functional for decades to come.
What I Wish I Knew Before Starting My First Deck
One of the biggest lessons I learned was how overlooked moisture management is. Proper sealing around joists transformed my projects, preventing rot and warping that once seemed inevitable. That experience taught me that the smallest detail, like applying high-quality joist tape, can significantly extend the life of your deck.
Another revelation was the importance of surface preparation. Spending extra time cleaning and drying surfaces before sealing made a world of difference in adhesion and durability. Rushing through this step often leads to costly repairs down the line, so patience here pays off.
Finally, I discovered that understanding weather conditions is crucial. Applying protective materials on hot, sunny days or in mid-winter can compromise their effectiveness. Monitoring the forecast and choosing optimal days for sealing or painting ensures the best results and lasting protection.
My Toolkit for Deck Success
- Impact Driver: A reliable, lightweight impact driver speeds up fastening while reducing material damage, making deck assembly smoother.
- Digital Moisture Meter: Early detection of moisture issues around ledger boards or joists helps prevent rot and mold, saving headaches later.
- Pressure Washer with Adjustable Settings: Perfect for deep cleaning before sealing or staining, ensuring maximum adhesion.
- Quality Railing Templates: Ensures precise alignment and safety compliance when installing or modifying railings, quickly and accurately.
Your Next Step in Creating a Lasting Deck
If you’re ready to elevate your outdoor space, remember that attention to detail and proactive maintenance are your best allies. With the right approach and tools, you can build a deck that stands the test of time and becomes the centerpiece of your backyard. Don’t wait for problems to arise—start implementing these lessons today and enjoy the peace of mind that comes with durable craftsmanship.
What’s one small adjustment you’re willing to make in your next deck project? Share your thoughts below—I’d love to hear your plans for creating a long-lasting outdoor retreat.