
I remember the first time I saw a deck start to sag unexpectedly. The wood looked fine on the surface, but beneath, the joists were silently rotting away. That lightbulb moment made me realize how sneaky built-in problems can be—especially with composite decking and underlying structural issues. I’d spent years building and remodeling decks, yet I overlooked a simple trick that could save me thousands in repairs.
Why I Started Using Joist Tape and You Should Too
After all, who wants their beautiful backyard retreat to turn into a maintenance nightmare? I decided to dig deeper into maintenance techniques and stumbled upon a straightforward method that’s often overlooked: applying joist tape. It’s surprisingly effective in preventing hidden rot—something that can quietly undermine your deck’s safety and longevity.
Is Joist Tape Really Worth the Hype?
Initially, I was skeptical. I’d made the mistake of assuming that deck joists would last forever if I used good-quality wood and proper flashing. But early on, I ignored the importance of tape sealing the cuts and seams on the joists. That was my first mistake. Later, I learned through reputable sources that these unprotected corners and cuts are prime spots for water intrusion leading to rot. The good news? A simple roll of tape can add years to your deck’s life—yet many DIYers still overlook it, risking costly repairs. According to a study by the American Wood Protection Association, properly sealed joists can double their lifespan, emphasizing how crucial protective measures are. If you’re like me and want to avoid seeing your deck turn into a rot-riddled disaster, then understanding this trick is essential. Ready to see how easy it is to implement?
Prepare Your Tools and Materials
Gather high-quality, UV-resistant joist tape, a utility knife, measuring tape, and the necessary safety gear. Ensure you select a tape compatible with your deck’s climate to maximize longevity. For my project, I chose a peel-and-stick butyl-based tape, which adhered well even in humid conditions.
Inspect and Clean the Deck Frame
Before applying the tape, examine the entire joist system for signs of rot, damage, or insect infestation. Use a stiff brush and soapy water to remove dirt, debris, and mold from the joists, ensuring the tape will adhere properly. During my inspection, I found minor mold buildup, so I scrubbed the surface thoroughly, which improved the adhesion process.
Identify Critical Areas and Measure
Focus on cuts, seams, and vulnerable corners where water infiltration is most likely. Use a measuring tape to mark the length of each joist segment needing protection. I measured each cut end to cut the tape precisely, avoiding excess material that could catch water or dirt.
Applying the Tape Correctly
Peel and Stick
Start at one end of the joist, peel the backing paper, and carefully lay the tape along the entire length, pressing firmly to ensure good adhesion. Use a squeegee or credit card to smooth out air bubbles and wrinkles. During my first attempt, I pressed too quickly, resulting in air pockets, but subsequent careful application yielded a smooth, airtight seal.
Cover the Cuts and Seams
For the cuts and seams, overlay extra tape to double seal, pressing firmly to prevent water ingress. I doubled the tape at seams, which prevented water from seeping behind the joists during heavy rain.
Seal End Caps and Corners
Pay special attention to the ends and corners of each joist, as these are common leakage points. Wrap tape around the ends and ensure it fully covers all sides. I wrapped the tape thoroughly around the corners, which gave me added peace of mind in heavy downpours.
Final Inspection and Maintenance
Once applied, run your hand along the tape edges to check adhesion. Inspect periodically, especially after severe weather, and reapply if any edges lift. I revisited my deck after a storm, re-secured a couple of edges, and ensured the tape remained intact, preventing potential rot.
Additional Structural Reinforcement
Consider reinforcing vulnerable areas with additional blocking or ledger flashing, especially around post-to-beam connections. For instance, I added extra blocking beneath the ledger, which improved support and prevented water pooling. A comprehensive approach combines proper sealing with structural enhancements for optimal durability.
Applying joist tape is a straightforward yet powerful step to extend your deck’s lifespan. For more on selecting the right system for your deck, check out this guide.
While many homeowners focus on choosing the right composite decking or stylish railing, there’s often a misconception about what truly impacts durability and safety. One common myth is that all composite materials are equally maintenance-free, but in reality, subtle differences in formulations and installation techniques can make or break your deck’s lifespan. For instance, some think that surface finish alone determines resistance to scratching or fading, yet the core material’s density and resin composition play critical roles—details that most DIYers overlook until it’s too late.
How does the choice of fasteners affect long-term integrity?
Advanced enthusiasts recognize that using the wrong type of screws—such as galvanized instead of stainless steel—can lead to corrosion, which propagates rot in hidden areas. A study by the Journal of Materials in Civil Engineering notes that fastener corrosion accelerates deck failure, often unnoticed until visible damage appears. Avoid the trap of cheap hardware; invest in quality fasteners to ensure your deck stays sturdy for years. Not accounting for thermal expansion is another sneaky mistake; composite boards expand and contract with temperature, which can cause warping or buckling if gaps aren’t properly designed. Proper spacing and fastening techniques are essential—yet many miss this detail, leading to costly repairs down the line.
What design pitfalls can compromise your pergola’s stability over time?
Many think that simply building a pergola with sturdy beams guarantees long-term stability, but overlooking diagonal bracing or proper anchoring depth can result in wobbling or collapse, especially in wind-prone areas. Using engineering principles combined with material-specific insights—like considering humidity effects on wood or composites—can significantly improve structural longevity. For example, integrating cross-bracing not only stabilizes the structure but also enhances visual appeal. Dive into pergola design ideas that incorporate these advanced techniques for durability and aesthetics.
Applying these nuanced insights can elevate your deck from a basic backyard feature to a resilient outdoor oasis. Remember, thinking beyond the surface—such as understanding the chemistry of materials or the physics of structural design—can save you from frequent repairs and safety issues. Have you ever fallen into this trap? Let me know in the comments, and share your experiences so we can learn together. For more expert tips on durable, low-maintenance decking options, visit this guide.
Keeping It Working: Essential Tools and Methods
Maintaining a beautiful, durable deck or pergola isn’t just about initial construction; it’s an ongoing process that relies heavily on using the right tools and applying precise techniques. For my projects, I’ve found that investing in quality equipment and adhering to methodological best practices has significantly extended the lifespan of my outdoor spaces, saving me time and money in the long run.
Power Tools That Make a Difference
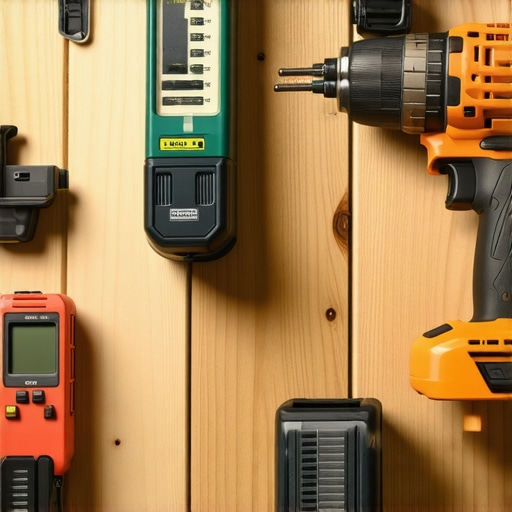
The cornerstone of effective maintenance is precision, and for that, a good oscillating multi-tool has become indispensable. I use it for detailed work like cleaning out joints, sanding edges, or removing old sealants. Its versatility allows me to perform multiple tasks with one device, which keeps my toolkit streamlined. Additionally, a cordless impact driver is crucial for tightening or replacing fasteners without striping them, especially on larger projects where hand tools become inefficient. I personally prefer models with brushless motors—like the Dewalt DCF887—due to their durability and battery efficiency.
Sealant and Cleaning Equipment
Applying sealants and protective coatings requires consistency and clean surfaces. I rely on a high-quality air compressor and a finishing nailer for re-fastening loose boards before sealing. For cleaning, a pressure washer equipped with variable nozzles helps remove dirt and mold without damaging composite surfaces. I’ve learned to avoid high-pressure settings that can cause splintering or absorption into the material. Regular cleaning with specialized composite deck cleaning solutions preserves the look and prevents buildup that could trap moisture. Trust me, using the right cleaning agents—like those adhering to ASTM standards—can make a notable difference in long-term performance.
Measuring and Inspection Tools
Accurate measurements are key for maintenance and scaling projects. A laser distance meter is a game-changer for quick, precise readings over large spans—whether checking joist spacing or evaluating the overall deck level. I prefer models with Bluetooth connectivity so I can sync measurements directly with my planning software, like SketchUp or AutoCAD, for efficient upgrades or troubleshooting. Additionally, a moisture meter helps identify hidden rot or mold in wooden components before visible damage appears. Regular inspection with these tools enables proactive maintenance—spotting issues early before they evolve into costly repairs.
The Future of Deck Maintenance Tools
As technology advances, I believe smart tools integrated with IoT could revolutionize deck upkeep. Imagine moisture sensors embedded in joists that send alerts to your smartphone when levels are abnormal, or drones performing aerial inspections in hard-to-reach areas. Adoption of such innovations will likely become standard, enabling homeowners and builders to maintain their outdoor spaces more efficiently and with greater confidence.
How do I keep my deck functioning smoothly over time?
The key lies in consistent inspections, timely repairs, and upgrading your toolkit with durable, precision equipment. For example, incorporating a high-quality laser measuring device or an advanced moisture meter into your routine allows you to catch issues early and plan for long-term solutions. These practices not only safeguard your investment but also keep your outdoor retreat looking spectacular for years to come. Take one tip—like testing your joist moisture levels regularly—and see how it transforms your maintenance routine. For more insights on protecting your deck’s longevity, explore this comprehensive guide.
Stay proactive, use the right tools, and apply precise methods—your outdoor space will thank you with years of reliable service!
What No One Tells You About Deck Durability
One of the most valuable lessons I learned was the importance of proactive maintenance over reactive fixes. I once ignored small signs of water intrusion in my deck, thinking a little mold was harmless. That oversight led to costly rotting in hidden joists, teaching me to inspect and reseal vulnerable areas regularly. This experience underscored how immediate attention to minor issues can prevent major structural failures down the line. Implementing routine inspections and sealing techniques, like joist tape, turned out to be game-changers for long-term deck health.
My Secret Weapon for Building Resilience into Your Deck
I’ve found that investing in quality hardware and thoughtful design choices makes all the difference. Using stainless steel fasteners instead of galvanized ones has significantly reduced corrosion-related issues. Additionally, incorporating diagonal bracing in pergolas and extra blocking in deck framing can dramatically improve stability. These decisions, rooted in understanding material behaviors and environmental factors, have extended my projects’ lifespan and saved me from recurring repairs. Applying such insights transforms a basic deck into a resilient outdoor retreat.
This Changed How I Approach Outdoor Design
Rather than focusing solely on aesthetics, I now prioritize how structures perform under real weather conditions. For instance, designing pergolas with a slight slope for water runoff or selecting composite boards with proper thermal expansion gaps prevents warping. Combining beauty with function creates spaces that are not just eye-catching but also enduring. This holistic approach, blending design principles with practical safeguards, ensures my outdoor environments remain inviting and safe for years to come.
Where to Go from Here
If you’re eager to elevate your outdoor spaces, start by exploring innovative design ideas and durable materials. Check out these design inspirations to spark your creativity. Remember, the foundation of a long-lasting deck or pergola lies in smart choices and consistent maintenance. Embrace continuous learning and refine your technique—your outdoor sanctuary will thank you for it. For tailored advice and expert insights, visit this resource to start transforming your outdoor spaces today.
Your Turn to Elevate Outdoor Living
Building and maintaining a durable deck or pergola isn’t just about following steps; it’s about understanding the nuances that ensure long-term success. What’s the one area in your outdoor space you’d like to improve? Share your experiences below, and let’s grow together in creating beautiful, resilient environments!