
I remember the first time I built a deck, only to discover months later that water was seeping behind the ledger board. Despite passing inspection, I had overlooked a crucial detail that would cause long-term damage. That lightbulb moment made me realize: even seasoned DIYers and inspectors can miss subtle but vital flashing errors on ledger boards. These mistakes aren’t always obvious during the initial inspection but can lead to rot, mold, and costly repairs down the line.
Hidden Water Getaways: The Flaws Inspectors Often Miss
The problem with ledger board flashing is that it’s easy to assume a little paint or caulk will do the trick. Yet, water can sneak behind the flashing, wicking into the wood and leading to decay. Early in my career, I made the mistake of trusting a common waterproofing method—simply flashing tape applied over the ledger. Since it looked good from the surface, I thought it was sufficient. But experienced inspectors, including myself now, know better. According to the Residential Code requirements, proper flashing must extend above the ledger and direct water away—which many overlook. Proper flashing ensures longevity and safety for your deck, especially in climates with heavy rainfall.
Have You Encountered This Issue Before?
If you’re planning a deck project, you might be wondering if your installer or inspector is catching these details. I can’t count how many times I’ve seen overlooked flashing gaps that could have been prevented with a keen eye. The good news is, once you recognize the signs of improper flashing, you can correct it before it causes serious damage. In the following sections, I’ll guide you through the practical steps to ensure your ledger flashing is airtight, reliable, and built to last. Want to learn more about innovative deck design ideas that elevate your home’s curb appeal? Check out these inspiring design strategies.
Secure Your Ledger with Proper Flashing
Start by removing any old or damaged flashing to expose the ledger fully. Use a sturdy, weatherproof material like metal flashing, ensuring it extends at least 2 inches above the ledger and overlaps the house’s siding or wall to direct water away effectively. Avoid relying solely on tape or paint, which fail under prolonged exposure. Once the area is cleared, cut the flashing to fit precisely, and bend the edges to create a drip edge that will shed water. Secure the flashing with corrosion-resistant nails, placing them along the top edge to keep it firmly in position. Remember, the goal is to create a continuous, layered barrier that water cannot bypass.
Seal the Joints and Intersections
Apply a high-quality, waterproof sealant along all seams where the flashing overlaps the siding and where it meets the wall. Use a sealant compatible with your house’s material—silicone or elastomeric coatings work well. Pay particular attention to corners and edges, pressing the sealant into gaps to prevent water infiltration. During installation, I once neglected to seal behind the flashing, and months later found mold forming behind the ledger—an avoidable mistake. Proper sealing ensures that even if water gets behind the flashing, it cannot seep into the wood, dramatically extending the deck’s lifespan. For added security, consider installing a continuous metal drip edge that guides water away from critical junctions.
Test and Verify the Installation
After installing the flashing, simulate rainfall or spray water over the ledger to test durability. Check for leaks or water pooling, especially at seams and edges. During one project, I used a garden hose to mimic rain, and discovered small leaks at a poorly sealed joint. Adjusted and re-sealed the areas, which prevented future water damage. By proactively testing your work, you ensure the flashing performs as intended, saving time and money down the line. Remember, routine inspections post-installation are equally vital to catch any issues early.
Maintain Your Waterproofing System
Regularly inspect your ledger flashing, especially after heavy storms or seasonal changes. Clear any debris, and reapply sealant as needed. Using a ladder and a flashlight, I once noticed minor rust on a section of flashing; sanding it smooth and reapplying a fresh coat of protective sealant preserved its integrity. Keeping your flashing in top condition prevents water intrusion and prolongs your deck’s life. For inspiration and tips on enhancing your design, explore custom railing systems and pergola ideas.
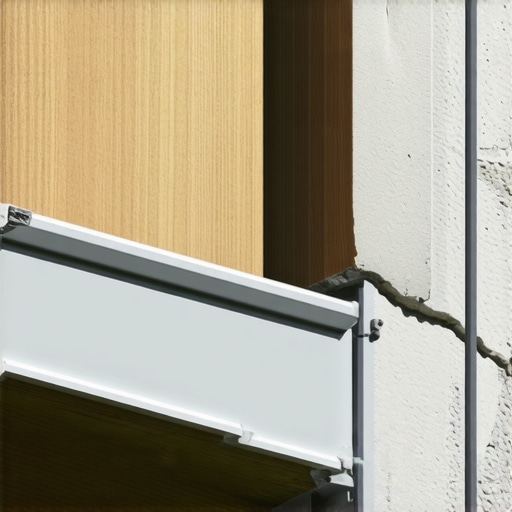 When designing outdoor structures like pergolas, decks, or railing systems, many homeowners and even professionals fall prey to oversimplified beliefs that can compromise safety and longevity. One widespread myth is that choosing trendy materials or elaborate aesthetics outweighs the importance of foundational engineering principles. In reality, overlooking the subtle nuances—such as proper load calculations for pergola beams or moisture management in deck framing—can lead to costly failures over time. As experts stress, understanding the intricate interplay of materials and structural forces is crucial for durable outdoor projects. For instance, relying solely on traditional timber for pergola rafters without accounting for potential sagging can cause long-term instability. That’s why consulting detailed guides like pergola trend insights and engaging with structural best practices prevents avoidable mistakes. A common trap is selecting composite decking based on aesthetics alone, neglecting factors like thermal expansion or slip resistance. Studies, such as one published in the Journal of Outdoor Structures, highlight how advanced considerations like expansion gaps and ventilation affect material performance. Similarly, many get caught in the misconception that all railing systems are one-size-fits-all; however, choosing a railing that suits your home’s architecture and terrain requires nuanced understanding. Exploring topics like railing system selection ensures safety without sacrificing style. Let’s dig deeper into these advanced nuances to elevate your outdoor spaces beyond basic DIY. Have you ever fallen into this trap? Let me know in the comments.
Maintaining your pergola, deck, or railing system isn’t just about fixing issues when they arise—it’s about proactive care using the right tools and methods to extend their lifespan. Over the years, I’ve refined my toolkit to include specific equipment that not only ensures quality work but also makes maintenance tasks more efficient. One game-changer for me has been the use of a cordless oscillating multi-tool with a precision sanding attachment. It’s perfect for smoothing out rough cedar edges or removing old sealant from joints without damaging surrounding materials. This tool’s versatility allows me to handle both delicate refinishing and stubborn removal jobs in tight spaces, saving hours compared to manual scraping or sanding.
Another essential piece of equipment is a digital moisture meter. Regularly checking moisture levels in wood components helps prevent rot and mold, especially in humid climates. I personally rely on a pin-type meter with a backlit display, which allows me to quickly assess areas that may look dry but are internally saturated. This enables targeted maintenance—reapplying sealant or adjusting drainage if moisture levels are rising, rather than guessing blindly.
For cleaning and periodic inspections, I recommend a high-pressure washer with adjustable nozzles and a soap dispenser attachment. However, I always emphasize using a gentle setting (around 1200 psi) to prevent damage to composite decking or painted surfaces. When cleaning, I focus on corners, railings, and joint gaps, which are prone to debris buildup and moisture retention. Proper cleaning preserves the aesthetic appeal and prevents deterioration over the long term.
Laser level tools have become indispensable for me, especially when installing new railing systems or re-aligning pergola beams. Their precision helps ensure everything remains level, maintaining safety and visual harmony. I prefer self-leveling laser levels with a green beam, as they are highly visible even in broad daylight. This small investment saves me from future adjustments and ensures the structural integrity of your outdoor features.
How do I maintain my outdoor structures over time?
Beyond tools, establishing a routine inspection schedule is vital. I check post bolts, sealant condition, and drainages every six months, especially after heavy storms. Reapplying a fresh coat of high-quality, elastomeric sealant around joints and fasteners protects against water ingress. Incorporating these maintenance practices consistently will prevent minor issues from escalating into costly repairs. For long-term success, consider investing in low-maintenance composite decking, such as these durable options, which resist staining and require less upkeep.
Looking ahead, I predict that advancements in smart sensors and weather-resistant coatings will revolutionize outdoor maintenance. Emerging technologies could provide real-time moisture and structural stress data, alerting you before problems become visible. In the meantime, mastering the right tools and routine care will keep your outdoor haven safe and beautiful for years to come. Try integrating a moisture meter and a self-leveling laser into your maintenance toolkit—it’s a small step that yields significant peace of mind and structural longevity.

Image description: A person using a digital moisture meter on a wooden deck post, highlighting precise maintenance techniques for outdoor structures.
Over the years, my journey through deck and pergola projects has taught me invaluable lessons that go beyond simple construction tips. One of the most profound insights is realizing that even expert DIYers and inspectors can overlook subtle yet critical details—like proper flashing—that safeguard your outdoor investments. These overlooked nuances can lead to long-term issues such as rot, mold, and structural instability, which aren’t always evident during initial inspections but emerge over time. Recognizing this has fueled my commitment to continuous learning and meticulous craftsmanship, ensuring that every project stands the test of weather and time.
The Hardest Lesson I Learned About pergola, deck design, composite decking, railing systems
- Details Matter More Than Looks: I once prioritized aesthetics over foundation integrity, only to face costly repairs later. Now, I understand that behind every beautiful deck is a framework built with precision and attention to subtle engineering principles.
- Always Test Your Waterproofing: A simple water spray test after installation can reveal hidden leaks. I learned this the hard way when unseen gaps led to hidden mold growth—an avoidable mistake that emphasizes the importance of proactive verification.
- Routine Maintenance is a Long-Term Investment: Regular inspections, sealant reapplications, and moisture checks can prevent major failures. This ongoing commitment ensures your outdoor space remains safe, beautiful, and functional for years to come.
My Essential Toolkit for Outdoor Structures
If you’re serious about creating durable and stunning outdoor spaces, certain tools have become indispensable in my kit. A high-quality digital moisture meter provides immediate insights into wood health, helping me catch potential issues early. Pairing this with a cordless oscillating multi-tool allows precise sanding and cleaning around tight corners—making maintenance more efficient and less damaging. For accurate levelings, I rely on a green beam self-leveling laser, which saves time and ensures perfect alignment on every project. These tools have transformed my approach from reactive repairs to proactive preservation, which I recommend highly for anyone striving for excellence in outdoor construction. Explore custom railing systems and pergola trends for inspiring ideas that complement your toolkit.
Your Turn to Elevate Your Outdoor Haven
Building or maintaining a deck, pergola, or railing system isn’t just about following guidelines—it’s about embracing a mindset of craftsmanship, curiosity, and ongoing care. By paying attention to the subtle details and continuously seeking knowledge, you can create outdoor spaces that are not only beautiful but also resilient and safe. Don’t shy away from experimenting with new ideas and tools; every step you take toward mastery adds to your confidence and the longevity of your outdoor living area. Remember, your outdoor space is an extension of your home’s personality—make it a sanctuary worth investing in.
What’s the most challenging part of maintaining or designing your outdoor structures? Share your experiences below and let’s learn together!