
I remember the first time I tried to cut a composite deck board for a railing post, only to be greeted by splintered, jagged edges that looked like they had been chewed by a beast. It was a frustrating moment—wasted material, time lost, and a sense that I was doing something wrong. That lightbulb moment hit me hard: there had to be a better way. And after a bit of trial and error, I discovered a simple trick that transformed my DIY projects.
In this post, we’re going to explore the painter’s tape hack—a surprisingly effective method to cut composite decking without the dreaded splinters. This technique is not just a quick fix; it’s a game-changer that can save you money, time, and headaches. If you’ve ever faced uneven edges or struggled to get a clean cut on composite material, stick around. You’re about to learn how to make your cuts look professional every time.
Why Flawless Cuts Make All the Difference in Deck Projects
A deck is more than just a flat surface—it’s your outdoor sanctuary, a space for gatherings, and a reflection of your home’s style. But those finishing touches, like railing caps and custom trims, rely heavily on precise cuts. Poor cuts not only look unprofessional but can also compromise the structural integrity of your build.
Composite decking is popular for its durability and low maintenance, but it’s notorious for being tricky to cut cleanly. Standard saw blades often leave splinters and rough edges, which can be dangerous and aesthetically displeasing. The right cut, however, enhances safety, prolongs the lifespan of your project, and boosts curb appeal. A neatly cut board fits better, reduces gaps, and creates a sleek, polished look.
Have you ever completed a deck project only to be disappointed with jagged edges that required extra sanding or filling? That experience is incredibly common, and I’ve been there too. But there’s good news: with just a bit of painter’s tape, you can significantly improve your cut quality.
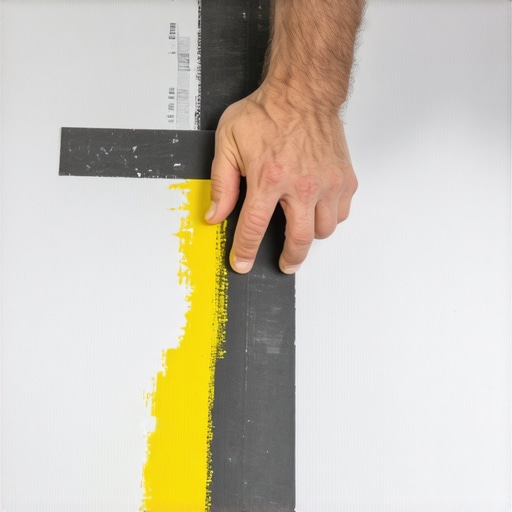
The concept is simple—apply painter’s tape along the cut line before slicing through the composite board. This acts as a barrier, preventing the blade from tearing the material and reducing splinters. It’s a technique supported by many seasoned builders, and research even suggests that tape can improve cutting precision by acting as a scoring guide (source: [Deck Builder Resources](https://deckforgebuilders.com/composite-decking-secrets-longevity-tips-for-a-lasting-deck)).
Before you dismiss this method as trivial, consider how many times a small detail like this can elevate your project from amateurish to professional-grade. Plus, it’s a low-cost, easy step that anyone can incorporate into their toolkit.
Ready to see how this hack works and learn the exact steps? If you’ve faced the frustration of splintered composite cuts, keep reading. The next section will walk you through the materials, preparation, and execution of this simple but powerful technique.
Prepare Your Materials for a Cleaner Cut
Start by gathering your composite decking, a sharp circular saw with a fine blade, painter’s tape, measuring tape, square, and pencil. Before cutting, clean the board’s surface to prevent debris interference and minimize splinters. Apply painter’s tape along the line where you’ll cut—stretch it smoothly and press firmly to avoid bubbles. Use a measuring tape and square to mark your cut line precisely, then reinforce the markings with extra tape to prevent shifting.
Guide the Saw for an Accurate, Smooth Cut
Place the composite board on a stable sawhorse or work table, ensuring it’s supported evenly. Align the saw blade with your marked line, making sure the blade depth matches the thickness of the deck board. Before cutting, double-check the alignment. As you begin to cut, follow the tape line carefully, maintaining steady, even pressure. Keep the saw straight and avoid twisting or forcing it through the material. Cutting with the tape acts as a scoring guide, preventing the blade from tearing the composite and reducing splintering.
Finish and Inspect for Quality
Once cut, remove the painter’s tape gently to reveal a clean edge. inspect the cut for splinters or rough areas. If slight splinters remain, lightly sand them with fine-grit sandpaper. Practice is key: I once made a series of cuts for my pergola posts, and the first few were rough—after applying this method consistently, my cuts became remarkably cleaner, saving me time on finishing work. For larger projects, consider using a miter saw equipped with a fine-tooth blade, following the same tape principle for best results.
Optimize Safety and Precision
Always wear safety goggles and a dust mask when cutting composite materials. Secure the board firmly to prevent slipping, which can lead to uneven cuts or accidents. For long or repeated cuts, extend your guide with a straightedge or rip fence to ensure continuous straight lines. If you’re incorporating these cuts into a larger design, like a railing system, precision becomes even more critical to maintain aesthetic consistency and safety standards. Want to explore more about deck design trends? Visit Pergola Trends.
 When it comes to designing outdoor spaces, many enthusiasts and even seasoned DIYers often fall into nuanced traps that compromise both aesthetics and longevity. One widespread misconception is the overreliance on traditional materials like pressure-treated lumber, which, despite its popularity, can be misleading for modern projects. *Many assume that pressure-treated wood is the only durable choice*, but with advancements in composite materials, options like composite decking now offer superior longevity and low maintenance. Relying solely on old standards can lead to unnecessary future repairs and increased costs.
A common mistake is neglecting proper drainage and ventilation in pergola and deck designs. For instance, overlooking hidden drainage solutions can result in trapped moisture, leading to rot and structural failure over time. Incorporating strategic drainage pathways isn’t just an advanced tip—it’s vital for ensuring your outdoor setup endures years of weather exposure.
In railing systems, many build projects with safety as an afterthought, focusing on aesthetics rather than code compliance. This often results in railings that are visually appealing but fall short of safety standards, especially regarding height and baluster spacing. *Remember, safety should never be compromised for style.* For comprehensive guidance, consider reviewing slope and railing essentials to ensure your design passes inspection and protects loved ones.
Let’s address advanced nuances—why do most fail to account for seasonal expansion and contraction in deck materials? Thermal dynamics can cause fasteners and joints to loosen over time, creating instability that’s tough to notice initially. An expert move is to use specialized expansion fasteners that accommodate material shifts. Ignoring these factors is a common trap that leads to costly repairs and safety issues.
Furthermore, many overlook the importance of aesthetic and functional integration of pergola and deck designs. A well-thought-out visual flow—like matching wood tones or complementary pergola styles—enriches the overall look but requires careful planning. Visiting latest pergola design trends can inspire you to avoid disjointed or mismatched outdoor spaces.
Finally, beware of the myth that installing a railing or pergola is a one-and-done job. Proper maintenance, such as sealing or cleaning, is often neglected, leading to premature degradation. Regular upkeep, especially of composite materials, significantly extends your project’s lifespan.
Have you ever fallen into this trap? Let me know in the comments. Remember, understanding these nuanced pitfalls elevates your outdoor design from basic to expert level, ensuring both beauty and durability for years to come.Maintaining your outdoor structures like decks and pergolas requires more than just periodic cleaning; it involves using the right tools and establishing reliable routines to ensure long-term durability. One of my go-to tools for keeping everything in top shape is a high-quality cordless impact driver, like the Milwaukee M18 Fuel, which provides the power and control needed for fastening or removing hardware with precision, especially when dealing with composite railing systems that demand secure, corrosion-resistant fasteners. Additionally, a digital moisture meter, such as the Tramex Moisture Meters, is invaluable for monitoring potential rot in timber components, ensuring that you catch issues early before they escalate into costly repairs. When it comes to routine cleaning, I personally recommend a soft-bristled brush and a gentle cleaner formulated specifically for composite decking, like those from Star Brite, to avoid damaging the surface. These tools help maintain the aesthetic appeal and structural integrity over the years, especially in regions exposed to harsh weather conditions. Looking ahead, I believe the trend will shift toward more automation in maintenance—think robotic cleaners integrated with smart home systems—making ongoing care even more effortless. But for now, establishing a solid maintenance routine with reliable tools is the best way to extend the life of your outdoor investments.
How do I maintain my pergola and deck systems over time?
Start by inspecting fasteners and joints annually, tightening or replacing any that show signs of corrosion or wear. Use a torque wrench on metal connections to ensure consistent fastening torque, which prevents loosening from expansion and contraction. Regularly clean surfaces with appropriate cleaners to prevent mold and mildew buildup, and apply protective sealants or paint where necessary—especially after cleaning—to preserve wood and composite finishes. Consider adding joist tape or sealing brackets to prevent moisture ingress, as detailed in this guide on joist tape installation. These measures, combined with consistent monitoring, create a dependable maintenance routine that keeps your outdoor structures functioning beautifully for years. To get started, try upgrading your fastener tools or scheduling an annual inspection—simple steps that make a significant difference in your project’s longevity. For more expert advice on protecting your deck from weather-related damage, visit our contact page.Achieving **professional-quality cuts** in your deck and pergola projects is both an art and a science, often revealing the difference between a backyard that’s merely assembled and one that’s truly inspiring. My greatest lessons came from countless mistakes—like misaligned cuts and splintered edges—that taught me to pay attention to the tiniest details, because in outdoor construction, those details define durability and beauty. Incorporating simple tricks such as painter’s tape not only improved my craftsmanship but also instilled confidence to tackle more complex projects, knowing that small, intentional steps make a significant impact. Every successful cut, joint, and finish adds to a cohesive aesthetic that elevates your entire outdoor space, transforming it into something you and your family will cherish for years.