
There was this one morning, balled up in my backyard, staring at a stubborn boulder that didn’t quite fit into my well-planned deck design. I’d spent hours trying to trace curves with my usual tools, only to end up with jagged edges and misaligned boards. It was frustrating—and honestly, a wake-up call. I realized that traditional methods just don’t cut it when Mother Nature throws a curveball like a giant rock in your outdoor space.
Why Scribing Decking Around Boulders Still Trips Up Hobbyists and Pros Alike
Dealing with natural irregularities, especially around boulders or other uneven landscaping features, can feel like trying to solve a puzzle with missing pieces. I bet you’ve faced this, too. You want a seamless look that makes your backyard appear thoughtfully crafted, not slapdash. But the challenge lies in accurately transferring those unpredictable shapes onto your decking material, which can be time-consuming and often leads to gaps or uneven cuts.
That’s where the Pencil Compass Hack comes into its own. It’s a simple, yet game-changing technique I stumbled upon during my early decking days, after repeatedly wasting material and time trying to eyeball curves or freehand the cut. Once I adopted this approach, my accuracy skyrocketed, and I could incorporate natural elements like boulders with ease and precision.
Here’s the thing—this hack is not just about saving time. It’s about elevating your craftsmanship and confidence. Imagine being able to make perfect, custom-fit boards around your backyard’s quirkiest feature, creating a cohesive and professional-looking space. Plus, if you ever doubted the importance of proper scribing, studies show that well-fitted decking can extend the lifespan of your materials and reduce future maintenance costs (source).
Ready to turn those jagged cuts into seamless curves?
If you’ve ever made that mistake of trying to eyeball the shape or use overly complicated templates that never quite fit, then you’re in for a treat. This hack will be your new best friend. But first, let’s confront the common skepticism that might be holding you back—
Is the Pencil Compass Hack really worth the hype?
Start with a Clear Marking Method
Taking my own experience, I remember the time I tackled a curved section around a large boulder. I grabbed a long piece of scrap plywood and a pencil, then placed the plywood against the boulder, marking its outermost edge. This became my template. The key is to create a reference line that mimics the natural contour, laying the groundwork for precise cuts.
Use a Compass or a Flexible Tracing Tool
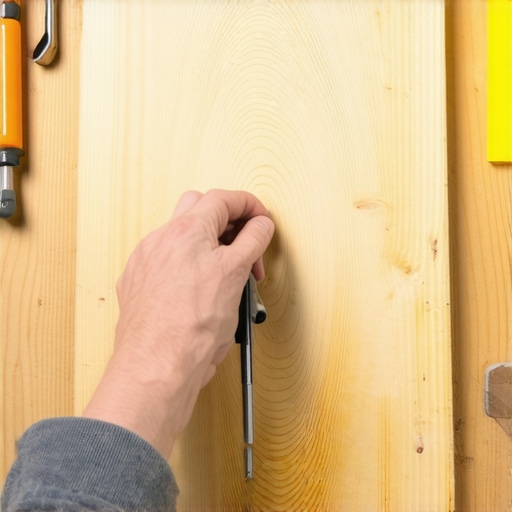
Next, I attached a pencil to a flexible arm or a homemade compass—imagine it as a makeshift tail that follows the curve. Holding the pivot point steady at a chosen center, I traced the outline of the boulder’s edge by moving the pencil along the arc, ensuring the line conforms perfectly. This step transformed an estimation into an exact template you can transfer.
Adjust for Variations and Test Fit
Initially, I cut slightly outside the traced line and tested the fit. Remember, it’s easier to trim a bit more than to fix a too-small cut. Once satisfied, I transferred the pattern onto the decking board, ready for final cutting. For complex irregularities, repeat the tracing process with a thicker cardboard or multiple layers for accuracy.
Cutting with Precision
Secure your decking board firmly on a stable surface, using clamps if necessary. Follow your traced line with a fine-tooth saw, maintaining steady, controlled motions. In my early attempts, rushing led to jagged edges—so slow and deliberate is the way. After the cut, test fit again, making minor adjustments if needed. This iterative approach saved me time and material, preventing costly mistakes.
Refine the Shape and Seal the Edges
Use a sanding block or detail sander to smooth out the cut edge, especially around curves. This step enhances sealing and prevents splinters, which is crucial when interfacing with natural elements. Before installation, treat cut ends with a protective sealant like copper naphthenate, ensuring longevity against moisture and decay.
Applying this method, I was able to incorporate the boulder seamlessly into my deck, creating a natural flow that looked intentional, not haphazard. It might seem intricate at first, but with practice, this process becomes second nature. For more insights on creating harmonious outdoor spaces, check out design ideas that elevate your home’s curb appeal.
Many homeowners and even some professionals tend to oversimplify the complexities involved in designing a durable, safe, and aesthetically pleasing deck. A prevalent misconception is that choosing popular materials or following generic plans guarantees success. However, the real expertise lies in understanding the subtleties, such as the limitations of certain railing systems or the intricacies of composite decking application. For example, many assume that all railings are created equal, but not all railing systems provide the same safety or style. Overlooking this can lead to safety hazards or compromised aesthetics, especially in high-traffic areas or landscapes with unique features.
Why do most people get railing system choices wrong, and what is the impact?
One common mistake is selecting a railing solely based on appearance without considering environmental factors or load capacities. For instance, glass railings offer sleek visibility but require rigorous framing and sealing to prevent fogging or corrosion—issues that often go unnoticed during installation. This oversight can result in costly repairs or replacements down the line. According to industry expert Mike Holmes, many failures attributed to railing systems stem from ignoring the detailed specifications and environmental compatibility, which emphasizes the importance of informed choices rather than trendy ones.
Similarly, when it comes to deck design, the myth that bigger is always better can backfire. Overly expansive layouts without proper support and zoning considerations risk structure instability. Plus, many underestimate the importance of correct spacing and substructure planning, especially when integrating larger features like pergolas or heavy furniture. An advanced aspect often overlooked is the thermal expansion of composite decking. Unlike wood, composites respond differently to temperature fluctuations, which can cause warping or buckling if not installed with proper spacing and fastening techniques. As highlighted in this comprehensive guide on composite deck longevity, understanding these nuances helps prevent preventable damage, ensuring longevity and performance.
Perking up your outdoor space without costly mistakes
Integrating a pergola can elevate your backyard’s appeal, but many neglect to consider the latest trends versus timeless design. For example, installing pergolas with movable louvers offers versatile shading and style but demands precise structural calculations and weather-resistant materials. Subpar installations can lead to sagging or failure under heavy snow or wind loads. A subtle yet crucial nuance is ensuring proper drainage and framing support for pergola posts, often overlooked in DIY projects. Incorporating these considerations enhances durability and safety, aligning with current designs from modern pergola trends.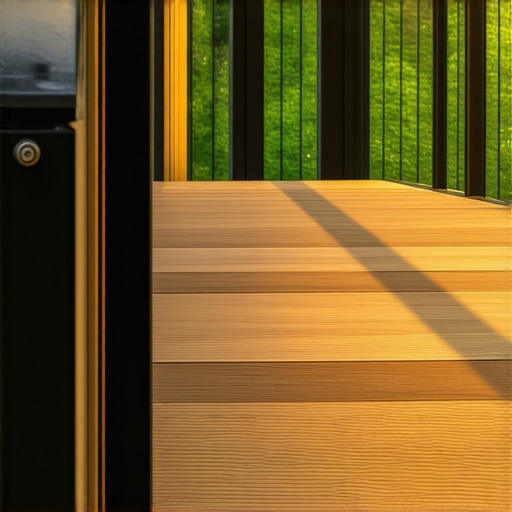
When selecting materials, homeowners are often swayed by aesthetics over performance. For instance, choosing a dark-colored composite decking near a pool can lead to quicker fading and surface warping due to heat absorption. Knowing the specific properties of decking materials—like UV stability and thermal expansion—is vital for long-term satisfaction. A recent study from the American Society of Landscape Architects emphasizes that understanding environmental impacts is key to outdoor space resilience.
Finally, don’t fall into the trap of ignoring the finer details during installation, such as proper fastener placement and spacing, which can make or break your project’s success. For example, improper spacing of balusters not only violates safety codes but also diminishes visual appeal. Learning these best practices can save you headaches and costs later. Need help navigating these nuances? Reach out for expert guidance or explore more at creative deck ideas. Have you ever fallen into this trap? Let me know in the comments.
Investing in Quality Tools for Longevity
Maintaining a beautiful and durable deck, railing, or pergola requires the right equipment. My go-to tool for ensuring precise cuts and consistent results is the DeWalt DCS356N Oscillating Tool. Its versatility allows me to clean, sand, and make detail cuts without switching tools, saving time and reducing errors. For more detailed work around intricate curves, I rely on a Festool Carvex Jigsaw. Its brushless motor and variable speed control help me tackle delicate tasks, like trimming composite decking edges, with finesse.
Additionally, a Bosch GLL 3-80 Laser Level is indispensable for ensuring perfectly level and aligned installations, whether for deck framing or pergola posts. It offers automatic self-leveling, which keeps your measurements accurate even on uneven terrain—crucial for long-term integrity.
Maintaining Your System Over Time
To keep your railing and decking systems functioning well, regular inspections are essential. I recommend annually checking for loose fasteners and rusted components. Using a impact driver like the Makita XDT131 speeds up tightening or replacing hardware. For preventing corrosion, I use a protective spray like CRC Marine Cleaner & Corrosion Inhibitor on metal fasteners and brackets, especially in humid climates.
Don’t forget to keep your tools sharp and clean; dull blades or dirty equipment can lead to sloppy cuts or damage to your materials. Upgrading or replacing worn-out tools ensures your projects stay precise and safe for years. For detailed guidance, see how proper grounding tools can eliminate static shocks during composite deck work.
How do I maintain my railing systems over time?
Consistent maintenance is the key. Regularly inspect for loose balusters or wobbly posts, especially after severe weather. Apply protective sealants to wooden components—such as copper naphthenate—to prevent moisture infiltration and rot. For metal railings, check for rust and repaint or use rust inhibitors as needed. Additionally, ensure fasteners are tight and replace corroded hardware promptly to prevent safety hazards and preserve aesthetics.
Looking ahead, innovations like smart sensors embedded into railings or integrated lighting controlled via apps are shaping the future of outdoor systems. Keeping your equipment updated and your skills sharp will prepare you for these advancements. Want expert advice on choosing the best tools for your specific project? Reach out to my team for personalized recommendations and support.
Try integrating a laser level into your next project to achieve flawless alignment or use a vibration-reducing impact driver to prevent material splitting during fastening. These small upgrades in your toolkit can make a significant difference in the quality and longevity of your outdoor spaces.
Three Lessons That Changed My Approach to Deck and Pergola Design
Firstly, staying adaptable is key—no two natural features are the same, and rigid templates often lead to waste or poor fit. Embracing flexibility, especially when scribing around elements like boulders or tree roots, has saved me countless hours and materials.
Secondly, investing in quality tools profoundly impacts the final outcome. A precise saw or laser level not only improves accuracy but also boosts confidence, making intricate curves and alignments achievable with less stress.
Lastly, understanding environmental nuances—like thermal expansion in composite decking—prevents future headaches. Recognizing these subtleties early on turns a good project into a lasting one, as each detail compounds into durability and aesthetics.
My Favorite Resources That Elevate My Work
For selecting the perfect railing system, this guide offers practical insights and helps prevent costly mistakes by matching products to your specific needs.
The latest design ideas inspire fresh ways to combine style and function, transforming simple outdoor spaces into personal retreats.
For tool selection, I trust industry-leading reviews and my own experience, which guides me in choosing equipment that makes a real difference in quality and efficiency.
Finally, continuous learning is vital—webinars, forums, and tutorials from seasoned professionals keep me updated on best practices and emerging trends, ensuring that each project benefits from the latest innovations.
Forge Your Path: Turns, Triumphs, and Transformation
Your outdoor space is an open canvas, ripe for craftsmanship that combines durability with beauty. Embrace the lessons learned, equip yourself with trusted tools, and draw inspiration from curated sources to craft a deck or pergola that truly elevates your home and lifestyle. With patience and passion, you can turn challenges into works of art that stand the test of time.
What’s the next detail you’re excited to perfect in your outdoor project? Share your thoughts or struggles below—I’m here to help you succeed!