
Have you ever stepped onto your deck, only to notice the unsightly exposed edges of composite boards glaring back at you? I remember the first time I built my outdoor space thinking I had everything perfect, only to realize the raw, jagged ends of my decking boards stared right back at me. It was a bit of a lightbulb moment—these exposed ends not only mar the aesthetic but can also invite moisture damage over time, leading to costly repairs.
The Secret to a Seamless Finish: The Picture-Frame Trick
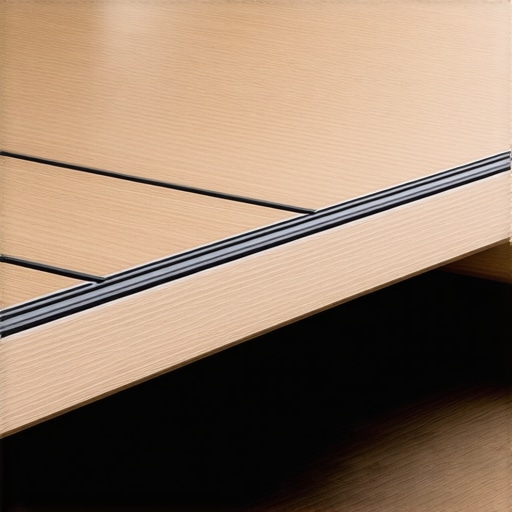
Ever since I discovered the Picture-Frame Trick, my approach to decking has completely transformed. This simple, effective technique involves framing the perimeter of your deck with a skillful use of the same material, effectively hiding those ugly board ends and giving your project a polished, professional look. Not only does this method elevate the visual appeal, but it also adds a layer of protection, extending the lifespan of your boards. Today, I want to guide you through this technique, sharing insights from my own experience and what I’ve learned from industry experts.
Is this method really worth the effort?
When I first considered tackling this project, skepticism crept in—was it just an aesthetic fix, or would it genuinely stand the test of time? To be honest, my early attempts were riddled with mistakes, like misaligned framing and poor cuts, which made the finish look uneven. But over time, I learned how critical precision is and how it can dramatically improve results. According to experts in deck construction, properly executed, the Picture-Frame Trick not only conceals imperfections but also enhances structural integrity—something I’ve come to appreciate through my own work.
If you’re tired of unsightly board ends and are looking for a solution that combines beauty with durability, you’re in the right place. Let’s dive into the details of how to master this technique, ensuring your outdoor space looks as stunning as you envisioned.
Prepare Your Materials and Workspace
Before diving into the framing process, gather quality decking boards, a saw, a drill, and appropriate fasteners. Clear your workspace and measure carefully to cut boards to the precise lengths needed. I remember once rushing through this step without double-checking my measurements, which resulted in uneven edges—taking the time to measure twice saved me hours of sanding later.
Frame the Perimeter with Precision
Start by installing the border boards around your deck’s perimeter. Use a level and spacers to ensure straight, even lines. Secure each board with corrosion-resistant screws, pre-drilling to prevent splitting. When I first did this, aligning the border took patience, but the clean edges made the overall look much more professional. Pay close attention to corners, and consider miter cuts for seamless joints.
Hide the Raw Ends with Inner Framing
Inside the perimeter frame, install a secondary frame using the same material, set slightly inward. This internal frame acts as a backing for your deck boards, concealing their cut ends. Use spacers to ensure uniform gaps—this not only improves appearance but also allows for thermal expansion. During my project, I realized that inconsistent gaps led to a cluttered look, so I adopted a spacer jig to maintain consistency.
Cutting and Fitting the Inner Frame
Measure each section precisely, accounting for the overall deck size. Cut the boards with a miter saw for tight joints at corners. When fitting, dry-assemble first to check alignments, then secure with screws. This step was tricky when I did it on a windy day; securing the inner frame temporarily with clamps helped maintain stability. Following this approach ensures the framing and board ends remain hidden beneath the surface.
Install Decking Boards with Confidence
Lay your decking boards perpendicularly over the inner frame, leaving proper gaps for drainage. Use hidden fasteners or face screws, depending on your aesthetic preference. I prefer hidden fasteners for a clean look, but they require precise pre-drilling. During my last installation, I used a spacer tool to keep uniform gaps, resulting in a sleek surface with no visible screws or gaps.
Finishing Touches
Sand any rough edges and apply a protective sealant suitable for composite or wood, enhancing durability. Double-check alignment and make adjustments if necessary. Remember, meticulous finishing transforms a good deck into an excellent one, and taking your time to trim and seal makes all the difference in longevity and appearance. For more in-depth tips on composite decking longevity, visit this guide.
When it comes to outdoor structures like pergolas and railing systems, many homeowners and even seasoned DIYers fall prey to oversimplified assumptions that can lead to costly mistakes. Let’s dig deeper into some nuances that are often overlooked and debunk a few prevalent myths, so your project stands the test of time and truly enhances your outdoor space.
Are Pergolas Always Better When Bigger and More Elaborate?
Contrary to popular belief, bigger or more ornate pergolas aren’t necessarily better. Oversized structures can add unnecessary weight that might strain your foundation, especially if not properly engineered. Moreover, complex designs often require more maintenance, increasing long-term costs. A lean, well-supported pergola with a clear purpose — like providing shade during the hottest months — often offers better functionality and easier maintenance. Experts in outdoor living emphasize that simplicity paired with quality materials—such as those discussed in this guide—can result in more durable and visually appealing results.
The Hidden Trap of Railing Systems
Many believe that choosing the highest-rated railing system guarantees safety. However, overlooking the importance of correct installation, especially in relation to local codes, can compromise safety. For instance, some overlook the necessity of proper anchoring or the appropriate height standards. This oversight often leads to loose or unstable railings, which could be hazardous. Always verify that your system meets local building codes and consult professional guidance—something I recommend exploring in this comprehensive article. Proper installation ensures safety and aesthetic harmony.
Maintaining your outdoor structures like pergolas, railings, and composite decks requires more than just occasional cleaning; it demands the right tools, a strategic approach, and awareness of evolving trends. One essential tool I rely on is a high-quality cordless impact driver. Its versatility allows me to tighten and loosen fasteners efficiently, especially in tight corners or when working with weather-resistant hardware. I prefer models with brushless motors, such as the Milwaukee M18 Fuel impact driver, because they offer increased durability and longer run times—crucial for extensive maintenance projects.
Another must-have is a digital moisture meter. Over time, moisture intrusion can lead to rot and structural compromise, particularly in wood components. With a reliable moisture meter, I can identify hidden areas of excess dampness beneath paint, sealants, or within framing that might not be visible to the naked eye. This proactive testing helps me address issues before they escalate, ensuring longevity and safety of the structure.
For cleaning composite decks, I swear by a combination of a deck-specific pressure washer and a gentle scrubbing brush. I opt for a pressure setting around 500-600 PSI, avoiding damage to the composite surface, and attach a fan tip to evenly distribute water. Using a biodegradable, composite-friendly cleaner ensures that I remove stubborn stains such as mildew or moss without harming the material. Regular application of a penetrating sealant, like the products recommended in this guide, helps maintain the deck’s appearance and resists weathering.
On the software side, I rely heavily on project management tools like Trello or Asana. Tracking maintenance schedules—annual inspections, fastener checks, and sealing routines—keeps my projects on track. For designing future enhancements or modifications, SketchUp offers precise modeling, enabling me to visualize changes and plan installations accurately, reducing costly mistakes down the line.
Looking ahead, the trend in outdoor maintenance tools points towards automation and smart technology. Imagine drones that can inspect your pergola’s structure or sensors embedded in decks to monitor moisture levels in real time. These innovations will drastically reduce manual labor and improve long-term durability by alerting homeowners to potential issues proactively.
How do I keep my deck and structures in top shape over time?
Regular inspections are key, especially after harsh weather or seasonal changes. Reapplying protective sealants every few years forms a barrier against moisture and UV damage. For structural components like railings and pergolas, tightening fasteners and checking for corrosion or cracking should be part of your yearly routine. Investing in durable hardware, such as stainless steel or architectural-grade aluminum, minimizes maintenance needs and extends service life. To streamline these tasks, I set reminders in my project management app, ensuring nothing is overlooked.
Mastering the use of these tools and adopting a proactive maintenance mindset will pay off by preserving the beauty and safety of your outdoor living features. For example, incorporating moisture meters into your routine can catch issues early—before they turn into costly repairs—saving you time and money in the long run. Don’t hesitate to [contact us](https://deckforgebuilders.com/contact-us) if you’d like tailored advice on selecting the right tools for your specific project needs or to explore innovative techniques that can transform your backyard into a lasting sanctuary.
Lessons That Make You Smarter Than the Average DIY Enthusiast
- Choosing the right materials isn’t just about looks; it’s about understanding how they age and perform over time. I once selected a trendy composite that looked stunning initially, only to find it warped after a harsh winter. Learning to evaluate material durability has saved me headaches and money.
- Perfection in measurements and cuts isn’t just a detail—it’s the foundation of a professional finish. A small miscalculation can lead to gaps or uneven boards, diminishing both aesthetic and structural integrity. Investing in good tools and patience pays off immensely.
- The importance of local codes and safety standards cannot be overstated. I used to overlook these, but a close call with an improperly installed railing taught me to always double-check regulations—your safety (and peace of mind) depends on it.
- Attention to drainage and water management can save your deck in the long run. Incorporating hidden drainage solutions and sealing techniques prevented rot in my previous setup, demonstrating the value of proactive waterproofing.
- Continuous learning from industry experts and seasoned DIYers can accelerate your mastery. Engaging with trusted blogs or forums provided insights that no beginner’s guide could offer, turning me into a more confident builder.
Tools and Resources That Changed My Approach
- This guide on composite decking longevity helped me select products that resist weathering and stains, extending my deck’s lifespan and saving maintenance time.
- Trends in pergola design inspired me to customize my structure for both function and style, enhancing my backyard’s visual appeal.
- A comprehensive railing selection guide ensured my safety standards were met without sacrificing aesthetic harmony, giving me peace of mind.
- Having a cordless impact driver from trusted brands has made assembly faster and more precise, especially when working in tight spots or with weather-resistant hardware.
Your Next Step Toward Outdoor Excellence
Building and maintaining beautiful, durable outdoor spaces is a rewarding journey that combines skill, knowledge, and passion. Embrace these lessons, utilize trusted tools, and stay curious—you’ll transform your backyard into a lasting sanctuary you’ll enjoy for years to come. Remember, every project is an opportunity to learn and grow, so don’t hesitate to try new techniques or ask for advice.
What part of your outdoor space do you find most challenging, and how are you planning to overcome it? Let me know below—we can learn from each other’s experiences!