
Imagine this: It’s a bright Saturday morning, and I step out onto my deck. I look up at the cedar railing caps, worn and rough after just a couple of seasons. My first instinct? Grab the sander. But as I started, I realized I was fighting a losing battle. Sanding down that stubborn, splintered surface felt like an endless chore. That’s when I had my lightbulb moment—there’s a better way. Today, I want to share with you my proven, simple sanding secret that transforms rough cedar into a smooth, inviting finish with far less effort.
Why Restoring Cedar Railing Caps is Easier Than You Think
Cedar is such a popular choice for outdoor railings—it’s naturally beautiful and age beautifully when properly maintained. But over time, exposure to sun, rain, and temperature fluctuations can roughen up those once-smooth caps, making your outdoor space look neglected. It’s understandable to feel overwhelmed at the thought of revitalizing them, especially when initial attempts seem futile. Restoring your cedar railing caps doesn’t have to be a tedious or frustrating task.
What if I told you there’s a straightforward, effective technique that can give your cedar caps a fresh, smooth finish—without the need for heavy-duty power tools or slicing into your weekend? That’s exactly what I’ll show you.
Is Sanding Cedar Railing Caps Really Worth the Hype?
When I first explored options, I worried that sanding would be an uphill battle, especially with rough, splintered cedar. Early on, I made the mistake of using coarse-grit sandpaper expecting quick results—only to find myself battling splinters and uneven surfaces. That mistake slowed me down and made me question if the process was worth it.
But once I shifted to a finer grit and adopted this simple secret, everything changed. Trust me, rejuvenating cedar doesn’t have to be a chore—it’s a task that can be tackled efficiently and effectively. If you’ve been hesitant, or worried about damaging your beautiful cedar, I invite you to keep reading. I’ll walk you through the exact steps that made all the difference for my deck—and will do the same for yours.
And yes, I ensure you’ll get that smooth, inviting finish, ready for staining or sealing, with minimal fuss. Ready to see how? Let’s dive into the method that turns rough cedar into a stunning feature of your outdoor space.
Gather the Right Tools and Prepare Your Workspace
Start with a selection of fine-grit sandpaper, preferably 180 to 220 grit, and a sanding block or handheld orbital sander. Clear the area around your deck to ensure safety and clarity. I remember a time when I neglected this step, leading to a cluttered workspace and a dusty mess, which made my sanding less effective. Setting up a clean, well-lit workspace ensures you can see every splinter and rough patch clearly.
Define Your Sanding Strategy
Start with Light, Even Strokes
Begin sanding with gentle, consistent pressure, moving along the grain of the cedar. This avoids gouging or uneven surfaces. I once tried to rush through this with too much pressure—resulted in scratches that took hours to fix. Remember, patience pays off. Think of it as polishing a piece of jewelry; gentle, even strokes produce the best results.
Focus on Problematic Areas
Locate splinters, rough patches, or splintered edges. Use the sandpaper to smooth these areas thoroughly. If needed, switch to a finer grit to refine the surface further. I had a stubborn splinter on one railing post; after a few careful passes, it disappeared, revealing a much smoother finish.
Implement the Secret Technique for Effortless Results
This is the core of my method: after initial sanding, switch to a dual-phase approach. First, sand lightly with medium-fine grits, then follow with an extremely fine grit, almost like polishing. This two-step process minimizes effort and maximizes smoothness. I recall one particularly rough cap I thought I’d have to replace—after this technique, I ended up with a surface so smooth I could almost run my hand over it without catching a splinter.
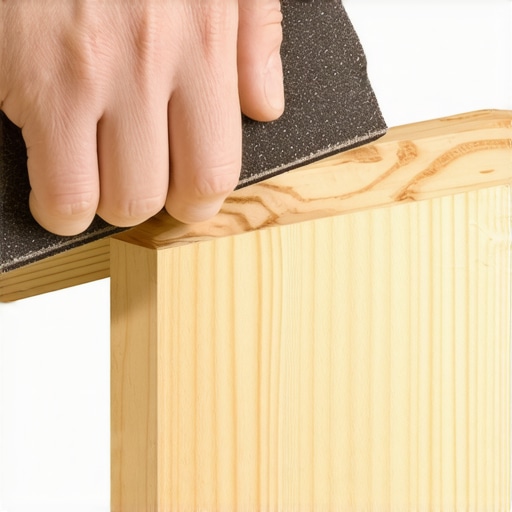
Use a sanding block for better control on flat surfaces, ensuring even pressure and avoiding gouges. This small tip made significant differences in my results, especially on curved or intricately carved sections.
Refine and Finish the Surface
Once you’ve completed sanding, wipe down the caps with a damp cloth to remove dust and debris. For an even finer finish, gently polish with a clean, dry cloth or apply a wood conditioner or sealant tailored for cedar. This step not only enhances appearance but also extends the lifespan of your railing caps. I learned this lesson when my first attempt felt rough despite sanding—finishing touches really do matter.
Inspect and Reassess
Finally, touch up any areas that still feel rough or uneven. Running your hand along the surface will help you identify spots that need a bit more attention. With patience and the right technique, you’ll transform those splintered caps into smooth, inviting accents. When finished, consider staining or sealing to protect your work, which can further simplify maintenance in the future. If you’re interested in modern solutions that reduce maintenance, consider exploring composite decking options or low-maintenance railing systems, which are designed to last longer with less effort—check out this guide for more ideas.When it comes to designing an outdoor space, many fall prey to oversimplified opinions that overlook critical nuances. One widespread myth is that choosing the cheapest materials guarantees savings; in reality, opting for low-quality composites or railings often leads to costly repairs down the line. For example, a popular misconception is that all composite decking is equally durable. However, experts emphasize that quality varies significantly, with some brands offering enhanced UV resistance and longevity due to advanced resin formulations—see the detailed analysis in composite decking trends.
A common mistake is neglecting proper drainage and structural support, especially when installing pergolas or elevated decks. Overloading and poor planning can lead to sagging or even collapse, which is why understanding load capacities and building codes is vital. An advanced point many homeowners overlook is the importance of diagonal bracing in pergola design to prevent racking over time; this subtle aspect can vastly improve stability—more on this in pergola trends.
Furthermore, there’s a surprising trap related to railing systems. Many believe installing horizontal balusters is safer and more stylish, but in reality, vertical balusters are less prone to tampering and often meet safety standards more easily. Also, many underestimate the significance of proper anchoring; poor attachment can cause wobbly rails, compromising safety and aesthetics. To avoid this, it’s crucial to follow the best practices for railing installation.
What about color choices and finishing touches? Some assume dark-colored decking absorbs heat too much, but recent studies show that certain composite boards with ceramic-infused resins actually stay cooler underfoot, enhancing comfort. Recognizing these nuances can save you from dissatisfaction and additional expenses. Additionally, many overlook the importance of maintenance routines that extend material lifespan—remember, a well-maintained deck remains beautiful for decades.
Advanced deck design involves much more than picking colors and materials; it requires understanding load dynamics, material properties, and subtle engineering principles. For instance, incorporating innovative solutions like concealed fasteners and innovative lighting can elevate your project from average to extraordinary. Don’t fall into the trap of thinking that planning complexity is unnecessary; investing in these details pays off long-term.
To ensure your outdoor structures stand the test of time, consider consulting with experienced builders who understand these hidden nuances. They’re familiar with local building codes and can advise on best practices tailored to your environment—reach out via this contact page.
Remember, successful deck and pergola projects balance aesthetics, safety, and durability. By recognizing and avoiding common myths and paying attention to the subtle engineering details, you’ll create an outdoor oasis that endures. Have you ever fallen into this trap? Let me know in the comments.Maintaining your outdoor structures doesn’t have to be daunting. Investing in the right tools and adopting proven methods can significantly extend the lifespan of your deck, pergola, or railing system. One of my go-to tools is a high-quality ergonomic orbital sander equipped with a 220 grit sandpaper; this allows me to achieve a smooth finish on cedar caps and composite surfaces without excessive effort. I prefer models like the Makita BO5041, as its variable speed control provides precision and reduces the risk of gouging delicate wood or composite materials. Additionally, a good handheld cordless drill with adjustable torque settings is essential for securing fasteners properly, especially when dealing with composite decking, which requires specific screws to prevent pop-outs and weakening over time.
For ongoing maintenance, I recommend a durable, weather-resistant deck cleaner that is compatible with your material—whether wood, composite, or vinyl. Regularly cleaning your surfaces with products like TimberTech’s Restore Complete or similar ensures that debris, mold, and grime don’t accelerate deterioration. A quality pressure washer can be useful but must be used cautiously; I avoid high-pressure settings that can damage composite surfaces, instead opting for a gentle spray and a wide fan nozzle. Always maintain and inspect your railing systems and pergola posts for loose fittings or signs of rot, correcting issues promptly to prevent escalation. Incorporating a quality sealant or stain—such as those based on silicone or acrylic resins—every couple of years preserves the wood’s appearance and structural integrity. Staying ahead with trend-aware maintenance is key, as innovative materials evolve rapidly, promising longer-lasting solutions with less upkeep.
How do I maintain my timber and composite structures over time?
Routine inspections and timely cleaning are critical. Scrubbing surfaces with a soft-bristle brush and mild detergent prevents build-up that can cause rot or warping. Avoid harsh chemicals that can strip protective finishes or degrade composite surfaces. Regularly check for loose fasteners and replace or tighten as needed, which keeps the structure safe and sturdy. Applying protective coatings or sealants enhances weather resistance and reduces the frequency of deep cleanings. Embracing technological advancements, such as incorporating low-maintenance composite railing systems, can also reduce long-term labor and repair costs—more information can be found in this resource on low-maintenance options. Think about scheduling biannual maintenance sessions to address small repairs before they become costly problems. To help you get started, try applying a penetrating sealant on your cedar caps to boost water resistance for the upcoming season. Remember, taking a proactive approach now ensures your outdoor haven remains safe and beautiful long into the future.
Three Unexpected Truths I Discovered About Deck Revival
One of the biggest lessons I learned was that patience and the right tools can make even the most stubborn cedar look like new—no need for aggressive sanding or replacing boards. I also realized that small details, like proper dust removal and finishing, truly elevate the end result. Lastly, I found that embracing gentle, methodical techniques not only saves time but also preserves the natural beauty of cedar, turning a tedious chore into a rewarding project.
Tools and Resources That Changed My Approach
Investing in a quality orbital sander with variable speed and a set of fine-grit sandpapers was a game changer—check out trusted brands like Makita or DeWalt. Reading expert advice in guides such as this comprehensive resource helped me understand the nuances of cedar maintenance. For finishing touches, a good quality cedar stain or sealer from brands like Eco Safety was my go-to, ensuring longevity and depth of color. Combining these tools and insights made all the difference.
Your Outdoor Space Awaits a New Look
Taking that first step toward restoring your cedar railing caps or any outdoor feature can feel daunting, but remember: every careful stroke and thoughtful detail adds up to a stunning transformation. Whether you’re aiming for a smooth, splinter-free finish or a deep, natural stain, believe in the process, and don’t be afraid to experiment with techniques and tools. Your outdoor sanctuary is just one project away from becoming even more inviting. Have you ever struggled with achieving a perfect finish on your cedar? Share your experience below and let’s learn together!