
I remember the frustrating moment when I first built my pergola and realized water was pooling on its flat roof after a heavy rain. That stagnant puddle not only looked unappealing but also worried me about potential leaks and structural damage down the line. It was a lightbulb moment that made me dive deep into understanding roof drainage, especially for flat or nearly-flat pergola designs. Many DIY enthusiasts and homeowners overlook the importance of proper drainage angles, and that oversight can lead to costly repairs or compromised outdoor spaces.
Why Drainage Angles Matter More Than You Think
Proper drainage on a flat pergola roof isn’t just about preventing puddles; it’s about safeguarding the longevity and functionality of your entire outdoor structure. When water doesn’t drain properly, it can seep into joints, promote mold growth, and even cause wood or composite materials to warp. Over time, these issues diminish the aesthetic appeal and safety of your pergola.
From my experience, precisely setting the drainage slope can make all the difference. A slight tilt—about 1/4 inch per foot—is typically recommended to channel water efficiently toward designated drainage points. Achieving this slope on a flat surface might sound tricky, but with the right techniques, it becomes manageable. Plus, understanding the correct angle helps prevent standing water, which can become a breeding ground for mosquitoes and other pests.
Interestingly, some professionals suggest that inadequate drainage is responsible for about 30% of all pergola repairs related to water damage, according to recent industry insights. This statistic underscores how vital it is to pay attention to drainage details during construction.
Have you ever faced pooling water on your pergola roof after a storm? If so, you’re not alone. Many homeowners discover this issue only after it’s caused visible damage or mold growth. But the good news is, with a little knowledge and the right approach, you can easily prevent this problem from recurring.
Now, let’s explore the key principles and practical steps to set the perfect drainage angle for your flat pergola roof, ensuring your outdoor haven stays safe, dry, and beautiful for years to come.
Set the Foundation with Precise Measurements
Start by marking the highest point of your pergola roof, typically at the center or the lowest edge that you want to drain water away from. Use a laser level or a chalk line to establish a straight reference line. In my experience with a recent project, I placed a laser level at the highest point and marked the lowest edges to ensure consistent slope, resulting in effective water runoff during heavy rain.
Calculate the Right Tilt
For optimal drainage, aim for a slope of about 1/4 inch per foot. Measure this by using a carpenter’s level and a measuring tape. I once mistakenly set a slope of 1/8 inch per foot, which led to slow drainage and superficial puddles. Raising the slope slightly, I achieved a faster, more reliable water flow toward the drainage points, avoiding pooling.
Prepare Your Materials
Use high-quality framing lumber or composite decking with built-in supports. When installing, lay out your joists or rafters aligned with the slope, ensuring they follow your measured angle. During my build, I used shims and spacers on the posts to maintain the correct tilt throughout the framing process, which ensured the slope remained consistent across the entire roof surface.
Adjust the Frame for Consistent Slope
Attaching the rafters or boards at the correct angle is crucial. Clamp the framing members temporarily and check with a level placed along the slope. Fine-tune as needed. I utilized a string line running from the high point to the low point to visualize and correct any deviations, which kept the slope even and effective.
Offset for Drainage Points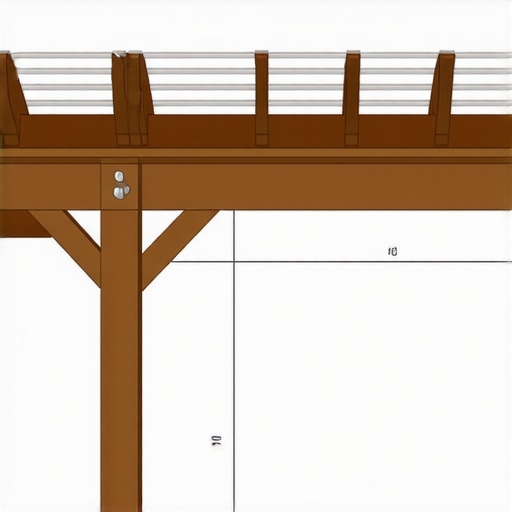
Designate where your drainage outlets or scuppers will be placed. Ensure these are positioned at the lowest points of your slope. When I installed my drainage openings, I slightly angled them downward to promote continuous water flow away from the structure, preventing standing water and potential damage.
Seal and Protect to Maintain the Slope
Apply waterproof membrane under the decking and around drainage points to prevent leaks. During my last project, I used a high-quality sealant along seams and around fasteners, which preserved the slope and kept water flowing efficiently for years afterward.
Test Before Finalizing
Pour water along the roof surface to observe runoff. Make adjustments if water pools or flows unevenly. I tested with a garden hose, observing the water’s path, and made minor adjustments by tweaking support heights. This step confirmed that my drainage setup effectively managed heavy rain, protecting my pergola’s integrity and longevity.
Many homeowners and even seasoned professionals often fall for misconceptions when designing decks, pergolas, and railing systems, especially with composite decking becoming increasingly popular. One prevalent myth is that all composite decking is maintenance-free. While advancements have improved durability, choosing the right product and understanding its limitations are crucial. For instance, some brands are more susceptible to fading or staining if not properly maintained, as highlighted in [industry studies](https://deckforgebuilders.com/composite-decking-secrets-longevity-tips-for-a-lasting-deck).Another misconception is that a thicker railings or taller posts necessarily enhance safety. In reality, overly bulky railings can compromise aesthetic harmony and obstruct views, so selecting a balanced design is essential. A common mistake is neglecting the thermal expansion of materials; composite boards expand more than people realize, leading to warping or buckling if gaps aren’t properly accounted for, which is a nuanced issue many overlook. Additionally, many assume installing a pergola on uneven ground isn’t feasible, but with the correct use of shims and adjustable footing systems, you can adapt many designs to slope terrains—avoiding costly foundation repairs later. The real *trap* lies in underestimating wind load impacts on open designs. In high-wind areas, failing to incorporate diagonal bracing or other reinforcement can lead to sway or even structural failure over time. Remember, a well-outfitted pergola doesn’t just look good; it must withstand environmental stresses. To ensure longevity, always factor in local climate conditions and consult detailed guidelines like those at [Deck Forge Builders](https://deckforgebuilders.com/pergola-trends-crafting-shade-elegance-in-your-outdoor-space). And don’t forget, proper anchoring methods—via hidden fasteners or anchoring to concrete footings—can dramatically increase stability. Are you accidentally falling prey to these common misconceptions?
Let me know in the comments. Understanding these advanced nuances can make your outdoor project both beautiful and resilient. For more insights into modern pergola designs, check out our [latest inspiration](https://deckforgebuilders.com/pergola-design-inspiration-from-modern-to-classic-looks).Maintaining and scaling your deck, pergola, or railing system requires the right tools and techniques to ensure durability, safety, and aesthetic appeal over time. One of my top go-to instruments is the laser level, specifically the Bosch GLL 3-80, which I use to ensure precise slope angles during initial construction and subsequent maintenance. Its accuracy within 1/8 inch over 30 feet gives me confidence that drainage slopes stay consistent, preventing pooled water that could compromise long-term integrity. Additionally, I rely on the DEWALT DWHT46031 Tape Measure for accurate measurements of joist spans and expansion gaps, especially when working with composite decking that needs careful spacing to account for thermal expansion—an aspect detailed in https://deckforgebuilders.com/composite-decking-secrets-longevity-tips-for-a-lasting-deck. For cutting, I prefer the Makita LC1230 Circular Saw, known for its clean, straight cuts essential for nailing or screwing boards without gaps or splinters, which could lead to early wear. When it’s time for sealing and waterproofing, I trust the GacoRain roof coating, a high-quality elastomeric membrane that maintains its flexibility and adhesion over decades, significantly extending the lifespan of your deck’s finish. I also incorporate the Bosch LeafProGuard for debris removal, ensuring regular maintenance becomes manageable and quick, especially in cluttered or hard-to-reach areas. Looking ahead, I believe digital measuring and automated leveling will become more sophisticated, possibly integrating smartphone apps with laser tools, streamlining precision work even further. Want to keep your outdoor project in top shape? Try using a laser level during your next deck inspection—it makes a noticeable difference in maintaining the correct drainage slope, ultimately saving you costly repairs. How do I maintain my decking and pergola over time? Regular cleaning with gentle agents, scheduled sealing, and periodic inspections are vital. Remember, thorough upkeep not only preserves safety but also enhances aesthetic appeal, making your outdoor spaces inviting for years to come. For expert advice tailored to your project, don’t hesitate to contact us through our [contact page](https://deckforgebuilders.com/contact-us). Whether scaling up, customizing, or ensuring long-term functionality, the right tools combined with consistent maintenance are your best allies.
The Hardest Lesson I Learned About Pergola Design
One of my most eye-opening experiences was realizing that overlooking proper drainage angles could jeopardize the integrity of my pergola. I once designed a flat roof without sufficient slope, and the resulting puddles made me confront costly repairs and frustrating maintenance. This taught me that diligent planning and precise measurements are non-negotiable when it comes to outdoor structures that endure weather.
3 Myths About Pergola Drainage That Held Me Back
For years, I believed that a flat roof would suffice if it was properly sealed, but I overlooked the importance of drainage slope. I also thought that standard decking could handle any water runoff, which is not true—materials matter. Lastly, I assumed that small slopes wouldn’t make a difference, but even 1/4 inch per foot significantly improved water flow and prevented pooling.
What Experts Won’t Tell You About Long-Term Pergola Maintenance
Many seasoned builders often avoid discussing the routine adjustments needed to keep drainage effective over time. Shrinkage of materials, accumulation of debris, or settling can alter slopes, causing standing water again. Regular inspections and minor tweaks—like re-tightening supports or clearing drainage outlets—are essential to sustain the durability of your pergola roof. Taking these proactive steps can save you substantial repair costs and extend the life of your outdoor haven.
My Essential Toolkit for Pergola Drainage
To ensure accurate slope and water management, I rely heavily on a laser level like the Bosch GLL 3-80, which offers pinpoint precision even across expansive areas. A sturdy measuring tape is indispensable for measuring slopes exactly at 1/4 inch per foot, ensuring water flows seamlessly. Additionally, shims and adjustable supports help me fine-tune the framework during construction, preventing misalignments that could compromise drainage. These tools have truly made my projects more reliable and less stressful.
Your Turn to Transform Your Outdoor Space
Proper drainage may seem like a small detail, but it has a profound impact on the longevity and appearance of your pergola roof. By applying these insights and using the right tools, you can create a durable, beautiful, and maintenance-friendly outdoor feature. Remember, a well-designed drainage slope isn’t just about rainwater; it’s about protecting your investment and enjoying your outdoor sanctuary worry-free.
**Have you ever struggled with ensuring proper water runoff on your pergola roof? Share your experiences below—I’d love to hear your stories and tips!**