
I remember standing on my neighbor’s brand-new deck last summer, holding a cold drink and trying to find something nice to say. He had spent a small fortune on the project, but in the harsh midday sun, the surface didn’t look like premium lumber. It looked like a giant, melted Lego set. The boards were unnaturally shiny, the wood grain repeated every twelve inches like a bad wallpaper job, and the edges were sharp enough to cut a steak. It was a classic case of ‘plastic-deck syndrome,’ and it’s a trap I almost fell into myself years ago. I once bought the cheapest capped composite I could find for a small porch project, thinking I was outsmarting the system. Instead, I ended up with a surface so reflective I had to wear sunglasses just to walk to my front door. That failure taught me that while we all want low-maintenance composite decking, we don’t necessarily want it to look like it came out of a toy factory.
Why Expensive Boards Sometimes Look Like Cheap Toys
The truth is, many homeowners choose composite because they want to escape the endless cycle of sanding and staining, yet they end up disappointed by the aesthetic. We’re going to solve that today by identifying the specific culprits that strip away the ‘wood’ feel and leave you with a synthetic mess. Whether it’s the way the light hits a cheap sheen or the lack of variegation in the color, I’ll show you how to spot the red flags before you sign a contract. Getting the look right is just as important as following longevity tips for a lasting deck. Have you ever walked onto a deck and felt like you were stepping onto a cafeteria tray? I’d love to hear if you’ve struggled with that ‘fake’ look during your own design process.
Is composite decking actually worth the hype?
Skepticism is healthy here. You might be wondering if you should just stick with cedar or pressure-treated pine to avoid the plastic vibe altogether. But the industry has come a long way. According to the North American Deck and Railing Association (NADRA), the composite market has shifted heavily toward ‘capped’ products that use advanced polymers to mimic the matte finish of real wood. The problem is usually not the material itself, but choosing the wrong generation or ‘tier’ of product. For instance, I’ve learned that solid core composite is worth the extra bulk because it sounds and feels more substantial underfoot, which is a huge part of the sensory experience that makes a deck feel ‘real.’ If the board sounds hollow when you walk on it, your brain will never believe it’s wood, no matter how pretty the grain is.
Choose the Right Board Texture and Finish
The biggest mistake I see is homeowners buying boards based on a small 2-inch sample under fluorescent hardware store lights. That’s like picking a car color based on a paint chip. To avoid the ‘Lego’ look, you need to prioritize color variegation and a matte finish. Look for boards that have multiple tones streaked through the grain rather than a solid, flat color. Modern composite decking trends focus on ‘hand-scraped’ textures that diffuse light instead of reflecting it. If the board looks like it has a oily sheen in the sun, skip it. I remember a project in 2019 where I insisted on a matte-finish walnut board for a client who wanted a rustic vibe; even after five years of North Carolina sun, you still can’t tell it’s synthetic from ten feet away.

Master the Art of the Hidden Seam
Nothing screams ‘fake’ louder than a random line of butt-joints cutting across the middle of your deck. If your deck is longer than 20 feet, you will have seams. Instead of just butting them together, use a breaker board or a ‘picture frame’ border to create a defined architectural break. Learning the secret to invisible seams allows you to turn a structural necessity into a design feature. I once tried to just ‘randomize’ the joints on a 40-foot run, and it looked like a jigsaw puzzle gone wrong. Now, I always use a perpendicular transition board to keep the lines clean and purposeful.
Manage Thermal Expansion Like a Pro
Composite boards are like living organisms; they breathe, but instead of oxygen, they take in heat and grow. If you don’t account for this, your perfectly spaced gaps will be touching by July and a half-inch wide by January. This is especially true for darker colors. I’ve learned the hard way that dark composite boards need extra expansion space because they can reach surface temperatures of 160 degrees. On a humid Tuesday last August, I had to return to a site to trim back three-quarters of an inch from a perimeter because the boards were literally pushing the railing posts out of alignment. Always use the manufacturer-recommended spacers, and if you’re installing on a freezing morning, leave a slightly larger gap than you think you need.
Use the Right Fastening Strategy
Visible screws are the enemy of a premium aesthetic. When you drive a screw into composite, it often creates a ‘mushroom’ effect where the plastic displaces upward around the screw head. It looks terrible. Use hidden fastener systems that clip into the side grooves of the boards. However, be warned: hidden fasteners can pop up if the framing isn’t perfectly level. To combat this, I treat the sub-structure with the same respect as the surface. Applying the joist tape secret not only prevents rot but creates a slight cushion that helps the fasteners seat more securely, reducing the ‘clicking’ sound when you walk across the boards.
Fixing the Small Scuffs
No matter how careful you are, someone is going to drag a metal chair or drop a heavy tool during the build. With wood, you just sand it. With composite, you have to be smarter. I’ve found that knowing how to fix scuffs with a heat gun is a life-saving skill. You can gently blend the plastic back together, but it takes a steady hand—too much heat and you’ll melt a permanent shiny spot into the grain. It’s a delicate dance of heat and texture that makes the difference between a ‘DIY’ look and a professional finish.
Common wisdom suggests that hidden fasteners are always the ‘premium’ choice for a modern look. In my experience, that is a half-truth that leads to massive headaches in specific climates. If you are building a deck that gets direct afternoon sun in the South, those clips often become the primary point of failure. While they look sleek, hidden fasteners fail on high-traffic areas or high-heat zones because they don’t allow the boards to slide as freely as they need to during extreme expansion. According to research by the Forest Products Laboratory, the thermal expansion coefficient of wood-plastic composites is significantly higher than natural lumber, meaning your boards are essentially trying to tear themselves away from the frame every time the sun hits. I have seen entire runs of expensive boards ‘pop’ or warp because the fasteners were too rigid for the local environment. Have you ever fallen into this trap? Let me know in the comments.
Stop Overbuilding the Frame and Start Venting It
The ‘oops’ factor I see most often with experienced DIYers is the belief that more lumber equals a better deck. They pack joists together tightly, thinking it adds strength, but they forget about airflow. When you use pressure-treated wood under composite decking, the frame needs to breathe. If you over-frame without leaving paths for moisture to escape, you create a greenhouse effect under your boards. This trapped humidity is exactly why your deck joists are rotting underneath the tape or through the fastener holes. I now advocate for using a rubber spacer trick for better airflow, which creates a vital 1/8-inch gap between the joist and the board, allowing water to evaporate rather than sit.
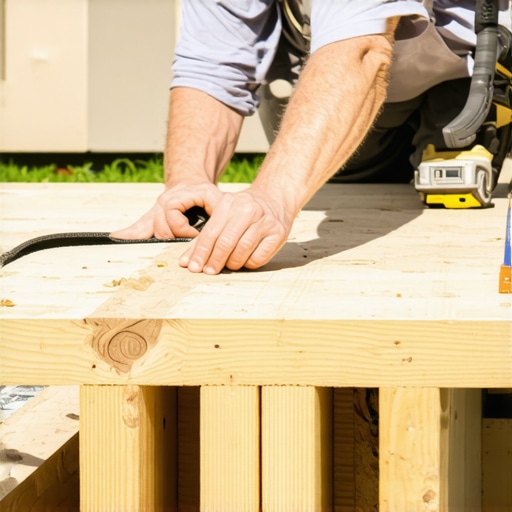
Are hidden fasteners actually a mistake for your specific climate?
If you live in a region with 40-degree temperature swings in a single day, the answer might be yes. For these ‘high-movement’ decks, I often suggest a hybrid approach. Use hidden fasteners for the main field, but use color-matched face screws on the perimeter and transition boards to anchor the structure. This provides the necessary shear strength that clips simply cannot offer. This level of planning extends to your shade structures too; for example, most DIY pergolas fail the uplift test because they treat the posts as static objects rather than sails that catch the wind. Using the hidden bracket trick for securing posts ensures the hardware is protected from the elements while providing the structural bite needed for safety.
Don’t Let Your Heavy Furniture Sink Your Investment
Another nuance that experts track is the ‘creep’ or sagging that happens over time. Composite is not as stiff as wood. Why your composite boards feel spongy under heavy furniture often comes down to the sub-frame layout. While code usually allows for 16-inch joist spacing, a high-end build should almost always utilize 12-inch spacing to provide a rock-solid feel. This is especially true if you are planning to add a heavy stone-topped table or a luxury grill station. Speaking of heat, never forget that black aluminum railings get hotter than you think. When pairing dark composite with metal railings, I always recommend choosing the perfect railing system with a wood-composite top rail to provide a ‘cool-to-the-touch’ surface for guests to lean on.
I’ve spent thousands of hours on my knees with a tape measure, and if there’s one thing I’ve learned, it’s that your eyes can lie to you, but a string line never does. When you’re aiming for that high-end look, precision isn’t a luxury; it’s the foundation. I swear by the string line method for perfectly level deck surfaces because even a quarter-inch dip in a joist will create a shadow line on composite that you can see from across the yard. For railing installs, I stopped ‘eyeballing’ it years ago and started using the simple jig for drilling straight baluster holes. It’s a ten-minute DIY project that saves four hours of frustration and prevents those slightly-tilted spindles that drive perfectionists crazy.
How do I keep my composite deck looking brand new for years?
The biggest threat to your investment isn’t the sun; it’s the wrong cleaning products. I see homeowners ruin their capped finish every spring by reaching for heavy-duty chemicals. You must remember why you should never use bleach on composite decks; it can break down the UV inhibitors and leave the boards brittle and faded. Instead, I use a soft-bristled brush and a specialized composite cleaner twice a year. You also need to look between the boards. Debris buildup is the silent killer of substructures. I’ve found that the secret to preventing leaf rot between deck boards is a simple quarterly pass with a high-powered leaf blower or a plastic putty knife to keep those gaps clear for drainage. According to technical bulletins from the Deck Fastener & Accessory Association (DFAA), ensuring clear drainage paths reduces the lateral pressure on fasteners caused by organic expansion, effectively doubling the life of your clips.

Build for the Future with Heavier Bones
When you transition from a basic deck to a full outdoor sanctuary with a shade structure, the structural math changes. I never build a pergola with 4×4 posts anymore; I’ve seen too many twist under the weight of a summer storm. I firmly believe why your pergola posts need to be 6×6 minimum for stability is a non-negotiable rule for any modern design. If you’re planning a heavy beam run, don’t just rely on bolts; use the hidden blocking move for supporting heavy pergola beams to transfer that load directly to the footings. Looking ahead, the industry is moving toward ‘Active Outdoor Spaces.’ I predict that within five years, we will see composite boards with integrated piezo-electric sensors that can track foot traffic or detect sub-structure moisture levels before rot even starts. For now, focus on the fundamentals of composite decking secrets to ensure your deck is ready for those upgrades. My challenge to you: before your next cleaning, try the how to fix scuffs with a heat gun technique on a scrap piece of board. Mastering that one pro skill will give you the confidence to maintain a professional finish for a lifetime.
The Hardest Lesson I Learned About Composite Framing
After a decade of building, my biggest ‘aha’ moment wasn’t about the boards themselves, but the sound of silence. A high-end deck shouldn’t ‘click’ or ‘clatter’ when you walk across it. I realized that the luxury feel comes from the density of the frame, not just the price of the cap-stock. Another lesson? Don’t fight the sun—work with it. Choosing a lighter shade isn’t just about style; it’s about thermal comfort. Lastly, never underestimate the power of a border. A simple picture-frame edge makes the difference between a DIY project and a custom masterpiece. Many homeowners forget that pressure-treated wood still warps under composite decking, so over-engineering your joist spacing is the only way to keep those expensive boards perfectly flat for the next twenty years.
My Essential Toolkit for a Lifetime Deck
If you are serious about avoiding that ‘Lego’ look, don’t just rely on the hardware store’s top-shelf items. I personally swear by these resources to bridge the gap between amateur and pro. First, I always recommend studying stunning deck design strategies to help you visualize the flow and board transitions before you buy your first pallet. Second, get a dedicated high-quality soft-bristle deck brush—it is the only tool that cleans the grain without scratching the delicate polymer cap. Finally, if you are stuck on the finishing touches, I always revisit the guide on the perfect railing system to ensure the safety hardware matches the premium aesthetic of the floor.
#IMAGE_PLACEHOLDER_E#
Your Backyard Deserves a Promotion
Building a deck is a massive undertaking, but don’t let the technical specs paralyze you. The goal isn’t to build a perfect museum piece; it’s to create a space where you actually want to spend your Friday nights. When you finally maximize outdoor living with low-maintenance composite decking, you are essentially buying back your weekends for the next two decades. Start with a solid plan, pick a board with a matte finish that mimics nature, and don’t skip the joist tape. You have the knowledge now—it is time to get out there and start your build. Have you ever struggled with getting that ‘fake’ plastic look to disappear in your own yard, or did you find a color that perfectly mimics real wood? Let me know in the comments below!