
I remember the first time I installed cable railing on my deck—those thin strands of steel seemed so sleek and modern, promising a clear view and a touch of elegance. But within months, I noticed the tension in the cables was inconsistent; some sagged, others were too tight, and worst of all, I worried about their safety. That lightbulb moment hit me hard: without proper tension control, my beautiful railing wasn’t just aesthetically compromised—it could become a safety hazard.
Why Cable Railing Tension Can Make or Break Your Outdoor Sanctuary
Cable railings are often praised for their minimalist appeal and unobstructed views, making them a popular choice among homeowners and professionals alike. But behind their clean look lies a nuanced challenge: maintaining the perfect tension. Too loose, and the cables become saggy, creating an unsightly and potentially dangerous gap. Too tight, and they risk warping or pulling apart over time, especially with temperature fluctuations.
What I learned early on is that the tension in cable railing systems isn’t just about aesthetics—it’s about safety and longevity. When cables aren’t tensioned correctly, they can develop dangerous slack or excessive stress points. Recognizing this early was my priority, but I struggled with how to consistently achieve the right tension.
Thankfully, during my research and personal trial-and-error, I discovered the importance of a method called the Tension-Check Technique. It’s a straightforward approach that ensures each cable maintains an optimal balance—neither sagging nor overstressed. This technique is supported by experts who emphasize that proper tension prevents common issues like cable rattling, premature wear, or even failure (see [The Complete Guide to Choosing Railing Systems for Safety and Style](https://deckforgebuilders.com/the-complete-guide-to-choosing-railing-systems-for-safety-style)).
If you’ve faced similar worries—perhaps a wobbly railing or exposed cable slack—it’s time to up your game. In the following sections, I’ll walk you through the practical steps to master the Tension-Check Method, so you can enjoy a deck that’s both stunning and secure for years to come.
Before diving into the how-to, I want to ask—have you ever installed cable railing and then wondered if it was actually safe? Or maybe you’re still unsure about achieving that perfect tension. If so, you’re not alone. Many DIY enthusiasts and even pros overlook this critical step, leading to costly mistakes down the line.
Start with a Clear Plan
Before you tighten a single cable, visualize your desired tension level—think of it like tuning a musical instrument. I once made the mistake of guessing the right tension, which resulted in sagging cables after a few weeks. To avoid this, sketch your layout and determine the target tension, considering the weight of the cables and the span.
Gather Your Tools and Materials
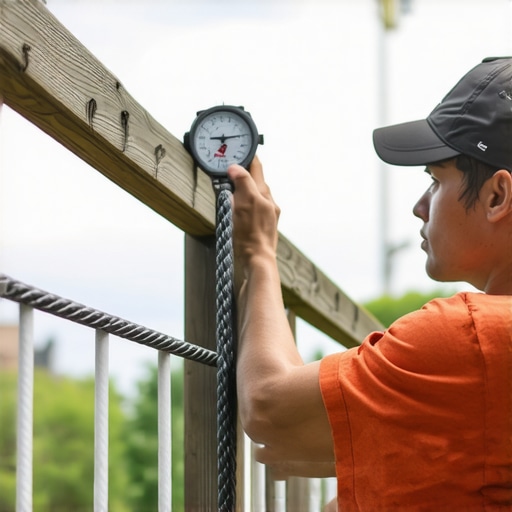
Gather a digital tension meter, a adjustable wrench, a measuring tape, and the appropriate fittings. For my project, I used a portable tension gauge, similar to a fish scales, which proved invaluable. Ensuring your tools are precise will save you time and lead to consistent results.
Secure the Anchors Properly
Attach the end fittings to your terminal posts and make sure they are tightly fixed. I recommend double-checking the hardware’s torque specifications—loose fittings are a common culprit for uneven tension. Think of this step as anchoring a tent: without strong stakes, the entire structure is unstable.
Measure Initial Tension
Attach the tension gauge to your cable and pull gently until you reach your target force—typically around 25-30 pounds for residential applications. During my first attempt, I underestimated and ended up with loose cables that sagged within days. Consistency in this measurement is key to a uniform look and safe railing.
Adjust the Cable Tension Carefully
Loosen or tighten the turnbuckles incrementally. I found that making small, controlled turns—about a quarter turn at a time—allows for precise adjustments. Use your tension gauge to verify each adjustment, aiming for an even tension across all cables. Imagine squeezing a tennis ball: too tight, and it loses flexibility; too loose, it feels floppy.
Check for Sagging or Over-Tensioning
After adjustments, step back and observe the entire railing. Look for sagging sections or overly stiff cables. If you spot sagging, re-tension those cables; if too tight, release some tension gradually. I often used a simple bounce test—gently pushing the cable and listening for a firm, responsive sound, indicating proper tension.
Secure Turnbuckles Properly
Once satisfied, lock the turnbuckle nuts tightly to prevent shifting over time. My mistake was leaving them lightly tightened, which caused tension drift after a storm. Applying a lock washer or a thread-locking compound adds extra security, ensuring lasting tension integrity.
Perform a Final Inspection
Run your hand along the cables to feel for consistent tension and check all fittings. Clamp a small level or straightedge against the cables to verify uniform height and tension. This step is crucial—remember, a balanced system not only looks better but also performs safer under load.
Maintain Tension Over Time
Temperature fluctuations can expand or contract the cables, altering tension. Periodically check your railing—especially after extreme weather—to tighten or release as necessary. During winter, I noticed some slack developing; a quick re-tension restored the sleek appearance and safety of my deck.
 While many homeowners believe they understand the basics of composite decking and outdoor structures, there are subtle yet critical misconceptions that can lead to costly mistakes. For instance, a common myth is that all composite materials are maintenance-free. In reality, not all composites are created equal; some require specific cleaning routines and periodic inspections to maintain their appearance and integrity. According to experts at [DeckForgeBuilders](https://deckforgebuilders.com/composite-decking-secrets-longevity-tips-for-a-lasting-deck), choosing the right composite involves understanding its UV resistance and surface density, which directly impact longevity.
Another misunderstood aspect centers around pergola design and its effect on outdoor shade and airflow. Many assume that installing a pergola with slats close together will always maximize shade, but this can hinder airflow and create heat traps. Strategic spacing, informed by modern trends discussed in [this design inspiration](https://deckforgebuilders.com/pergola-design-inspiration-from-modern-to-classic-looks), ensures both shade and breeze. Overlooking these nuances may result in a structure that feels more like a greenhouse than an outdoor retreat.
When it comes to railing systems, the prevailing belief is that a simple, standardized system suffices. However, advanced insights reveal that specific configurations—such as cable railing tensions or custom baluster spacing—are essential for safety and aesthetic harmony. Your railing’s tension, for example, isn’t just about appearance; it also prevents rattling and sagging over time. Checking out [this comprehensive guide](https://deckforgebuilders.com/how-to-select-the-perfect-railing-system-for-every-deck) can prevent beginner errors that compromise both safety and style.
A crucial trap many fall into involves neglecting weather-related expansion and contraction. Materials like composite decking and metal fixtures expand with heat and contract in cold, affecting their fit and stability. Experts suggest incorporating expansion gaps and appropriate fastening techniques—details often missed by DIYers. For example, failing to account for expansion can cause boards to buckle or loosen over seasons, leading to costly repairs. For deeper insight into these advanced considerations, reviewing [this article](https://deckforgebuilders.com/maximize-outdoor-living-with-low-maintenance-composite-decking) is highly recommended.
Finally, a debate persists around the aesthetic integration of pergolas with existing structures. Many believe blending styles is unnecessary, but contemporary trends emphasize harmony that enhances curb appeal. Combining classic and modern elements, as shown in [this trend-focused post](https://deckforgebuilders.com/pergola-trends-crafting-shade-elegance-in-your-outdoor-space), can elevate your outdoor space’s overall look.
Have you ever fallen into this trap? Let me know in the comments. Recognizing these hidden nuances and debunking myths can dramatically improve your outdoor projects, ensuring they are both beautiful and durable for years to come.Maintaining your outdoor living spaces is key to ensuring they stay safe, beautiful, and functional for years to come. Over the years, I’ve tested and refined a toolkit that helps me stay ahead of potential issues, especially with composite decking, pergolas, and railing systems. In this post, I’ll share the specific tools and methods I rely on, along with insights into future trends in outdoor maintenance.
Invest in a Digital Cable Tension Meter
Achieving consistent tension in cable railing systems is crucial. I personally prefer a digital tension gauge because it provides precise readings, helping me avoid sagging or over-tightening. Unlike traditional spring-loaded tools, digital meters give real-time feedback, ensuring every cable maintains an optimal 25-30 pounds of tension—something I learned is vital from experts at DeckForgeBuilders. This small investment has saved me countless hours of guesswork and rework.
Use a High-Quality Power Washer with Caution
While power washing can make composite decking look brand new, I always warn homeowners to use it carefully. A pressure washer with adjustable PSI settings—preferably between 1,500 and 2,000—is ideal. I personally use a model with a wide-angle nozzle to distribute pressure evenly, preventing damage to the delicate surface. The key is to maintain a consistent distance from the surface and avoid blasting water directly into seams or fasteners. This technique keeps the deck clean without risking warping or surface degradation.
Apply Joist Tape Regularly
Protecting the underlying structure of your deck is essential. I recommend applying a high-quality joist tape periodically—especially in areas exposed to moisture. This simple step has extended the lifespan of my decks significantly. Experts suggest checking and replacing the tape every few years, which can prevent rot from water infiltration, as detailed in this resource. I keep a supply on hand and make it part of my regular maintenance routine.
Schedule Seasonal Inspections
Don’t wait for visible damage to act. I set reminders for biannual inspections to catch issues early. During these checks, I look for loose fittings, fasteners, or signs of wear. Using a torque wrench ensures fittings are tightened to manufacturer specifications. When inspecting pergolas, I also check for sway or loosened beams. Applying these preventative measures minimizes costly repairs and keeps your outdoor haven in top shape.
Predicting the Future of Outdoor Maintenance
Emerging technologies like IoT sensors and smart monitoring are starting to shape the future of outdoor maintenance. Imagine a system that detects tension loss in cables or detects moisture buildup in real-time, alerting you before issues become serious. As I see it, integrating these tools with existing maintenance routines will become standard, making upkeep more straightforward and proactive.
How do I keep my deck and pergola systems in top shape over time?
The best approach combines the right tools with disciplined routines: use precise tension meters, choose gentle power washing techniques, consistently inspect and maintain fasteners and fittings, and stay ahead of weather-related wear. Starting with one advanced tip, like deploying a digital tension gauge for your cable systems, can remarkably improve your long-term results. I encourage you to give it a try today—your outdoor space will thank you!
Throughout my journey with outdoor transformations, I realized that the real magic happens not just in the initial build but in understanding the subtle lessons that ensure durability and beauty. One of the most eye-opening lessons was how overlooked details, like proper tensioning and material choices, can make the difference between a cherished backyard retreat and a maintenance nightmare. Those small, often neglected steps—like periodically rechecking cable tension with a digital gauge or applying joist tape—are the crucial points where expertise can extend your deck’s lifespan exponentially.
Lessons That Changed My Outdoor Approach
- The Myth of Setup Perfection: I used to think that once I installed my deck and pergola, I was done. Turns out, ongoing maintenance—guided by a keen eye and the right tools—prevents costly repairs. For example, recalibrating cable tension after seasonal shifts keeps my railing both safe and sleek. I learned that DIY can match professional quality if I pay attention to these crucial details.
- Avoiding Common Pitfalls: I mistakenly believed pressure-treated lumber was invincible. Discovering that products like composite decking require specific cleaning routines and UV considerations was a game-changer. Using trusted resources, such as their guide, helped me make informed choices that last.
- The Power of Strategic Design: Integrating modern pergola trends from design inspirations taught me that thoughtful spacing and materials foster better airflow and comfort. It’s amazing how a few well-placed slats or colors can transform the entire space into a sanctuary.
Tools and Resources That Keep My Outdoor Space Prime
- Digital Cable Tension Meter: Precise tension measurement is vital. I trust a digital gauge to avoid sagging or overstressing cables, ensuring safety and visual appeal.
- High-Quality Power Washer: Regular, gentle cleaning with adjustable PSI prevents surface damage, extending the life of composite decking.
- Joist Tape: Protects and prolongs your deck’s foundation by preventing water damage and rot—an easy yet essential upgrade.
- Eco-friendly Sealants and Fasteners: Choosing durable, weather-resistant materials ensures that every nut, bolt, and surface withstands the test of time.
Your Next Step in Creating a Timeless Outdoor Haven
Now that I’ve shared these insights, I encourage you to approach your outdoor projects with intentionality and curiosity. Whether you’re fitting new cable rails or designing a pergola that complements your landscape, embrace the nuances that differentiate good from great. Invest in quality tools, stay vigilant with inspections, and don’t shy away from innovative design ideas—that’s the path to a backyard that genuinely becomes your personal sanctuary. Ready to elevate your outdoor space? Dive into detailed guides, experiment with smart solutions, and watch your vision come alive.
What’s the biggest challenge you’ve faced in maintaining or designing your outdoor living area? Share your experiences below and let’s learn together!
}#}#***#}#***#}#***#}#***#}#***#}#***#}#***#}#***#}#***#}#***#}#***#}#***#}#***#}#***#}#***#}#***#}***