
I vividly recall the first time I attempted to square up my pergola headers, only to end up with a skewed, lopsided structure that made my entire outdoor project feel amateurish. That moment of frustration was a lightbulb moment for me—realizing that precision is everything when it comes to creating a clean, professional finish in carpentry. If you’ve ever faced similar struggles, you’re not alone. Many DIY enthusiasts and pros alike stumble at this crucial step, often relying on guesswork or imperfect measurements.
Today, I want to share with you a proven technique I came across called the T-Square Method for squaring up pergola headers. This approach has completely changed my game, saving me time, materials, and embarrassment. Whether you’re building a pergola from scratch or just aiming to improve your accuracy, mastering this method ensures your headers are perfectly aligned, which sets the foundation for a stunning look and structural integrity.
The Importance of Precise Headers in Pergola Design
Before diving into the method itself, let’s talk about why headers matter so much in pergola construction. Headers provide the main support for the structure, anchoring the beams and ensuring everything sits squarely and safely. If these aren’t aligned correctly, you risk uneven weight distribution, wobbling, and an unsightly appearance that screams DIY botch instead of professional craftsmanship. A well-squared header isn’t just about aesthetics—it’s about durability and safety too. Plus, when your headers are cut and positioned correctly, it simplifies installing other components like rafters and decorative elements.
So, how do you ensure those headers are perfectly squared every time? That’s where the T-Square Method shines. It’s a simple yet effective technique that hinges on a basic carpenter tool, but it requires a strategic approach that I wish I knew when I first started. Trust me, this method will give you peace of mind, knowing that your pergola headers are aligned to perfection.
Have you ever struggled with getting headers square, only to end up making adjustments later? If so, you’re in the right place! The key is to understand how to leverage tools and measurements in a way that minimizes errors from the start. I learned this lesson early in my projects, and I want to help you avoid the same mistakes.
Supporting this, a study by the National Association of Home Builders highlights that layout accuracy at initial stages significantly impacts the overall quality and longevity of outdoor structures. Implementing precise techniques like the T-Square Method isn’t just about neatness; it’s about building smarter and stronger.
Stay tuned, because in the next sections, I’ll walk you through the step-by-step process of applying this method to your pergola headers. By the end, you’ll have a reliable way to achieve perfect alignment and elevate your outdoor projects to a professional level. Ready to master your next build? Let’s get started.
Set Up Your Bench and Mark Your Centerlines
Begin by placing the header board on a stable work surface. Use a carpenter’s pencil to mark the centerline accurately, aligning it with your planned measurement from the building. In a previous project, I once used a makeshift table, and a slight wobble caused my lines to shift—highlighting the importance of a stable setup for precision.
Align the T-Square and Transfer the Markings
Position your T-square along the centerline, ensuring it’s flush with the edge of the board. Draw a perpendicular line across the width of the header, creating a reference point for square. I once neglected this step and ended up needing to redo the cuts, wasting time and material. Ensuring the T-square is square to your centerline is crucial—use a level or a framing square to double-check.
Measure and Mark the Cut Lines
Mark the cut points on both ends of the header, referencing the perpendicular line you drew. Use a tape measure to verify the distance, and transfer these points to the edges of the board. This systematic approach eliminates guesswork, unlike my early attempts where I eyeballed the cuts, leading to uneven headers.
Cut with Confidence
Set your saw to the correct angle and firmly cut along the marked lines. If using a circular saw, clamp a straight edge as a guide. Once I clamped a straightedge to my workpiece, my cuts became cleaner and more accurate, giving my pergola a crisp, professional look. Remember, slow and steady cuts prevent splintering and inaccuracies.
Double-Check and Adjust
After cutting, temporarily place the header in position. Use a carpenter’s square to verify that it’s perfectly aligned. If minor adjustments are needed, trim small amounts rather than forcing the fit. In one instance, I gently sanded down a slightly oversized cut, saving the header from being discarded.
Secure the Header and Confirm Level
Once satisfied with the fit, fasten the header securely. Use a level to ensure your header is perfectly horizontal. If you’re working on an uneven surface, shim under the supports before fixing. I learned the hard way that a crooked header can throw off the entire structure, emphasizing the value of this step.
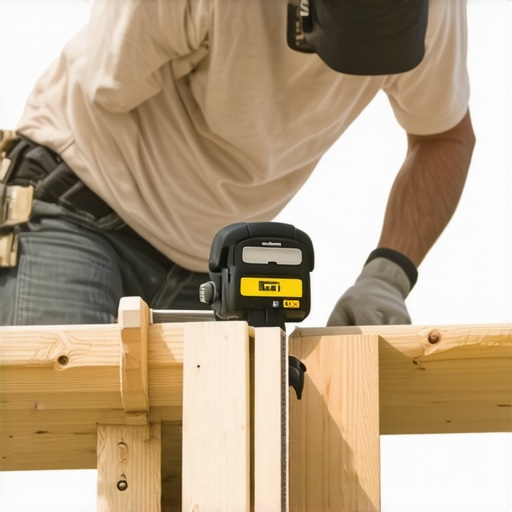 Many homeowners and DIY enthusiasts often fall into the trap of oversimplifying pergola and deck design, leading to costly mistakes and subpar results. One widespread myth is that composite decking is entirely maintenance-free; in reality, overlooking regular cleaning and inspections can cause premature wear. For example, I once neglected to seal my composite boards, which resulted in surface staining—an avoidable issue that emphasizes the importance of understanding material-specific care. When planning railing systems, it’s common to assume that any standard design will meet safety codes, but in truth, each local regulation may have nuanced requirements on baluster spacing and load ratings, as detailed in expert guides like the one on railing safety standards. An advanced oversight involves misjudging the drainage and ventilation around pergolas; neglecting airflow can trap moisture, leading to rot and structural compromise over time. This is often overlooked because many builders assume that a sloped roof or open sides automatically correct moisture issues, but as studies show, proper drainage planning is crucial in extending your structure’s lifespan (see here for details).
What about advanced deck design techniques—are there hidden pitfalls professionals avoid?
One sophisticated consideration is the precise calculation of joist spans and material strength, which many overlook in favor of simpler layouts. This can lead to sagging or even failure under heavy loads, especially when supporting hot tubs or built-in planters. According to structural engineers, misjudging these elements significantly weakens the overall deck integrity (learn more). Also, the choice of railing systems often assumes aesthetics are the primary concern, but advanced designs factor in wind load and slip resistance, which are critical for safety—reference the comprehensive railing selection guide for insights. Missteps here can cause rattling, loosening, or failure during storms. To ensure your project aligns with best practices, always consider these nuanced details rather than relying solely on common assumptions. Have you ever fallen into this trap? Let me know in the comments.Maintaining your pergola and composite decking systems is essential to preserve their appearance and structural integrity over time. The right tools can make all the difference, enabling you to perform inspections, cleaning, and minor repairs efficiently. I personally rely on a combination of high-quality power washers, precision screwdrivers, and specialized cleaning solutions tailored for composite materials to keep my outdoor structures in top shape.
Invest in Reliable Cleaning Equipment
When it comes to cleaning, a professional-grade pressure washer with adjustable PSI settings is invaluable. I recommend a model with variable pressure controls to prevent damaging the composite surface. Using a soft-bristle deck brush paired with a mild, composite-friendly cleaner helps remove stains and debris without scratching or dulling the finish. Regular cleaning not only keeps your deck looking fresh but also prevents the buildup of mold and mildew, which can compromise material longevity.
Select Precise Repair and Maintenance Tools
For repairs, I swear by a Cordless Drill with an assortment of driver bits. It allows quick tightening of loose fasteners on railing systems and pergola brackets, especially when updating or modifying your setup. Additionally, a reputable level and carpenter’s square are essential for ensuring structural components remain aligned after years of exposure to the elements. A good quality moisture meter can also alert you to hidden rot or water intrusion before visible damage occurs, aligning with recommendations from structural engineers to catch issues early.
Leverage Technology for Long-Term Monitoring
Beyond physical tools, modern solutions like moisture sensors and smart maintenance apps are shaping the future of outdoor structure care. These devices can send real-time alerts to your phone if humidity levels rise in critical areas, enabling preemptive action. Combining traditional tools with smart technology ensures comprehensive oversight, extending the lifespan of your pergola and deck.
Make Routine Checks Part of Your Maintenance Routine
Performing seasonal inspections with these tools allows early detection of issues like loose fasteners, warping boards, or compromised railing connections. Applying protective sealants periodically, especially on wood elements, adds an extra layer of defense against moisture infiltration and UV damage. I recommend scheduling a comprehensive inspection at least twice a year, taking advantage of well-calibrated tools to identify problems before they escalate.
Where Future Trends Are Heading
As technology advances, expect increasingly autonomous monitoring solutions—such as solar-powered drones or AI-driven visual inspections—that could revolutionize outdoor structure maintenance. Staying informed about emerging tools will help you adopt innovative strategies, ensuring your outdoor spaces remain safe and beautiful for years to come. If you’re interested in deepening your maintenance game, I suggest starting with smart moisture sensors—they are a game-changer in early detection of hidden damage. Take the step today to integrate technology into your upkeep routine and enjoy long-lasting, stunning outdoor spaces. For more guidance on selecting the right railing systems for safety and style, check out this comprehensive railing safety standards guide.
Lessons Hidden Behind My Pergola Missteps
One of the hardest lessons I learned was how tiny measurement errors can ripple into major misalignments, creating a structure that feels off from every angle. I once skipped triple-checking my angles, only to spend hours adjusting and trimming, realizing that patience and consistent verification are your best friends in pergola building. Another insight was the importance of proper tool calibration; an unbalanced saw led me to uneven cuts and wasted material, reminding me that investing in quality and maintenance saves time and frustration.
Finally, I discovered that understanding material behavior, especially in varying weather, prevents future headaches. Wood expands and contracts, so factoring in allowances during measurements ensures your pergola stays perfect over the years. These personal lessons emphasize that every mistake in precise measurements teaches patience, attention to detail, and the value of quality tools—fundamentals that elevate your outdoor projects from amateur to professional.