
I vividly remember the day I installed my first deck and overlooking the intricacies of railing post placement. It seemed straightforward at first—two posts at each corner, a few along the sides, and I was done. But when I finally stepped back to admire my handiwork, I noticed a disconcerting wobble at the stairs. Turns out, I hadn’t paid enough attention to the crucial detail: the 3-foot rule for railing posts near stair ends. That lightbulb moment taught me a vital lesson in safety and design that I wish I knew from the start.
Why Proper Railing Post Placement Matters More Than You Think
Whether you’re building a new deck or updating an existing one, understanding the rules around railing post placement isn’t just about following building codes—it’s about ensuring your outdoor space is safe for family and friends. The 3-foot rule, a simple guideline used by professional builders, dictates how close posts should be placed near stair ends to prevent wobbling, buckling, or worse, railing failures that could lead to injuries. Ignoring this can cost you in repairs, safety hazards, or insurance headaches down the line.
Is the 3-Foot Rule Really That Important?
Absolutely. Early in my project, I underestimated the importance of adhering strictly to this rule. I thought it was just a typical guideline, but I soon learned that improper placement can compromise the stability of your railing, especially at stair ends where the railings endure more stress. According to professional standards, misplacing or spacing posts incorrectly can cause safety risks, and in some cases, result in code violations that might prevent you from passing inspections or even using your deck legally. Understanding this rule saves money, prevents accidents, and ensures you meet local regulations. If you’re unsure whether your railing meets safety standards, don’t hesitate to contact experts who can assess your setup, or explore more about safe railing practices [here](https://deckforgebuilders.com/the-complete-guide-to-choosing-railing-systems-for-safety-style).
Lay Out Your Deck Framework Precisely
Start by measuring your deck area, marking where each post will go. Use a chalk line or painter’s tape to visualize the layout, especially around stairs and corners. I once used a laser level to double-check my measurements, which saved me from costly adjustments later. Ensuring your posts are correctly spaced upfront sets a solid foundation for safety and aesthetics.
Apply the 3-Foot Rule Near Stair Ends
Identify the stair stringer locations, then mark the points within 3 feet of stair landings. These spots require extra reinforcement to prevent wobbling. Use a tape measure to verify distance, and double-check your markings. I found that placing temporary stakes helped me visualize these critical points, leading to more accurate post installation. This approach is vital to meet safety standards and maintain structural integrity.
Use Proper Tools for Accurate Drilling
Equip yourself with a power drill, level, and adjustable post brackets. Drill pilot holes at marked points, ensuring the drill bit matches the post anchors. Level each post during installation; a small bubble level attached to your drill guide can expedite this. Once, I neglected to level one post, resulting in uneven railing—so take your time. Precise drilling and leveling ensure your railing remains sturdy and safe.
Secure Posts with the Right Fasteners
Choose corrosion-resistant anchors or bolts suitable for your material—galvanized or stainless steel work best. Pre-drill holes for the screws to prevent splitting. When attaching posts, tighten fasteners securely but avoid over-tightening, which can cause damage. I recommend using structural screws over lag bolts for a more secure fit, especially in high-stress areas like stair ends. Proper fastening guarantees durability and safety.
Confirm Post Alignment and Spacing
After installing all posts, use a string line or chalk line to check alignment. Measure distances between posts to confirm consistent spacing, typically 4 feet apart. Any deviations can lead to an uneven railing or hazardous wobbling. I once had to redo a post because I didn’t re-measure after drilling; it’s better to verify multiple times during the process than risk a wobbly railing down the line. Consistent post placement is crucial for both look and safety.
Finalize with Railing Attachment and Inspection
Once posts are securely in place, attach your railing system according to manufacturer instructions. Check that each section is level, securely fastened, and meets local code requirements. Perform a stability test by gently pushing on the railing; it shouldn’t wobble or creak. During my last project, double-checking all fasteners and alignment prevented future safety issues. Careful installation here ties everything together, ensuring a safe, durable finish.
Many homeowners embark on outdoor projects believing they’ve mastered the basics, but the real challenges and pitfalls often lie in overlooked details and misconceptions. One widespread myth is that composite decking requires no maintenance—while it’s low-maintenance compared to natural wood, understanding its material nuances can prolong its lifespan. For instance, some assume that all composite boards are equal; in reality, solid-core varieties outperform hollow counterparts in cold climates, resisting warping and scratching better, as noted in expert studies.
Another common mistake involves railing systems. Many think that any railing is suitable for every deck, but the choice of fasteners and anchoring methods significantly impacts safety and durability. Using the wrong fasteners or ignoring proper attachment techniques can lead to loose railings, increasing safety risks. Dive into the best practices here to ensure your outdoor safety remains uncompromised.
On pergola design, a frequent oversight is neglecting diagonal bracing, which can cause structural sagging over time. Modern trends emphasize sleek aesthetics, but functional reinforcement remains crucial—a tip often missed by DIY enthusiasts. For creative inspiration and to avoid such pitfalls, explore innovative design ideas that balance style and stability.
A particularly tricky area is dealing with composite board scratches and surface damage. Many believe that surface scratches are unavoidable or only aesthetic, but using the right cleaning techniques, like the sandpaper trick or specific cleaning products, can significantly extend the aesthetic life of your decking. For example, materials like PVC decking are more resistant to scratches and stains, making them suitable for high-traffic areas.
Advanced builders should also consider the importance of proper spacing and alignment, especially near critical points like stair landings or curves. Small errors can cause uneven surfaces or safety hazards. Incorporating tools like the tension check method or spacing blocks, as discussed in detailed guides, can prevent common errors.
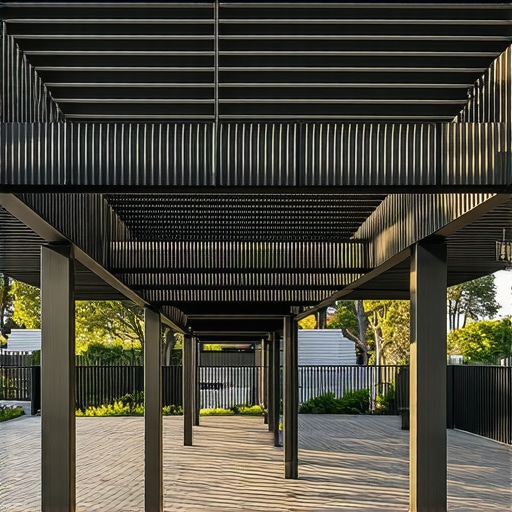
It’s easy to fall into these traps if you’re not aware of the subtleties involved in high-quality outdoor construction. Remember, the goal isn’t just a beautiful yard but a safe, durable, and functional space that stands the test of time. Curious if you’ve ever fallen into these common misconceptions? Share your experiences in the comments, and let’s learn together!
Keep Your Outdoor Space in Prime Condition
Ensuring your pergola, deck, or railing system remains functional and visually appealing requires the right tools and a solid maintenance routine. Investing in dedicated equipment streamlines the process and prolongs the lifespan of your structures. One essential tool I personally rely on is a high-quality digital angle finder. Precise angles are crucial for components like pergola rafters and posts, ensuring everything fits snugly and maintains structural integrity. I use a digital angle finder with a magnetic base, which allows me to double-check angles even in tight spots, saving me time and preventing miscuts.
For cleaning composite decking, I recommend a power washer with adjustable pressure settings. However, I always limit pressure to about 1500 psi to prevent surface damage. Pair it with a soft-bristle deck brush attachment for stubborn stains or mold. Regular cleaning with these tools helps prevent the buildup of grime and preserves the decking material’s appearance and durability. When dealing with scratches or surface imperfections, the sandpaper trick using a fine grit (at least 220) can significantly restore the surface—this is especially effective on PVC decking, which resists scratches better than other materials.
Maintaining your railing system is equally vital. A torque wrench is indispensable for ensuring all fasteners—especially deck screws and anchoring bolts—are tightened to manufacturer specifications. Proper fastening prevents wobbling and long-term loosening. Consider using a cordless impact driver with adjustable torque settings for quick, consistent work. Additionally, applying a marine-grade silicone sealant around post bases prevents water infiltration that can lead to rot or corrosion.
How do I maintain my pergola and deck for years of enjoyment?
Long-term results depend on consistent upkeep and choosing the right tools. For example, using structural screws instead of lag bolts, as recommended [here](https://deckforgebuilders.com/why-you-should-use-structural-screws-instead-of-lag-bolts), ensures your deck’s frame remains secure over time. Applying protective coatings or sealants tailored for your material—wood, composite, or metal—adds an extra layer of defense against weathering. I also suggest periodic inspection of all components, especially posts and fasteners, to catch issues early before they develop into costly repairs. Looking ahead, automation and smart monitoring systems are evolving; imagine a deck that self-detects loose fasteners or water leaks. Staying updated with these innovations can make maintaining your outdoor space even easier. Why not try the tension check method for cable railings to ensure long-lasting tension and safety? It’s a simple yet effective technique that prevents sagging and keeps your railing looking sharp for years.
The Hardest Lesson I Learned About Deck and Pergola Construction
One crucial insight I wish I had known from the start was the importance of precise post spacing near stairs and corners. Misjudging these measurements led to wobbly railings and extra work that could have been avoided with better planning and adherence to rules like the 3-foot guideline. This lesson taught me that investing time in accurate layout and understanding the subtle details can save significant effort and ensure safety.
Key Tools That Transformed My Building Process
Using tools like a digital angle finder and a tension check for cable railings made a noticeable difference. These tools helped me verify angles and tension accurately, preventing issues before they arose. I trust these because they provide consistent, reliable readings, which are vital for professional-looking, durable results. Incorporating specialized tools into your process can elevate the quality of your outdoor projects.
One Unexpected Barrier That Changed My Approach
I underestimated the complexity of proper fastener selection, thinking all screws and anchors were equal. Realizing the importance of using corrosion-resistant, structural screws and appropriate anchors for each material was a game-changer. Proper fastening not only enhances safety but also prolongs the lifespan of your deck or railing system, which is why investing in quality fasteners is worthwhile.
Why Overcoming My Misconceptions Became a Game Changer
Initially, I believed that composite decking required no maintenance, but I learned that understanding its material nuances and cleaning techniques truly preserves its appearance and performance. Similarly, recognizing the significance of diagonal bracing in pergolas or ensuring correct joist spacing improved my project’s overall safety and longevity. These realizations emphasize that educating yourself about the details makes a tangible difference in outdoor construction.
My Top Recommendations for Building with Confidence
- Invest in a high-quality digital angle finder to ensure precise cuts and angles. I personally rely on models with magnetic bases for ease in tight spots.
- Use a tension check method for cable railings to prevent sagging and maintain safety over time. It’s simple but highly effective.
- Choose corrosion-resistant fasteners like galvanized or stainless steel, especially for stair ends and outdoor environments. They guarantee durability in harsh weather.
- Explore trusted resources such as pergola design inspiration and custom railing systems to expand your creative horizon and ensure structural integrity.
Your Next Deck or Pergola Awaits Your Expertise
Building or upgrading your outdoor space is a rewarding journey—one that combines safety, style, and personal satisfaction. Embracing the nuanced lessons, trusting the right tools, and investing in quality materials will help you create a deck or pergola that lasts and impresses. Remember, careful planning and attention to detail turn a good project into an extraordinary one. So go ahead—take that next step with confidence and bring your outdoor vision to life!