
Have you ever spent hours trying to align railing balusters, only to end up with a crooked mess that makes your entire deck look amateurish? I sure have. There was that weekend I decided to redo my deck’s railing, thinking it would be a quick project. But after several frustrating attempts, I realized my balusters were anything but straight. The worst part? I didn’t know about the vertical drill guide trick back then.
The Struggle of Achieving Perfectly Straight Railing Balusters
When I first started my DIY deck project, I naively believed that measurements and careful marking would be enough. Wrong. Without a proper guiding system, even a slight misalignment could turn your railing from stylish to slapdash. I learned the hard way that visual inspection alone isn’t reliable—what looks straight from afar can be crooked up close.
Most folks underestimate the importance of consistent spacing and alignment when installing balusters. That was my mistake early on: rushing through the process without a foolproof method. It turns out, a small variation in drill perpendicularity affects the entire appearance—and safety—of your railing. Did you know that misaligned balusters can compromise safety standards? According to the American Society of Testing Materials (ASTM), proper spacing and alignment are crucial for safety and compliance.
But don’t worry—I found a solution that transformed my approach and, honestly, made my installation process much more enjoyable. That solution is the vertical drill guide trick: a simple yet powerful technique that ensures perfectly straight balusters every time. Today, I’ll share how you can master this trick and elevate your railing game.
Overcoming Skepticism: Is the Vertical Drill Guide Really Effective?
When I first heard about using a vertical drill guide, I was doubtful. I thought, “How much difference can one guide make?” That was until I made the mistake of skipping this step and ended up re-drilling multiple balusters. The key is in consistency—getting your drill perpendicular to each baluster and maintaining that orientation throughout. Trust me, I’ve been there. If you want to avoid the hassle and achieve professional-looking results, mastering this trick is worth it. Curious about more tips? Check out comprehensive guides on how to select the right railing system.
In the next sections, I’ll walk you through the step-by-step process of setting up your vertical drill guide—no special tools required—so you can enjoy a flawless finish on your next railing project. Ready to get started? Let’s dive in and turn those crooked balusters into a thing of beauty.
Set Up Your Work Area and Tools
Start by clearing your work area, ensuring a flat, stable surface. Gather necessary tools: a drill, a level, measuring tape, clamps, a pencil, and a straight edge or spacer block. For my project, I used a scrap piece of wood as a spacer to maintain consistent spacing between balusters, which proved invaluable during alignment.
Mark Your Baluster Positions Accurately
Measure and mark the positions for each baluster along the top and bottom rails, using the measuring tape and pencil. Double-check spacing for uniformity. I recommend laying out all marks first, so you visualize the entire railing before drilling. A common mistake is rushing this step, leading to uneven gaps.
Clamp a Guide or Spacer to Keep Consistent Spacing
Attach a straight edge or spacer block at the designated spacing points—say, 4 inches apart—clamped firmly to the rails. This ensures each mark for drilling aligns perfectly. I once used a scrap of 1×4 lumber clamped along the rail, which kept my drill bit consistently positioned for each hole, drastically reducing errors.
Align the Drill Perpendicular for Clean Holes
Position your drill bit perpendicular to the surface. To verify, hold the level against the drill, or use a carpenters’ square as a visual guide. This step is crucial; tilting the drill causes misaligned balusters. During my initial attempt, I neglected this and ended up re-drilling, which wasted time and material.
Master the Technique: Use the Vertical Drill Guide
For the core of this method, create a simple guide: take a scrap piece of wood with a hole drilled through it, matching the diameter of your drill bit. Clamp this guide to the baluster at the marked position. The guide acts as a physical barrier, ensuring the drill stays perfectly perpendicular. I found that even a makeshift cardboard template with a pre-cut hole worked well—cost-effective and adjustable.
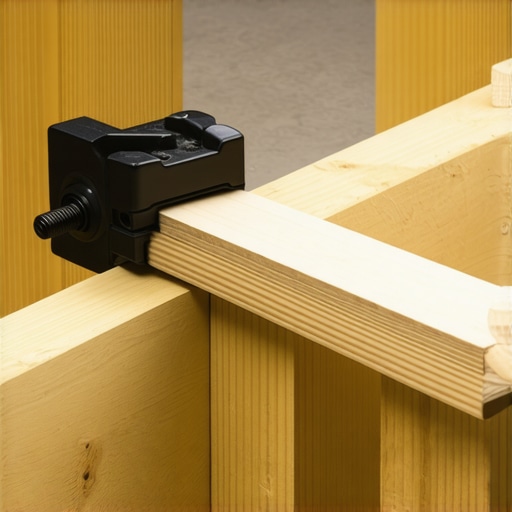
This setup minimizes tilt and helps you drill straight through the baluster, maintaining uniformity across all posts. Over time, I refined this process by marking a perfect perpendicular line on my drill chuck, which served as a quick reference for future projects.
Drill Smooth and Steady
Apply steady pressure and drill at a moderate speed. Avoid forcing the drill; let the bit do the work. A wobbly motion often leads to crooked holes, as I experienced when rushing through a large project. Using a drill that has a clutch helps prevent over-penetration, protecting the wood and ensuring safety.
Check Alignment and Adjust as Needed
After drilling each hole, verify the alignment by inserting the baluster temporarily. If you notice any deviation, adjust your guide or re-drill. Consistent practice enhances precision. Remember, patience yields professional results—a crooked baluster can compromise the aesthetic and safety of your railing.
Repeat and Maintain Consistency
Proceed systematically along the entire railing, using your guide setup. Stick to the same process for each baluster, which ensures uniform spacing and alignment. Trust me, the effort in setting up correctly pays off with a sleek, professional-looking finish that enhances your outdoor space, whether you’re upgrading your deck or adding a new pergola – check out pergola design trends for inspiration.
While many DIY enthusiasts and even professionals share tips on installing composite decking, pergolas, and railing systems, there’s a deeper layer of nuances often overlooked. Contrary to popular belief, simply choosing the most popular or affordable materials isn’t enough to guarantee a long-lasting, visually appealing outdoor structure. One common myth is that all composite decks are maintenance-free; in reality, selecting premium, UV-resistant, and properly installed composite boards significantly extends your deck’s lifespan, as detailed in this guide on longevity tips.
Another trap many fall into is neglecting the importance of proper framing and support systems. A deck might look perfect initially but can warp or squeak over time if the substructure isn’t engineered correctly. For instance, insufficient joist spacing can cause excessive flex and deterioration, especially in high-moisture zones like pools or coastal areas. Experts emphasize that understanding the local climate and load requirements is critical, as outlined in this article on deck support fundamentals.
When it comes to pergolas, there’s a misconception that their design complexity equals higher cost. However, strategic use of diagonal bracing and weatherproofing techniques can make even intricate designs affordable and durable. Be wary of common mistakes like ignoring drainage considerations for pergola roofs, which can lead to water pooling and rot. For modern designs, incorporating louvered roof systems not only enhances functionality but also adds a sophisticated touch—see this resource on louvered options.
In railing systems, a prevalent mistake involves installing balusters or panels with gaps that compromise safety or visual appeal. It’s tempting to prioritize speed, but meticulous measurement and understanding of code requirements—such as the 3-4 inch spacing limit—are vital. Advanced installers ensure safety and aesthetics by verifying perpendicular drillings and consistent spacings, which can be challenging on sloped terrains. For comprehensive safety standards, refer to this complete guide.
One aspect often underappreciated is the hidden stress points within these structures. Over time, hardware like joist hangers or fasteners can loosen or corrode if installations neglect manufacturer’s specifications or environmental factors. Using structural screws instead of lag bolts, especially in seaside locations, can dramatically improve longevity—as discussed in this detailed comparison.
Let’s dig deeper into one advanced question that trips up many: How does understanding weather patterns influence the choice of materials and design for outdoor structures? Recognizing the impact of freeze-thaw cycles and high UV exposure leads to smarter material selection and enhanced durability. For example, selecting composite boards with proven UV stabilization and metal hardware resistant to corrosion can prevent costly repairs.
Paying close attention to these hidden factors and nuances can transform your outdoor project from an average build into a professional masterpiece. Have you ever fallen into this trap? Let me know in the comments, and share your experiences or questions about mastering these advanced aspects.
Maintaining your outdoor structures isn’t just about quick fixes; it requires the right tools and methods to ensure longevity and safety. One essential tool I personally swear by is a digital angle gauge. Unlike traditional bubble levels, a digital angle gauge gives precise readings, ensuring your posts and railings stay perfectly aligned over years. I use it during every project to verify angles before drilling, which drastically cuts down on misalignments and rework. For software, I recommend SketchUp for deck and pergola planning. Its intuitive interface allows me to visualize complex designs, adjust measurements in real-time, and plan reinforcement points—saving time and materials in the long run. As trends lean toward low-maintenance materials, mastering digital planning tools offers a significant advantage in executing durable designs efficiently.
Looking ahead, I predict an increase in using smart sensors integrated into deck and pergola structures. These sensors can monitor wood movement, weather exposure, and even load stress, alerting homeowners before issues arise. Embracing these advancements now can make your maintenance routine more predictive and less reactive.
How do I keep my outdoor structures in tip-top shape over time?
Regular inspections are key. I schedule a thorough check each spring, focusing on fastener integrity, wood condition, and drainage channels. For fasteners, I prefer structural screws, which resist corrosion longer and hold stronger, especially in seaside environments—learn more about their benefits here. Using a cordless impact driver with a clutch ensures you don’t overtighten, preventing wood splitting. I also keep a supply of high-quality wood preservative and weatherproofing stains, applying them every few years to preserve the integrity of your wood components.
To streamline ongoing maintenance, I swear by a simple but effective method: applying a brightly colored chalk line along critical fastener points after each inspection. It’s a visual cue to check those spots sooner rather than later, preventing small issues from turning into costly repairs.
Incorporating Tool Efficiency for Longevity
Investing in a good cordless drill and an impact driver is non-negotiable. High-quality bits, such as cobalt or titanium, stay sharper longer, enabling more precise work over time. When drilling through composite decking, I switch to a screw bit with a built-in stopper for consistent depth, which reduces the need for post-installation adjustments. Additionally, I keep a spray lubricant handy—like silicone spray—to protect moving parts of hinges or adjustable brackets, extending their lifespan. Proper storage of tools in a dedicated, dry toolbox prevents rust and maintains their accuracy, which is vital for long-term projects.
The future of outdoor maintenance will likely include IoT devices, allowing homeowners to monitor structural health remotely. Currently, integrating simple sensors along critical load points can warn you about differential settling or material fatigue—saving you from unexpected failures. For now, combining meticulous manual inspections with the right tools, like a digital angle gauge and quality fasteners, offers the best line of defense. Try incorporating a digital planning tool into your next project, and you’ll see how it elevates your precision and confidence in the long run.
The Hardest Lesson I Learned About Deck and Pergola Projects
One of my biggest epiphanies was realizing that patience and meticulous preparation trump speed every time. Rushing led me to costly rework, especially when it came to aligning pergola beams or ensuring even spacing in railings. I discovered that taking the extra time to measure twice, double-check angles, and set up aligned guides transformed my results from mediocre to professional-looking. This lesson taught me that investing effort upfront—like creating custom spacers or using a digital angle gauge—pays dividends in the finish and longevity of outdoor structures.
Tools and Resources That Changed My Approach
Over the years, I’ve relied on specific tools that truly make a difference. A high-quality impact driver with adjustable clutch allows me to fasten components securely without overdriving or damaging material, especially in composite decking. I trust structural screws for their durability. For planning, deck design software gives me a clear visual of layouts, helping me anticipate potential issues. Finally, my digital angle gauge and a good set of spacer blocks help achieve perfect precision, saving me headaches and material costs in the long run.
Embracing the Courage to Start and Improve
Building or upgrading your outdoor space is more than just a project—it’s an investment in your happiness and home value. If you’re hesitant about tackling complex features like custom pergola designs or intricate railing layouts, remember that every expert started where you are now. Take that first step, armed with the right techniques—like mastering the vertical drill guide trick—and a mindset ready to learn. Your outdoor sanctuary is within reach. So, why wait? Dive in, experiment, and don’t be afraid to make mistakes—they’re just stepping stones to excellence. Ready to transform your backyard into a personal oasis? Share your plans or questions below—I’d love to hear about your journey.