
I remember standing in my backyard three years ago, staring at a massive, steaming hot tub sitting on a temporary pad while my half-finished deck looked like a ribcage around it. I had the saw in my hand, ready to notch out a main joist to make it fit ‘perfectly.’ My gut stopped me. If I cut that joist, I wasn’t just making room; I was inviting a structural collapse. It was a cold realization that most DIY guides don’t tell you the truth about the sheer weight of 400 gallons of water plus people. One wrong cut and that relaxing soak becomes a very expensive date with a contractor.
Stop Hacking Away at Your Deck’s Backbone
The first time I tried to integrate a spa into a custom deck design, I followed a popular tutorial that made ‘notching’ look like a five-minute job. Six months later, I noticed a subtle, sickening dip near the stairs. That ‘quick fix’ turned into a structural vulnerability assessment that cost me three times the price of the tub itself. We often get so caught up in the aesthetics of modern outdoor living that we forget physics is a harsh critic. A standard hot tub, once filled, can easily weigh over 5,000 pounds. According to the structural guidelines from the American Wood Council, a typical deck is built for 40-50 pounds per square foot, but a hot tub requires a foundation that can handle 100 to 150 psf minimum. When you cut a joist, you’re not just ‘making space’—you’re amputating the load-bearing capacity of your entire platform. I’ve learned that the joist tape secret for doubling your deck’s life is a great tip, but no amount of tape can fix a compromised beam. Today, I’m going to show you how to frame a dedicated opening that allows the tub to sit on its own reinforced concrete pad while your deck floats seamlessly around it. This keeps your low-maintenance composite decking stable and your warranty intact.
Is it actually possible to get a flush look without the structural risk?
This is the biggest pushback I get from my neighbors. They want that sleek, ‘built-in’ look where the deck boards meet the tub lip perfectly. They assume the only way to get there is to drop the tub into the deck’s framework. But here is the lightbulb moment: you don’t need to cut the backbone; you just need to use the cantilever move for creating floating deck appearances. By building a separate sub-structure and letting the decking overhang slightly toward the tub, you get that high-end look without the terrifying bouncy feeling of a weakened frame. I once made the rookie mistake of trusting a single header to carry a double-joist load. It squeaked for years until I finally tore it out. Have you ever felt that suspicious ‘give’ under your feet when walking near a heavy planter or hot tub? If you’re nodding your head, we need to talk about proper framing before you touch that saw. Reach out on my contact page if you’re stuck in the planning phase—I’ve been there, and I’d rather you learn from my mistakes than repeat them. Let’s be real: your deck is your sanctuary. Whether you are looking at pergola designs that turn your garden into a sanctuary or just a simple spot for a morning coffee, the foundation is everything. Cutting a joist is like taking a brick out of the bottom of a chimney; it might stay up today, but you won’t want to be there when the weight is actually applied. [IMAGE_PLACEHOLDER]
Ditch the Joist Cutting and Build an Independent Foundation
The secret to a deck that doesn’t collapse under a spa is realizing the tub and the deck should never actually touch. I once spent three days fighting a slight half-inch slope on a client’s concrete pad. I considered using the shim trick for leveling, but I knew that with 5,000 pounds of pressure, those shims would eventually crush. We ended up pouring a self-leveling topper to get it perfect. Your first move is to pour a reinforced concrete pad that sits exactly at the height needed so the tub lip will eventually hover just above your finished boards. This separates the vibration of the pumps from the rest of your home and ensures the structural reason your deck needs a mid-span beam isn’t complicated by uneven hot tub weight.
Why Your Pad Must Be Independent
When you link the two structures, the natural expansion of wood and the settling of the tub work against each other. I’ve seen decks literally pull away from a house because a heavy spa shifted an inch in the mud. By keeping them separate, you allow for ground movement without stressing your innovative deck design. If you are worried about the gap looking ugly, you can always use the best way to hide ugly concrete deck footings with stone to dress up the visible base.
Master the Double Header for Structural Peace of Mind
Once the pad is set, you need to frame a ‘box’ around where the tub will sit. This is where you apply the double header move. Instead of just running single joists to the edge of the opening, you install two thick beams (headers) across the cut joist ends. This transfers the weight of the people walking around the tub back to the main posts. I remember a project in 2021 where we didn’t use double headers for a smaller ‘soaking’ tub; within a month, the modern outdoor living space felt like a trampoline every time someone walked past the water. Never skip the extra lumber here. 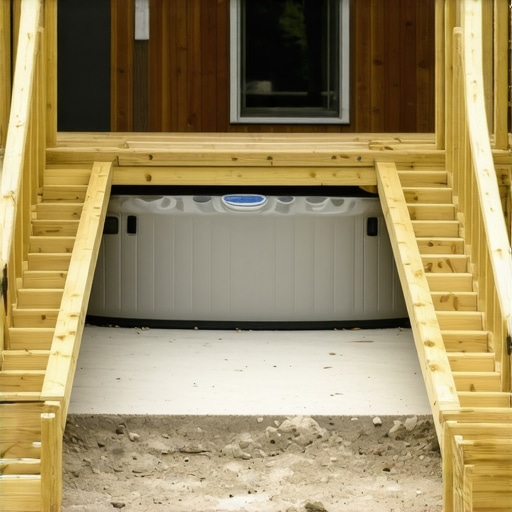
How to Fake the Built-In Look Using a Cantilever
To get that high-end, flush finish without the tub resting on the wood, you need the cantilever move for creating floating deck appearances. Run your joists toward the tub, but stop them about 2 to 3 inches short of the spa’s acrylic shell. When you lay your low-maintenance composite decking, let the boards overhang that last joist. This ‘floating’ edge hides the gap and the concrete pad below, making it look like the tub was dropped into the floor. Just make sure you use the string line trick for leveling deck joists before you fasten anything, or that overhang will look like a set of crooked teeth.
Anchor Your Railings Without Compromising Access
Safety is the last piece of the puzzle. You’ll need a railing system for safety and style that doesn’t block the view of the water but keeps people from falling into the ‘gap’ during the build. Use the double nut secret for rock-solid railing posts around the perimeter of the tub area. This is especially vital because people naturally lean on the railings while talking to those inside the water. If you’re still deciding on materials, how to select the perfect railing system often comes down to maintenance; stay away from wood near the splash zone to avoid constant sanding and staining.Let’s dig deeper into the stuff that most ‘weekend warrior’ videos gloss over because it isn’t pretty. One of the most persistent myths I see in the innovative deck design community is that composite decking is a ‘set it and forget it’ material. While it is true that you won’t be staining it every spring, I’ve seen gorgeous layouts ruined because the builder didn’t account for thermal expansion. Everyone says the boards are stable, but in reality, a 20-foot board can expand up to half an inch in direct sun. If you don’t know why dark composite boards need extra expansion space, your expensive picture-frame border will eventually buckle or push your railings out of alignment. I learned this the hard way on a South-facing project where the boards grew so much they actually snapped the hidden fasteners right out of the joists. Have you ever fallen into this trap where your ‘perfect’ gaps disappeared by July? Let me know in the comments, because it’s a heartbreak I’d like to help you avoid.
Why do even seasoned pros struggle with structural deflection near heavy spans?
Most people assume that if the deck doesn’t collapse, it’s built correctly. But ‘bounciness’ is a sign of long-term failure. The International Residential Code (IRC) specifies clear deflection limits, but when you add a 5,000-pound spa or a heavy timber pergola, those standard tables go out the window. If you aren’t calculating for L/360 deflection, your low-maintenance composite decking will feel ‘spongy,’ leading to micro-cracks in the core over time. This is exactly the structural reason your deck needs a mid-span beam—not just to hold weight, but to eliminate the vibration that kills the luxury feel. 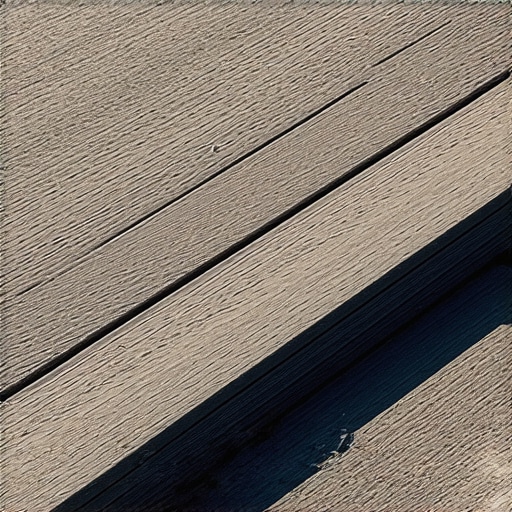
Stop Obsessing Over Hidden Fasteners in High-Traffic Zones
Here is my contrarian take: stop using hidden fasteners everywhere. I know, they look sleek. But for the stairs and the areas immediately surrounding your hot tub, they are a liability. Water and heavy foot traffic cause the boards to shift more than a clip can handle. I’ve transitioned back to color-matched top screws for high-impact zones because why hidden fasteners fail on high traffic areas isn’t just about aesthetics; it’s about safety. A loose board near a water feature is a trip hazard waiting to happen. If you want that clean look, use the ‘plug’ method instead. It’s more work, but it’s the hallmark of composite decking secrets and longevity tips that actually work.
The Pergola Trap That Most Builders Ignore
When you’re dreaming of pergola designs that turn your garden into a sanctuary, don’t just think about shade. Think about ‘uplift.’ Most DIYers focus on how much weight the deck can hold up, but they forget that a pergola acts like a giant sail in a storm. According to the Insurance Institute for Business & Home Safety, wind uplift is one of the leading causes of deck-attached structure failure. You need more than just a few screws through the decking. You need the hidden blocking move for supporting heavy pergola beams to tie that structure directly into the house frame or the primary deck posts. Simply bolting a 6×6 to a piece of composite is a recipe for a backyard disaster. If you’re feeling overwhelmed by these technicalities, hop over to my contact page and we can look at your specific layout together.
If you have followed my advice so far, you have a deck that is structurally sound and looks incredible. But here is the thing about high-end outdoor spaces: the difference between a project that looks great for two years and one that stays perfect for twenty is the gear you use to maintain it. I’ve seen homeowners drop fifteen grand on materials and then try to maintain them with a cheap pressure washer and generic cleaning chemicals. That is a recipe for disaster. One of the biggest mistakes people make is using harsh chemicals; you should realize why you should never use bleach on composite decks if you want to keep the protective cap intact. Bleach eats away at the UV inhibitors, and before you know it, your ‘lifetime’ boards look like sun-bleached driftwood.
Precision Tools That Make the Maintenance Grind Easier
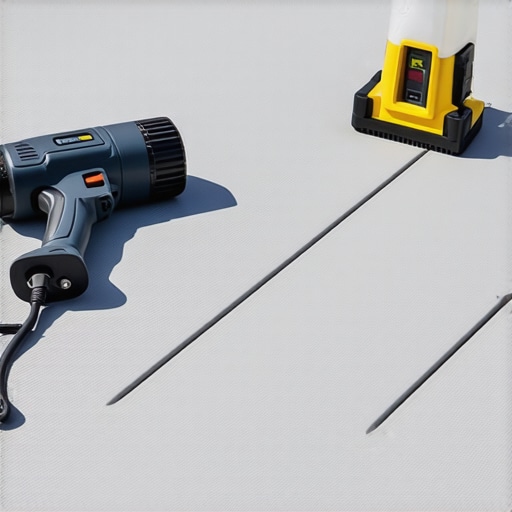
When I am finishing a project, I don’t just pack up my saws and leave. I keep a ‘maintenance kit’ in my truck that includes a high-powered heat gun and a quality laser level. Why the heat gun? Because life happens. Someone is going to drag a metal chair across your floor, and you will need to know how to fix scuffs on dark composite boards with a heat gun to blend those marks back into the grain. It feels like magic when the scratch just disappears. For the structural side, I swear by my Bosch GLL3-330CG laser. String lines are great for the initial layout, but wood moves. Every spring, I do a quick sweep with the laser to ensure no settling has occurred. If you see a dip, it is better to catch it while it is a quarter-inch problem rather than a structural failure. I also suggest keeping a dedicated kit for spills. Knowing how to clean red wine stains off composite decking fast can save your Friday night when a party gets a little too lively.
How do I keep my composite deck looking brand new for a decade?
The secret is proactive protection rather than reactive scrubbing. Every fall, I perform what I call the ‘detritus sweep.’ You need to master the secret to preventing leaf rot between deck boards by clearing out the gaps. If wet organic matter sits in those gaps all winter, it creates a localized swamp that can rot even the best pressure-treated joists underneath. This is also the time to apply the pvc trim move for protecting exposed deck joist ends. By capping those vulnerable ends, you stop moisture from wicking into the grain. According to the North American Deck and Railing Association (NADRA), over 40 million decks in the U.S. are over 20 years old and in need of replacement or major repair. Don’t let yours become a statistic simply because you skipped a ten-minute cleaning routine. I’ve found that composite decking secrets and longevity tips are mostly about managing water and heat expansion.
The Future of Outdoor Living is Integrated and Intelligent
Where is the industry going? We are moving past just ‘boards on posts.’ The next five years will be dominated by ‘smart’ decks with integrated sensors for weight load and moisture. Imagine your deck sending an alert to your phone because the humidity levels under the boards are too high, indicating a drainage issue. We are already seeing this with low-voltage lighting systems. I always use the flashlight hack for finding railing bracket alignment when installing post-cap lights, but soon, these systems will be fully automated. If you are building today, run extra conduit. It is cheap now, but it will be a lifesaver when you want to add automated screens to your pergola designs next year. If you want to really level up, try the heat gun scuff-fix trick on a scrap piece of board today—it is the single most empowering ‘pro’ skill you can learn for maintaining a composite space. If you’re still stuck on the technical details, feel free to reach out via my contact page.
The Expensive Lessons Only a Sledgehammer Can Teach
After years of framing, I’ve realized that the ‘perfect’ deck isn’t about the day it’s finished, but the day it survives its first decade. I once thought that tight gaps were a sign of quality, but now I know that’s just a recipe for buckling. If you’re building in the sun, you absolutely must understand why dark composite boards need extra expansion space. Another hard truth? Most people ignore the stairs until the end, but a bouncy step ruins the luxury feel instantly. I always use the diagonal bracing secret for ultra stiff deck stairs to ensure that solid, commercial-grade feel. Lastly, never trust a railing that passes a visual check; if it doesn’t survive the 3-second push test for wobbly railing systems, it isn’t ready for your family.
The Pro-Grade Kit That Saves My Reputation
I don’t leave my workshop without a few specific items that ensure a high-end finish. First is a heat gun, which is the only way to effectively learn how to fix scuffs on dark composite boards with a heat gun—trust me, you’ll need it when the furniture arrives. I also swear by hidden fasteners for main areas, but I always keep the hidden clip trick for no visible screw stairs in my back pocket for those tricky transition zones. Finally, don’t skimp on the skeleton; I use the knowledge of why your deck joists need tape to prevent rot as my primary defense for protecting the framing before the first board even goes down. [IMAGE_PLACEHOLDER_E]
Your Vision is Closer Than You Think
Building an innovative deck design is an investment in your lifestyle, and while the technical details can feel daunting, the result is a sanctuary that pays dividends every single morning you spend outside. Don’t be paralyzed by the fear of a wrong cut—plan twice, support everything, and build for the long haul. What is the one thing holding you back from starting your project this weekend? Let me know in the comments below!