
I thought I was a hero. I’d spent three long weekends digging footings and lugging heavy 2x10s, and the framing finally looked complete. Then I laid down my first piece of expensive composite decking. My heart sank. There was a visible dip—maybe only a quarter inch—but in the midday sun, it looked like a crater. I realized right then that “good enough” in framing is a recipe for a wavy disaster once the finish boards go down. You can spend thousands on the latest composite decking trends, but if the skeleton underneath isn’t flat, the whole project looks amateur.
Wave Goodbye to Bumpy Decking with One Simple String
Most DIYers assume that if they buy pressure-treated lumber, it’s going to be uniform. That’s a lie. I learned the hard way that why pressure treated wood still warps under composite decking often comes down to the moisture content in the wood when it leaves the yard. One joist might have a massive crown, while the one next to it is as flat as a pancake. If you just screw your boards down, you’ll feel every single one of those height differences underfoot. The string-line trick is the secret sauce used by the pros to find these discrepancies before they become permanent headaches. It involves pulling a mason’s line tight across the tops of your joists to see exactly where the high spots need to be planed down or where the low spots need a shim.
Is This Method Really Better than a Laser Level?
You might think a high-tech laser would be more accurate, but out in the bright sun, a physical string doesn’t lie. Many people fear that this process adds hours to the build, but in reality, it saves you from the nightmare of a bouncy, uneven floor. I once skipped this because I was in a rush to finish a pergola project, and I regretted it every time I walked across that deck for five years. According to the American Wood Council, wood is an anisotropic material, meaning it shrinks and expands differently in every direction. This biological reality means no framing is ever truly level without manual intervention. Have you ever looked at a finished deck and noticed those annoying shadows where the boards don’t quite meet the joists?
Stop Trusting Your Level for Everything
A four-foot level is great for many things, but it can’t show you the overall plane of a sixteen-foot deck. The the string line method for perfectly level deck surfaces allows you to see the entire field at once. By identifying the “crown” of each board—the natural upward curve—and then using the string to find the outliers, you ensure a professional finish. It’s about more than just looks, too; a flat deck prevents water from pooling in low spots, which is a major factor in long-term rot. I’ll show you exactly how to set up your line so it’s tight enough to play like a guitar string, ensuring your deck looks like a million bucks.To start, you need a high-quality mason’s line. Cheap twine from the junk drawer won’t work; it stretches and sags under its own weight. I remember a project back in 2019 where I used some leftover kite string because I was too lazy to drive to the hardware store. By noon, the humidity had caused the string to dip, and I ended up planing down a joist that was actually perfectly level. I felt like a total amateur when I had to go back and add shims the next day. Now, I pull my line until it actually ‘pings’ when you flick it. Run the line from one end of your rim joist to the other, about an inch above the surface, using identical blocks on each end to keep it uniform. This ensures the line is a perfect mathematical plane above your wood.
Check Every Joist Against the String
Once the line is taut, take a third block—the exact same height as your end blocks—and slide it under the string across every single joist. This is the moment of truth. If the block gets stuck, that joist has a crown that needs to be planed. If there’s a gap between the block and the string, that joist is low. This precision is vital because why your composite boards feel spongy under heavy furniture is often caused by the boards spanning over a low spot, creating a spring-board effect every time you step on them. You aren’t just looking for ‘close enough’; you are looking for a surface as flat as a billiard table. If you’re building a massive project, even a tiny error here cascades until your innovative deck design ideas start looking like a funhouse mirror.
Fix High Spots with a Power Planer
When you find a high joist, don’t reach for the belt sander. You need a power planer. It’s the only tool that can shave off a consistent sixteenth of an inch across the entire width of the board. Think of it like giving your deck a haircut. While you’re at it, this is the perfect time to apply the joist tape secret for doubling your decks life because once you’ve shaved off that factory-treated top layer, the wood is more vulnerable to moisture. I’ve seen beautiful wood projects ruined within three years because the builder planed the joists but forgot to reseal the exposed grain. 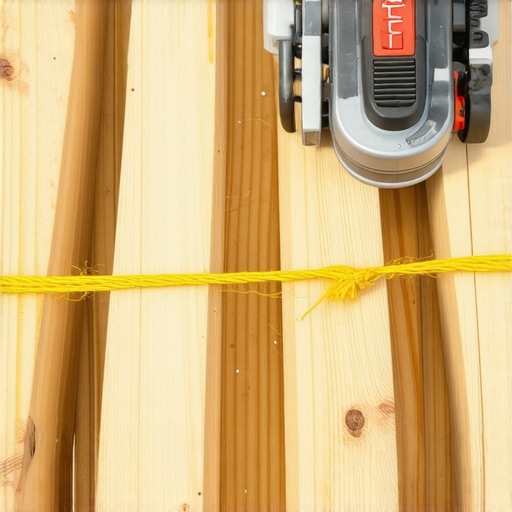
Shims Are Not a Sign of Weakness
On the flip side, for the ‘dippers’ or low spots, you’ll need shims. Don’t use cedar shingles; they compress over time. Use strips of PVC or specialized composite shims that won’t rot or flatten. This step is especially important if you are planning to add a pergola or heavy railing systems later. If the foundation isn’t flat, your railing choices will look crooked no matter how much you adjust the brackets. I once spent four hours fighting with a post-mount because the joist underneath had a slight twist I ignored during the framing stage. It was a miserable lesson in why the string-line doesn’t just help the floor—it helps the structural integrity of the entire build, ensuring you don’t end up wondering why most diy pergolas fail the uplift test in storms due to poor connections at the base.
Once you’ve achieved that perfectly flat frame, the temptation is to jump straight into the prettiest finishing touches without a second thought. But here is where most people get it wrong: they assume the most expensive products are foolproof. I’ve seen homeowners drop fifteen grand on premium materials only to have the deck look like a jigsaw puzzle gone wrong six months later. Let’s talk about the ‘hidden fastener’ obsession. Everyone tells you that hidden clips are the only way to get a clean, high-end look. In my experience, while they look great in a showroom, why hidden fasteners pop up in extreme summer heat is a reality many pros don’t want to admit. If you live in a climate with 40-degree temperature swings, those clips can act like little ejector seats for your boards as the material expands and contracts.
Dark Boards Look Great Until the Sun Hits
The biggest ‘oops’ factor I see with modern composite decking trends involves color choice versus physics. We all love those deep, charcoal-grey boards, but why dark composite boards need extra expansion space is often overlooked. According to the North American Deck and Railing Association (NADRA), dark composite materials can reach surface temperatures 40 to 60 degrees higher than the ambient air. This heat causes the boards to grow in length significantly. If you butt them tight against your house or a picture-frame border, they will buckle. I once saw a gorgeous wraparound deck literally rip its own fascia boards off because the builder didn’t leave the required 3/16-inch gap for expansion. If you’re building near water, keep in mind that why you should choose lighter colors for pool side decking isn’t just about foot comfort; it’s about the longevity of the fasteners holding everything together.
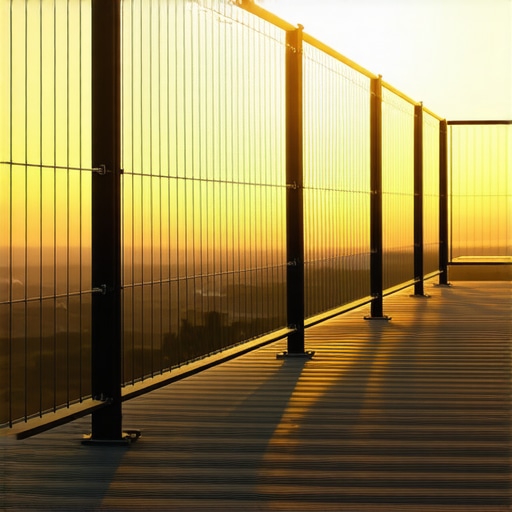
Why Does Your Cable Railing Sag Every Single Winter?
This is the most common question I get from people who try to DIY their own custom railing systems. You tighten the cables in July, they look like harp strings, and by January, they’re drooping like wet spaghetti. Usually, it’s one of the 3 mistakes that make your cable railing sag every winter: either the end posts aren’t structurally reinforced, you didn’t use a tensioner on both ends, or you didn’t account for metal contraction. It’s also worth noting that why black aluminum railings get hotter than you think can affect the tension of your cables over time. People often forget that how to select the perfect railing system involves more than just picking a style; it’s about matching the hardware to your local environment. If you want a rock-solid feel, you need to master the double nut secret for rock solid railing posts before you even think about running a single wire.
The Static Shock Nobody Warns You About
Here is a weird nuance: have you ever walked across a brand-new deck and gotten zapped when you touched the railing? It’s more common than you think. Understanding why your composite deck is statistically likely to static shock you comes down to the friction of shoes on the plastic-capped surface in low humidity. It’s a small detail, but it’s the kind of thing that can ruin a luxury experience. To avoid these types of surprises, I always recommend sticking to composite decking secrets and longevity tips that address the chemical and physical properties of the boards, not just the aesthetic. Have you ever fallen into this trap? Let me know in the comments.
Once the static is gone and the neighbors are finished oohing and aahing over your new boards, the real work begins—the long-term stewardship of your outdoor sanctuary. I used to think that ‘low maintenance’ meant ‘zero maintenance,’ but that’s a dangerous myth that leads to structural failure. To keep everything functioning, I never start a season without performing the garden hose test for proper deck water runoff. It sounds simple, but watching how water moves (or doesn’t move) across your low maintenance composite decking can tell you more about the health of your frame than any visual inspection. If you see water clinging to the edges, you might need to implement the drip edge trick for protecting deck ledger boards before the next rainy season hits.
Ditch the Bleach and Save Your Surface
I’ve seen homeowners ruin a five-figure investment in a single afternoon by using harsh chemicals. You should never use bleach on composite decks because it can break down the capping material and lead to permanent discoloration. Instead, I personally use a soft-bristled brush and a pH-neutral cleaner specifically designed for synthetics. It takes twenty minutes longer, but it preserves the grain that you paid a premium for. For those of you extending an existing structure, don’t skip the ice pick test for checking joist strength on older decks. I’ve found rot hiding inside joists that looked perfectly fine from three feet away.
How do I maintain my composite deck and pergola over time?
The secret is in the hardware. Every two years, I take my impact driver and check the tension on my custom railing systems. According to the International Residential Code (IRC) Section R507, deck railings must be able to withstand a 200-pound concentrated load. If your bolts have loosened even a fraction of an inch due to seasonal wood movement, you aren’t just losing style—you’re losing safety. If you’re dealing with a wooden structure, learn how to restore faded wood railings without sanding for hours to keep the aesthetic cohesive with your newer composite floor.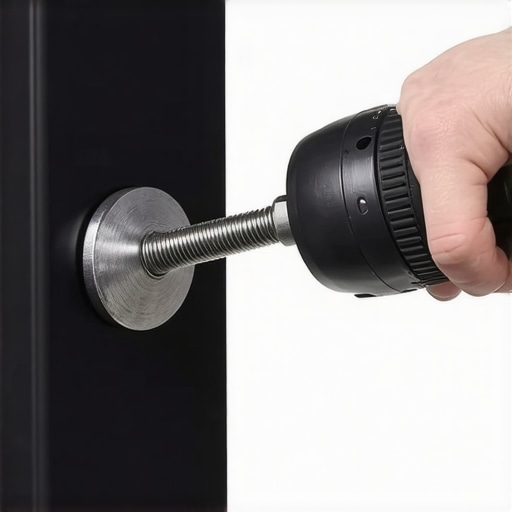
Smart Features Are the Next Big Thing
Looking ahead to 2025 and beyond, innovative deck design ideas for 2025 are moving toward integrated smart tech. I’m already starting to install sensors that can detect moisture levels in the framing and automated pergola trends that react to wind speeds. It’s no longer just about building a platform; it’s about building an ecosystem. If you want to stay ahead of the curve, I highly recommend trying out the joist tape secret for doubling your decks life right now. It is the single highest-ROI step you can take during a build or a major renovation. Don’t wait until you see the first sign of a ‘spongy’ board to care about the skeleton underneath.
What Pro Builders Secretly Do Differently
After decades of sawdust and sore knees, I’ve realized that the difference between a deck that lasts 30 years and one that sags in five isn’t luck; it’s physics. First, stop thinking of your deck as a static object. Wood is alive—it breathes, moves, and fights against the fasteners. Second, the “skin” (your beautiful composite boards) is only as good as the skeleton. If you ignore the why pressure treated wood still warps under composite decking issue, you’re just putting a tuxedo on a crooked frame. Finally, don’t be afraid to over-engineer your foundation. Adding an extra mid-span beam or choosing why solid core composite is worth the extra bulk might cost more upfront, but it pays dividends in stability every time you host a party.
The Only Resources You Need for a Perfect Outdoor Space
Building a high-end deck requires more than just a hammer. I always recommend checking out the NADRA (North American Deck and Railing Association) guidelines for current safety codes. For inspiration, I keep a close eye on innovative deck design ideas for 2025 to see where the industry is heading. If you find yourself overwhelmed by the technicalities of ledger flashing or structural load-bearing, don’t hesitate to reach out for a professional consultation. It’s much cheaper to get an expert’s opinion early than to fix a structural failure later.
Take the First Step Toward Your Dream Backyard
There is a unique kind of satisfaction in standing on a surface that you know is perfectly level, knowing that every joist is protected and every board has room to breathe. Whether you are tackling a simple platform or a complex multi-level structure with integrated custom railing systems, the effort you put into the details now defines your comfort for years to come. Your outdoor space isn’t just an addition to your house; it’s where your best summer memories will happen. Don’t be afraid of the string line—embrace it, and build something you’re proud of. Have you ever performed the 3-second push test for wobbly railing systems on your current deck? Let me know what you found in the comments below!