
I felt that unmistakable “give” right under my heel last July, and for a second, I thought I was heading straight into the dark, damp crawlspace below. I was carrying a heavy cooler toward the grill when my left foot hit the spot—the one that felt like walking on a overripe peach. My stomach dropped. I immediately assumed the worst: rot had set in, the joists were gone, and I was looking at a five-figure demolition bill. But after crawling underneath with a flashlight and a screwdriver, I realized I’d almost made a massive, expensive mistake by jumping to conclusions. [image_placeholder] Years ago, during my first DIY attempt, I actually did rip out a perfectly good 12-foot 2×8 because the board on top was soft. I didn’t realize that [the structural reason your deck feels bouncy and how to fix it](https://deckforgebuilders.com/the-structural-reason-your-deck-feels-bouncy-and-how-to-fix-it) is often localized moisture trapped between the board and the joist, not a failure of the entire frame. Today, I’m going to show you how to firm up that walking surface and address the ‘squish’ without tearing your whole world apart.
Save Your Frame and Your Wallet
If the rest of your deck looks great but you have one or two spots that feel like a trampoline, you likely don’t have a structural catastrophe; you have a fastener and fiber problem. Usually, the top ‘meat’ of the joist where the screws enter has softened, or the boards themselves have lost their rigidity due to internal rot. Before you buy a single piece of lumber, I highly recommend performing [the 15-minute deck inspection every homeowner should do](https://deckforgebuilders.com/the-15-minute-deck-inspection-every-homeowner-should-do) to pinpoint exactly where the softness ends. According to the USDA Forest Products Laboratory, wood decay is often highly localized, especially in areas with poor airflow or where debris accumulates in gaps. This means you can often reinforce the existing structure rather than starting from scratch. I once spent a whole weekend trying to ‘tighten’ screws into mushy wood, only to make the holes larger—a classic amateur move that I won’t let you repeat. Have you ever stepped on a board and felt that terrifying little dip? I’d love to hear how you’ve handled those soft spots in the past!
Can a patch really be as safe as new wood?
I know what you’re thinking: isn’t this just a band-aid on a gunshot wound? It’s a fair skepticism. If the core of your joist is solid but the top edge is struggling, techniques like ‘sistering’ or using [the flash and tape method for protecting deck joists](https://deckforgebuilders.com/the-flash-and-tape-method-for-protecting-deck-joists) can actually make that section stronger than the original build. We aren’t hiding the problem; we are reinforcing the load path. By adding support exactly where the deflection happens, you stop the movement that causes further wear and tear. This approach keeps your deck safe while extending its life by years, letting you focus on enjoying the sun rather than sweating over a circular saw. Next, we are going to look at the specific tools you need to probe the wood and decide if it’s time for a simple fix or a deeper intervention.
Probe the Problem Without Overthinking
Before you tear anything out, you need to find the line where the wood is still “angry” (wet and soft) and where it is “happy” (solid and dry). I use a simple flathead screwdriver. You aren’t just looking for surface discoloration; you are looking for structural integrity. Poke the top of the joists every six inches. If the screwdriver sinks in more than half an inch with moderate hand pressure, that wood fiber is compromised. I once spent four hours on a deck in a humid July thinking I could just sand away some surface mold, only to find my screwdriver could pass entirely through the rim joist. If you find the rot is localized to the top edge, you can save the frame. If the bottom of the joist is soft where it meets the beam, you might need the simple way to fix a sagging deck beam instead of a simple patch.
Double Up the Joists Like a Structural Splint
The most effective way to kill the squish is a process called sistering. Think of it like putting a splint on a broken leg. You take a new piece of pressure-treated lumber—the same dimensions as your existing joist—and sandwich it against the old one. But here is the secret: you don’t just nail it in and walk away. You need to apply a heavy bead of exterior-grade construction adhesive between the two boards to create a unified structural member. 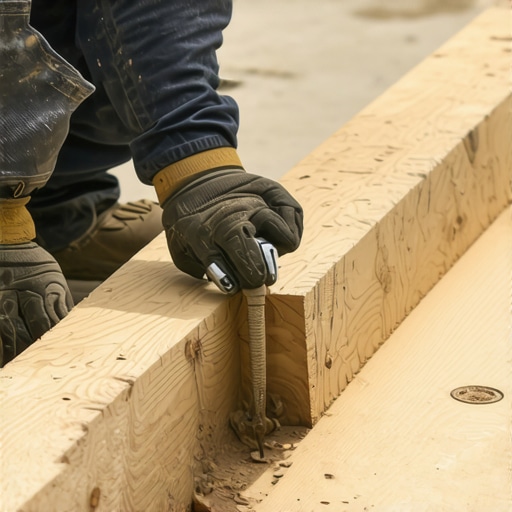 I remember a specific project where the client’s deck felt like a diving board. I sistered three joists in the center, and the difference was night and day. If you are doing this near the edges, you might even consider the double joist trick for perfectly flush picture frame borders to give yourself more “meat” to screw into for your perimeter boards. Secure the sistered joist with staggered pairs of 3-inch structural screws or carriage bolts every 12 inches.
Why Joist Tape is Non-Negotiable Now
Once you’ve reinforced the frame, you have to stop the cycle of rot. The reason that spot got soft in the first place is that water sat in the gap between the deck board and the joist, slowly turning the wood into compost. This is where the flash and tape method for protecting deck joists becomes your best friend. By applying a butyl-based tape over the top of the joist, you create a waterproof umbrella. Water can no longer seep into the screw holes. I’ve gone back to decks I taped five years ago, and those joist tops look as fresh as the day they were milled. If you’re skeptical, the deck joist tape test proves that this $30 roll of tape can add a decade to your deck’s lifespan.
Fix the Flop in Your Decking Boards
Sometimes the “squish” isn’t the frame at all; it’s the boards losing their grip. This is common if you have older wood or if you’ve noticed why your deck boards are popping up at the ends. If the wood is still solid but the screws have pulled through, you can’t just put a screw back in the same hole. Move your fastener an inch to the left or right, or use a wider-gauge screw to grab fresh wood. If you are working with composite, check your spacing; boards that are too close together can buckle in the heat, creating a false sensation of softness. Ensure your fasteners are seated correctly to prevent the board from rocking, which eventually wears down the wood fiber underneath.
People often assume that switching to composite decking is a “one and done” solution for rot. This is a dangerous myth that I see professional contractors and DIYers alike fall for every season. In my experience, the biggest mistake is forgetting why pressure-treated wood still needs maintenance under composite. You might have a lifetime warranty on your plastic-capped boards, but if the wood frame beneath them is turning into mulch, the deck remains a safety hazard. I once saw a twenty-thousand-dollar project fail in under a decade because the builder skipped a simple roll of joist tape, allowing moisture to rot the frame from the top down.
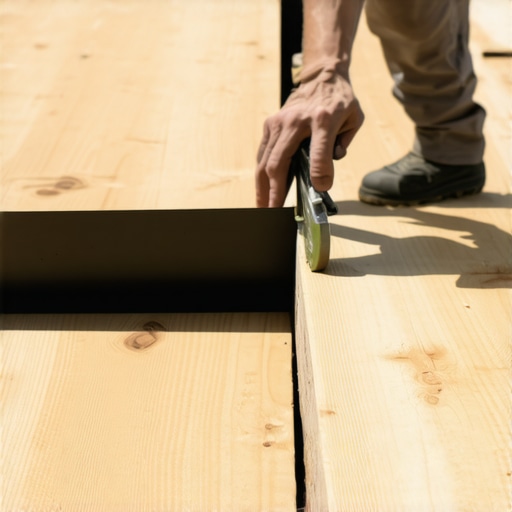
Another common trap is the obsession with the “hidden fastener” look. While everyone loves the clean, screw-free surface, why hidden fasteners can be a maintenance nightmare becomes painfully clear the moment you need to replace a single damaged board in the middle of the deck. Without top-down screws, you often have to disassemble the entire surface to reach the problem area. Furthermore, during peak summer, why your hidden fasteners are popping up in heat is a frequent complaint; the thermal expansion of composite can actually shear off plastic clips if the spacing isn’t perfect.
How much weight can your existing frame really handle?
If you are planning to add weight—like heavy ceramic planters or an outdoor kitchen—standard joist spacing simply won’t cut it. I always tell homeowners to check the joist spacing secret for decks with heavy ceramic planters before they start loading up the deck. The American Wood Council (AWC) emphasizes in their DCA 6 guide that structural failures are rarely about the board breaking; they are almost always about the connections, specifically the ledger and the lateral load path. To prevent the perimeter from sagging, I recommend the double rim joist secret for rock solid deck edges, which provides the necessary rigidity that single-board rims lack. Have you ever fallen into this trap or found a “permanent” fix that failed? Let me know in the comments!
The Only Tools That Actually Save Your Back and Your Deck
I’ve wasted thousands of dollars over the years on ‘gimmick’ tools that promised to make deck building easier, only to find they ended up in the bottom of a bucket. If you want to handle the maintenance and repair of a composite or wood deck without losing your mind, you only really need three things: a high-quality impact driver, a 12-inch speed square, and a moisture meter. I personally swear by my sub-compact impact driver because it fits between 16-inch-on-center joists where a standard drill just gets stuck. When you’re tightening those perimeter boards to avoid why your deck boards are popping up at the ends, the torque of an impact driver ensures you aren’t stripping heads. For your railings, stop guessing if they are straight; I always use the simple tool for making sure your railing posts are plumb to avoid that dreaded ‘leaning tower’ look after a heavy winter.
How do I keep my deck looking brand new for twenty years?
Maintenance isn’t about a once-a-year power wash. In fact, if you’re using a pressure washer on anything other than concrete, you’re likely doing more harm than good. I’ve seen homeowners shred the surface of their expensive boards because they didn’t realize why you should never use a pressure washer on composite; it opens up the ‘pores’ and lets mold move in permanently. Instead, focus on the gaps. Organic debris acts like a wet sponge against your joists. I spend twenty minutes every fall cleared out the spaces between boards. This simple act is how to stop moss from growing in the gaps of your deck and prevents that rot from even starting. According to the American Wood Protection Association (AWPA) U1 Standard, wood treated for ground contact (UC4A) is resilient, but constant moisture exposure from trapped leaves can still cause fungal decay over time.
Looking ahead, I see a major shift toward ‘smart’ decking materials. We are already seeing the rise of heat-reflective technology where why capped polymer composite stays cooler than wood-plastic is becoming the primary selling point for families in sun-drenched areas. In the next five years, expect to see joist systems made entirely of light-gauge steel becoming the standard for DIYers who want a frame that literally never rots. If you’re sticking with wood for now, you must implement the drainage move that saves your deck from mold by ensuring your house-side ledger is properly flashed. My biggest advice? Don’t wait for the squish. Go out this weekend and try the ‘screwdriver test’ on your rim joists. If you find a soft spot early, a single $15 roll of joist tape could save you from a $15,000 replacement bill down the road.
Three Lies My First Deck Project Taught Me
Over the years, I’ve learned that what you don’t see is always more important than what you do. First, I used to believe that a little ‘give’ was just character in an old deck—it isn’t; it’s a structural cry for help. Second, I thought composite decking was a magic shield that protected the wood underneath. It’s actually the opposite; because composite is so heavy and dense, it can trap moisture against the joists even more effectively than wood if you aren’t careful. Finally, I learned that ignoring the ledger is the fastest way to a total collapse. These hard-won lessons are why I now obsess over every fastener and flashing detail to ensure structural integrity across all my deck design projects.
#IMAGE_PLACE_FINAL#
My Go-To Kit for a Rock-Solid Frame
If you want a deck that outlives your mortgage, you need the right gear. I never start a repair without a roll of high-quality butyl tape. I’ve seen the flashing tape move that doubles the life of your joists save countless frames from the landfill by preventing the ‘top-down’ rot that plagues most outdoor structures. I also rely heavily on structural screws rather than traditional lag bolts; they bite harder and don’t require pre-drilling, which keeps the wood fibers intact. Lastly, for anyone looking at a total refresh, studying transform your home with stunning deck design strategies is essential to ensure your new layout actually supports the way you live while maintaining proper airflow for the substructure.
Reclaim Your Outdoor Space This Weekend
A soft spot in your deck doesn’t have to be the end of your summer. By taking a proactive approach—probing with a screwdriver, sistering those weak joists, and applying protective tape—you can turn a ‘trampoline’ floor back into a rock-solid foundation. Whether you are maintaining a classic cedar build or implementing composite decking secrets longevity tips for a lasting deck, the goal is peace of mind. You deserve to walk out with your morning coffee without wondering if your foot is going through the floor. Your deck is more than just wood and plastic; it’s the stage for your family’s best memories. Have you ever discovered a ‘hidden’ rot problem during a simple repair? Tell me your story in the comments below!