
It was 2:00 AM on a Tuesday in November when I first realized my dream deck had a voice—and it was a shrill, piercing scream. I was standing on my porch in a bathrobe, shivering, staring at the beautiful glass panels I’d just installed. The wind was whipping off the coast, and instead of the peaceful silence I’d paid for, my railing was emitting a high-pitched whistle that sounded like a kettle that never boils. I’d spent weeks obsessing over railing systems for safety and style, but I completely ignored the physics of air movement. I’d accidentally built a giant wood-and-glass harmonica. My neighbors weren’t thrilled, and frankly, neither was I. If you’ve ever felt like your outdoor sanctuary was being invaded by a haunted flute, I’ve been exactly where you are. Today, I’m going to share the hard-won secrets to silencing that screech once and for all without sacrificing your view.
Your Glass Railing Shouldn’t Sound Like a Ghost
When I first heard the noise, I did what every desperate DIYer does: I started shoving things into the gaps. I actually tried using foam weatherstripping from the hardware store. It looked like absolute trash, and the wind spat it right back at me within two hours. That was my first big mistake. The truth is, that whistling isn’t a sign of a broken railing; it’s an aeroelastic phenomenon. According to the Journal of Wind Engineering and Industrial Aerodynamics, these sounds, often called Aeolian tones, occur when wind passes over a structure and creates alternating vortices—essentially playing your railing like a musical instrument. It’s fascinating in a lab, but it’s a nightmare when you’re trying to sleep. This is why solid railing panels cause wind damage and noise issues that most homeowners never see coming. I realized that to fix the sound, I had to change how the air moved through the system, not just plug holes randomly. Have you ever been woken up by your deck making strange noises during a storm?
Is a Quiet Deck Just a Pipe Dream?
I used to think that the only way to get a quiet outdoor space was to stick with traditional balusters, but that’s just not true. You can have the crystal-clear aesthetic of glass without the auditory assault. The fix usually comes down to breaking up the airflow or adjusting the tension of the panels themselves. Sometimes, it’s as simple as checking for a wobbly top rail that’s vibrating at a high frequency. Before you consider tearing the whole thing down and starting over, let me walk you through the structural tweaks and dampening tricks I used to finally get some peace and quiet on my own deck. We are going to look at everything from rubber gasket adjustments to the strategic placement of outdoor elements that break the wind’s path.
Stop the Wind from Singing Through Your Glass
The sound you’re hearing is essentially air getting caught in a “pinch point.” To kill the noise, you have to change the shape of that pinch point. I learned this the hard way on a coastal project where the wind was so constant we couldn’t even talk. I spent four hours with a torque wrench and a handful of specialized gaskets, dropping my hex key into the dense bushes below no less than three times. It was frustrating, but it taught me that the physics of sound on a deck is just as important as the structural integrity of the railing systems for safety and style we usually focus on.
Tighten Your Gaskets to Kill the Vibration
Most of the whistling comes from the gap between the glass and the post. If the rubber gaskets have shrunk or weren’t seated properly, the glass creates a tiny reed-like vibration. You need to inspect every clip. Use a lubricant like soapy water to slide the gaskets deeper into the channel. It’s a tedious job, but it’s the most effective way to stop your deck from rattling when people walk or when the wind kicks up. I once tried to shortcut this by using silicone caulk, and it was a disaster—it looked like a kindergartner’s art project and turned yellow within a month. Stick to the proper rubber inserts for a professional finish.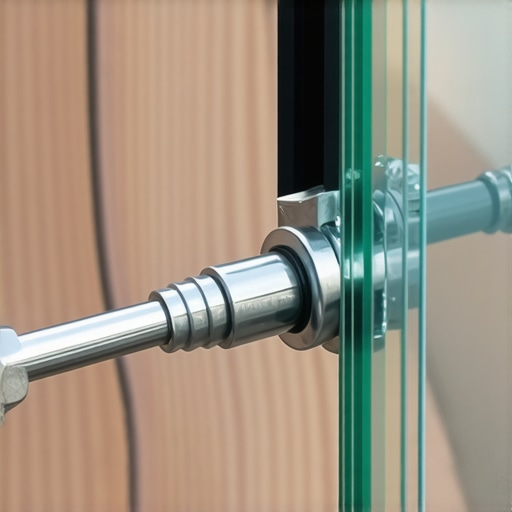
Break the Airflow Without Blocking the View
If the whistling persists even after tightening, you likely have a laminar flow problem. The wind is hitting your deck in a perfectly flat sheet, creating those dreaded Aeolian tones. You need to introduce turbulence. Think of it like a spoiler on a car. By strategically placing a few large planters or a well-designed privacy screen that doesn’t block the breeze, you can break that wind sheet before it hits the glass. On my own deck, I added a small section of decorative latticework at the corner where the wind funneled the most. The noise stopped instantly because the air was no longer hitting the glass edges at a uniform speed and pressure.
Firm Up the Top Rail to Silence Hidden Vibrations
Sometimes the “whistle” isn’t actually the air moving through a gap, but the top rail vibrating against the glass at a high frequency. Perform the 3-second push test for wobbly railing systems to identify loose points. If you feel any play in the rail, it’s acting like a giant tuning fork. You can often solve this by learning how to fix a wobbly top rail without removing the balusters. Often, it just requires a few well-placed stainless steel shims or tightening the hidden set screws inside the rail brackets. I remember one job where we spent half a day looking for a “ghost whistle,” only to find that a single bracket was missing its internal rubber buffer. We replaced it, and the deck finally went silent.
Shift the Frequency with Precise Gap Adjustments
If the gaps between panels are the source of the noise, you can actually use the logic of the rubber spacer trick for better airflow under joists to modify the distance between glass panels. By widening or narrowing the gap by just an eighth of an inch, you change the frequency of the air movement so it is no longer audible. It sounds like physics magic, but it’s really just about moving the “instrument” out of its resonant range. This small adjustment can be the difference between a restless night and total backyard bliss.While my midnight battle with a whistling deck taught me about aerodynamics, it also opened my eyes to the high-level mistakes even the best DIYers make. Most people think that once the glass is quiet, the job is done, but that is just scratching the surface of true outdoor engineering. We are often told that high-end materials like composite or glass are ‘maintenance-free,’ but in my experience, they actually require a higher level of technical precision during the initial build than traditional timber ever did. If you ignore the nuance of how these materials interact with the environment, you aren’t just building a deck—you’re building a ticking clock of structural frustration.
Hidden Fasteners Aren’t Always the Gold Standard
The most common myth in modern deck building is that hidden fasteners are the ultimate sign of quality. Everyone wants that clean, screw-free look, but here is the contrarian truth: in high-traffic zones or areas with extreme temperature swings, they can be your worst enemy. I’ve seen countless projects where hidden fasteners fail on high-traffic areas because the constant micro-movements of the boards slowly back the clips out of their grooves. While they look great in a brochure, they don’t provide the same lateral shear strength as a color-matched screw driven directly into the joist. If you are building a space meant for heavy parties and massive grills, you might want to rethink the ‘invisible’ approach for a more robust mechanical connection.
Why do your composite boards feel spongy under heavy furniture?
It is a question I get asked at least once a month. A homeowner spends thousands on durable composite decking solutions, only to find that their expensive patio set feels like it’s sitting on a trampoline. This happens because most people stick to the standard 16-inch on-center joist spacing used for wood. However, composite isn’t as stiff as cedar or pressure-treated pine. Under the weight of a heavy dining set or a stone-topped table, those boards will flex. This is why your composite boards feel spongy under heavy furniture—the substructure simply wasn’t designed for the material’s specific elasticity. To get that ‘rock solid’ feel, you really need to drop your joist spacing to 12 inches on-center.
The Expansion Gap Trap That Ruins Ledgers
The ‘oops’ factor I see most often involves the transition between the deck and the house. People are so focused on a tight fit that they forget that composite boards are basically long plastic sponges that expand and contract with the sun. According to a technical report by the International Code Council (ICC), some composite materials can expand up to 1/32 of an inch for every 10 degrees of temperature change. If you don’t use the ledger gap fix that prevents house siding rot, that expanding board will literally punch through your siding or, worse, trap moisture against your house’s rim joist. I once had to tear up a three-year-old deck because the ‘perfectly tight’ boards had turned the home’s ledger into a mushroom farm. You also have to remember that the wood underneath is moving too; pressure-treated wood still warps under composite decking, and if the two materials are fighting each other, the composite will always lose the battle of aesthetics. Have you ever fallen into this trap of prioritizing a tight fit over a functional gap? Let me know in the comments.I used to think a basic toolkit was enough until I watched a friend strip thirty consecutive screws while trying to install a complex picture-frame border. If you are serious about longevity, you need to move beyond the ‘close enough’ mindset. I never step onto a job site without my high-torque impact driver paired with a depth-sensing bit holder. It is the difference between a clean, flush finish and a deck that looks like it has been through a hail storm. This precision is one of those composite decking secrets for a lasting deck that I wish I had known ten years ago. It is not just about the boards; it is about the substructure. I have started applying butyl tape to every single joist before the boards go down. Using the joist tape secret for doubling your deck’s life prevents water from sitting in those screw holes and rotting the timber from the inside out. This small step adds perhaps two hours to a build but adds decades to the structural integrity.
How do I maintain my composite deck for the next twenty years?
It is a common misconception that ‘low-maintenance’ means ‘no maintenance.’ The North American Decking and Railing Association (NADRA) emphasizes in their safety checklists that annual inspections of the hardware and ledger connections are vital for long-term safety, especially in regions with heavy snow or salt air. For the boards themselves, keep the cleaning process simple. You should never use bleach on composite decks because it can break down the UV inhibitors in the plastic capping, leading to premature fading. If you find a deep scratch from a dragging chair or a dropped tool, do not panic. You can actually learn how to fix scuffs on dark composite boards with a heat gun. I have saved dozens of projects by carefully blending out a blemish with a low-heat setting—just do not get too close, or you will melt the grain pattern right off. Always test on a scrap piece first.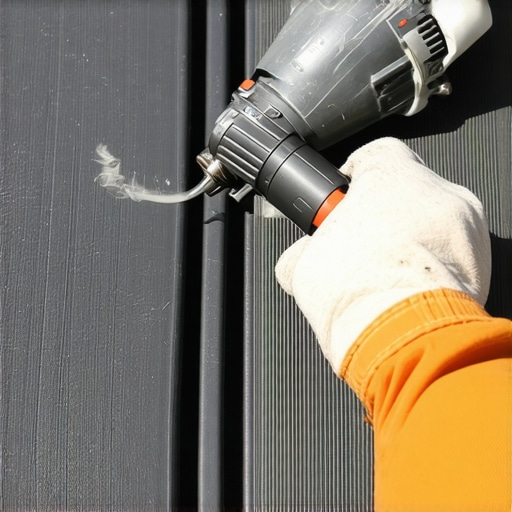 The Future of Outdoor Living is Brighter Than You Think. As we look toward innovative deck design ideas for 2025, we are seeing a massive shift toward integrated technology. We are not just talking about a couple of post-cap lights anymore. I am seeing requests for built-in sound systems and lighting ideas for modern outdoor kitchens that are controlled entirely via smartphone apps. The deck is no longer a separate platform; it is a seamless extension of the smart home. I even saw a project recently where someone used their leftovers and figured out how to use scrap composite boards to build custom planters with built-in irrigation sensors. The future is automated, durable, and highly customized. My advice? Grab a heat gun and try blending out a small scratch on a piece of scrap composite this weekend. Mastering that one skill will give you the confidence to treat your deck like the high-end piece of engineering it truly is.
What My Years on the Joists Taught Me About True Quality
I’ve spent thousands of hours on my knees with a level and a drill, and if those years taught me anything, it’s that the details you can’t see are always more important than the ones you can. First, I learned that physics always wins—you can’t fight thermal expansion, so you might as well plan for it by mastering composite decking secrets for a lasting deck before you even order your materials. Second, silence is a feature, not a fluke; that whistling glass railing I dealt with taught me that every gap is either an instrument or a vent. Third, and perhaps most importantly, the substructure is the heart of the project. If you treat your framing with the same reverence you treat your expensive boards, using the joist tape secret for doubling your deck’s life, you aren’t just building for today—you are building for the next generation. Finally, never underestimate the power of a single missing gasket; in the world of high-end decking, the difference between a sanctuary and a source of stress is often just an eighth of an inch.
The Gear I Actually Carry to Every Single Build
I don’t go to a job site without a depth-sensing bit holder; it’s the only way to ensure every fastener is perfectly flush without over-driving and creating a water trap. I also swear by high-quality butyl tape for joist protection; it is the single most cost-effective insurance policy you can buy for your framing. For the boards themselves, I always keep a low-setting heat gun in my truck to blend out those inevitable installation scuffs. I also recommend every homeowner check out the NADRA safety guidelines once a year—it’s the gold standard for making sure your outdoor living space stays as safe as it is beautiful. These are the tools that transform a DIY project into a professional-grade masterpiece.
Your Path to a Master-Level Outdoor Sanctuary
Building an outdoor space is a journey that moves from the initial frustration of a technical challenge to the ultimate freedom of a finished sanctuary. As you look toward innovative deck design ideas for 2025, remember that every screw turned and every gap measured with precision is an investment in your long-term peace of mind. Your deck is more than just wood and plastic; it is a legacy of your craft and a place where memories are made. Don’t be afraid to take your time and get those small details right. Have you ever been driven crazy by a deck whistle or a squeaky board? Let me know your story in the comments below!