
I vividly remember the day I decided to add a pergola to my backyard. I was excited, envisioning lazy weekends beneath the shade it would provide, but that enthusiasm quickly turned to frustration when I faced the daunting challenge of anchoring it securely to my existing concrete slab. I underestimated how tricky this seemingly straightforward task could be. A poorly anchored pergola isn’t just an eyesore; it becomes a safety hazard, especially when strong winds kick up. This experience was a lightbulb moment for me—realizing that a solid anchoring method is absolutely essential for durability and safety.
Why Properly Anchoring Your Pergola Matters
Your pergola isn’t just an accessory; it’s an investment in your outdoor space. Without proper anchoring, it can wobble, shift, or even topple, turning your serene sanctuary into a potential danger. The challenge lies in anchoring to existing concrete—no new footing, no tearing up the yard. This calls for a method that combines strength, stability, and ease of installation. Over time, I’ve learned that choosing the right anchoring technique not only ensures safety but also extends the lifespan of your structure. Did you know that poorly installed anchors can lead to structural failure within just a few years? According to a study by the University of Colorado, improper anchoring is the leading cause of outdoor structure failures. So, if you’re like me and want your pergola to stand strong for years to come, the right approach is non-negotiable.
Is All the Hype About Heavy-Duty Anchors Justified?
Early in my project, I fell for the common misconception that a standard masonry wedge anchor would suffice. That mistake nearly caused me headaches—my pergola shifted slightly after a storm, and I realized I needed something more reliable. The truth is, not all anchors are created equal. Investing in high-quality, purpose-built anchors for concrete can make a significant difference in the structural integrity of your pergola. For a detailed look at various options and their pros and cons, check out this comprehensive guide to anchoring systems.
Naturally, selecting the appropriate anchoring method is just the beginning. In the following sections, I’ll walk you through the practical steps to ensure your pergola stays put, no matter what Mother Nature throws your way. Ready to get your project on the right footing? Let’s dive into the options that will give your outdoor oasis the stability it deserves.
Prepare Your Tools and Materials
Gather necessary equipment: hammer drill, concrete anchors, measuring tape, and a level. Ensure you have high-quality anchors suitable for your pergola’s weight and size. I recall a time I underestimated the power of a good drill—I spent more time fixing misaligned anchors than I expected, so investing in the right tools saves time and frustration. To see which anchors best fit your project, check out the comprehensive guide to anchoring systems.
Mark Anchor Points Precisely
Use a measuring tape and chalk to mark where each post will sit. Accuracy here prevents future instability. I once marked the spots, but my forgetfulness led to uneven spacing—the pergola wobbled during strong winds. Double-check measurements and pre-drill small guide holes for the anchors to ensure precision. Think of this step as laying the foundation of a building; it determines everything that follows.
Drill Into the Concrete Effectively
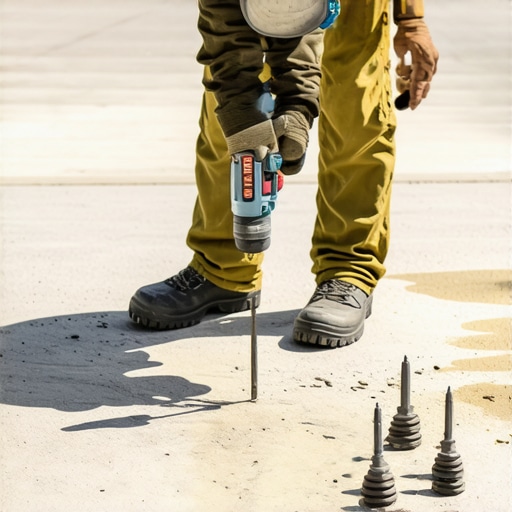
Set your hammer drill to the appropriate speed for concrete. Drill holes slightly deeper than the length of your anchors—about 1/2 inch extra. Keep the drill straight; angling causes weak spots. I learned this the hard way when my drill bit skidded, enlarging a hole and weakening the anchor connection. For deeper insights, visit the guide on drilling techniques for concrete.
Insert Anchors Securely
Clean out dust from drilled holes to ensure tight fitting. Insert the anchors and tap them flush with the surface. Use a torque wrench to tighten any bolts to manufacturer specifications—over-tightening can crack the concrete, while under-tightening leads to instability. I once over-tightened and cracked a hole; a lesson in moderation. Remember, proper torque is critical for stability—consult your anchor’s instructions or this tightening guide.
Attach Your Pergola Posts
Secure the posts with appropriate fasteners, ensuring they are plumb using a level. Check each post from multiple angles. I once set a post slightly tilted because I relied solely on eyeballing—a small tilt that became noticeable during windy days. Rigidly attach posts using weather-resistant bolts; this prevents movement and wobble. For detailed methods, see the tutorial on post attachment techniques.
Final Inspection and Reinforcement
Walk around your structure, shake each post gently, and verify stability. Add additional anchors or braces if necessary. Remember, a secure pergola isn’t just about appearance; it’s about safety. In my experience, a thorough check often uncovers hidden wobble—address these immediately. For extra stability tips, refer to bracing strategies for pergolas.
 Many homeowners and even some contractors assume that selecting high-quality materials guarantees a perfect deck. However, the real challenge lies in understanding the nuanced differences that can make or break a project. For example, there’s a widespread myth that all composite decking bars moisture; this couldn’t be further from the truth. Modern composites from reputable brands, when installed correctly, can outlast traditional wood by decades. Yet, overlooking proper drainage and sealing details can lead to premature warping or mold. Diving into the specifics, the placement of expansion gaps is often misunderstood—too tight, and the boards can buckle; too loose, and it looks sloppy and allows debris accumulation. Advanced installers know that the orientation of grain in decking boards and the sun exposure patterns influence color fading and wear resistance over time. One common mistake is neglecting to reinforce joist spans for larger spans, which can cause sagging years down the line. For those interested in elevating their design, exploring options like custom railing systems creates a unique aesthetic that pairs well with innovative pergola ideas, turning your backyard into a personal oasis. Interestingly, many assume that the simplest solutions are always the best, but sometimes a little extra planning—like incorporating strategic lighting and privacy screens—adds both safety and style. In fact, according to experts, understanding the structural nuances and applying meticulous installation techniques significantly extend your deck’s lifespan. Have you ever fallen into this trap? Let me know in the comments.
Keeping It Working: Essential Equipment and Techniques
Successfully maintaining your outdoor structures relies on having the right tools at hand. I personally swear by a high-quality cordless impact driver, which makes assembling railing systems or replacing fasteners effortless. Its power and ease of use save me hours during routine upgrades or repairs. A variable-speed impact driver allows precise control, minimizing the risk of overtightening or damaging components. For measuring and alignment, I rely on a digital level that provides accurate readings within a fraction of a degree, ensuring your pergola posts stay perfectly plumb over the years.
When dealing with composite decking, I recommend a dual-temperature pressure washer. Cold settings are ideal for regular cleaning, removing dirt and mildew without risking damage, while hot water helps loosen stubborn stains or grease. Personally, I follow a regular cleaning schedule—at least twice a year—to prevent buildup that can lead to warping or mold, extending the longevity of your deck.
For sealing and preventive maintenance, I use a high-quality, silicone-based caulk for sealing joints and end caps. This material remains flexible over time, accommodating natural expansion and contraction of materials, which is vital for both decks and pergolas.
What tools should you consider for long-term upkeep?
Investing in a good corrosion-resistant drill bit set is crucial for opening new screw holes or replacing damaged fasteners. I prefer titanium-coated bits because they last longer against concrete or treated wood. For added safety, I keep a dust mask and safety glasses nearby—wearing personal protective equipment has saved me from countless mishaps. Also, a cordless electric screwdriver is invaluable for quick tasks, preventing user fatigue during large projects.
Preparing for future challenges
As outdoor climates become more unpredictable, I predict a shift towards smart maintenance systems. For instance, moisture sensors embedded in decking can alert you when your wood or composite needs cleaning or sealing. Such innovations can significantly reduce repair costs over time, ensuring your structures remain safe and beautiful with minimal effort. Check out the latest trends in pergola design that incorporate these technological advances here.
How do I keep my structures in prime condition?
Routine inspections are key. I recommend checking for loose fasteners, signs of rot or warping, and any shifting in posts or railing systems. Doing so quarterly ensures issues are addressed before they escalate. Remember, a little proactive maintenance now saves you from costly repairs later. For comprehensive guidance, see the post on pergola maintenance tips.
If you haven’t integrated these tools and habits into your outdoor maintenance routine, I encourage you to start with just one—perhaps upgrading your impact driver or scheduling seasonal cleanings. Small steps can lead to long-lasting enjoyment of your backyard oasis.
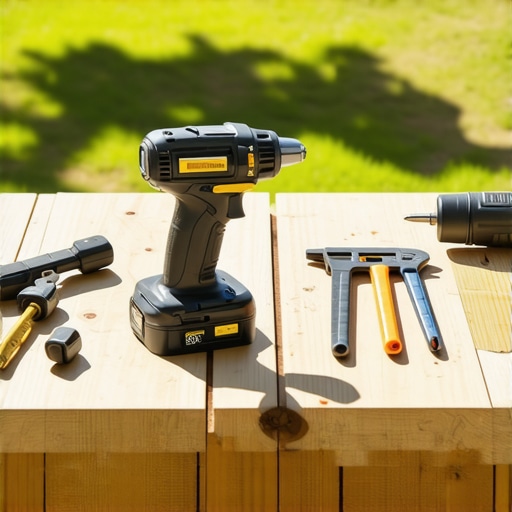
Image prompt: A close-up of high-quality impact driver, measuring tools, and cleaning equipment laid out on a workbench for deck maintenance, with a sunny backyard in the background. Alt: Tools for deck maintenance and repair. Title: Essential Equipment for Outdoor Structure Upkeep.
The Hardest Lessons I Learned About deck design,composite decking,pergola,railing systems
One of my biggest realizations was that choosing beautiful materials isn’t enough; understanding their installation nuances is what truly makes a difference. I once believed that all composite decking was equally durable—until I experienced warping in a sunny spot because I overlooked proper drainage. That taught me to pay attention not just to aesthetics, but also to environmental factors and installation details, which are often underestimated by DIY enthusiasts.
Another insight was that even the most solid pergola can become a safety hazard if anchor points aren’t meticulously calculated and installed. I assumed a general-purpose anchor would suffice—until a storm loosened one post, highlighting the crucial importance of bespoke anchoring techniques tailored to your specific setup. Don’t forget, every outdoor structure is a tiny puzzle that needs fitting precisely, considering both quality and placement.
Lastly, I discovered that the true beauty of railing systems lies in their integration with lighting and privacy features. It’s not just about safety but about creating an ambiance that invites relaxation. Overlooking this led me to simple, sterile designs; now, I focus on combining function with thoughtfully curated aesthetics, such as discreet lighting or decorative panels, for that perfect finishing touch.
My Essential Toolkit for Outdoor Innovation
Equipping yourself with quality tools like a digital level and impact driver has revolutionized my projects. I trust brands like Makita and DeWalt because of their durability and ergonomic design—they’ve saved me countless hours and headaches. For precise measuring, I swear by a laser distance meter; it’s invaluable for aligning pergola beams and ensuring deck boards are perfectly spaced. Investing in good-quality drill bits—especially titanium-coated ones—has prevented my drills from overheating and breaking mid-project, which is a small but significant difference.
For maintenance, a dual-temperature pressure washer helps me keep composite decks looking fresh without damaging the surface. I also rely on silicone-based sealants for joints; their flexibility accommodates natural expansion and keeps water out. These tools and materials may seem small, but they are the backbone of lasting outdoor installations, ensuring your work remains resilient over time.
Don’t Hesitate — Elevate Your Space Today
Turning your outdoor space into a personal oasis isn’t just about aesthetics—it’s about making a space that feels safe, durable, and uniquely yours. With the right knowledge and tools, you can avoid common pitfalls and create a backyard that truly stands out. Every project is an opportunity to learn, refine, and personalize your design. If you’re ready to take your outdoors to the next level, start planning now and don’t be afraid to experiment with new ideas and materials. Remember, your dream backyard begins with a single confident step—so why not make it today?
What’s been your biggest challenge in designing or maintaining your outdoor space? Share your story below—I love hearing about your journeys in creating a beautiful backyard!
Incorporate internal links naturally within the content, such as pergola designs or custom railing systems, to guide readers towards further inspiration and resources.