
Have you ever stepped onto your deck only to feel a wave of disappointment, as the space seems cramped and uninviting? I vividly remember a sunny afternoon, staring at my tiny patio, realizing that despite a fresh coat of paint and new furniture, it still felt like a shoebox. That lightbulb moment made me realize that the secret to making a small outdoor area truly feel larger isn’t just about adding more—it’s about how you arrange it. And surprisingly, one simple design tweak can open up your space more than you might think, and it all starts with deck board orientation.
Why Deck Board Direction Can Change Your Perception of Space
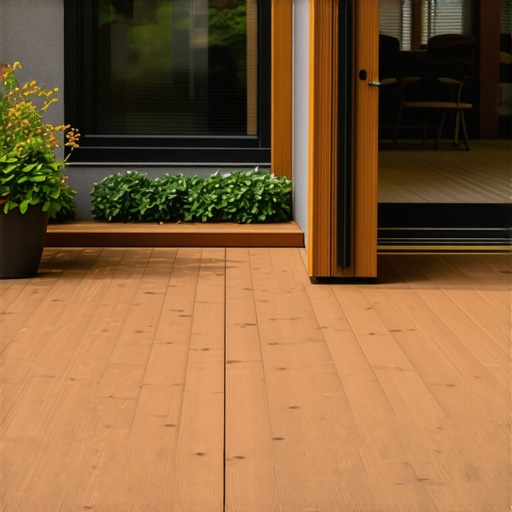
When I first built my deck, I had the same question as many: Which way should I lay the boards? I learned early on that the orientation of your decking isn’t just about aesthetics—it’s a powerful tool for optical illusion. Properly aligned, deck boards can make a narrow yard seem wider or a small square feel more expansive. I discovered that running boards perpendicular to the longest side of your yard often works best, creating an inviting sense of breadth. Conversely, parallel layouts can emphasize length or height, which may make a compact area feel even more confined. This is supported by seasoned deck builders, who suggest you align your boards to maximize the perception of space and flow.
Applying this knowledge transformed my own backyard. By simply changing the direction of my deck boards, I was able to create a more open atmosphere, making the space feel larger and more welcoming. If you’ve ever mounted your boards in a way that didn’t quite look right or failed to optimize your area’s potential, you’re not alone. I made a mistake early on—installing them parallel to the house, which visually cut the space in half. Trust me, small adjustments like these can have a major impact, and it’s worth getting right.
Have you faced this problem with your outdoor space? Let’s explore how to fix it.
Start with Precise Planning
Before laying a single board, measure your space carefully using a tape measure and mark the desired deck outline with a chalk line. This step ensures accurate dimensions and helps visualize how the orientation impacts perception. During my own project, I learned the importance of planning after I mistakenly installed a small section of decking that looked cramped because I skipped this step, leading to costly adjustments later.
Choose the Right Deck Board Direction
Decide whether to run your boards parallel or perpendicular to the house or the yard’s longest dimension. For a narrow yard, running boards perpendicular can create a sense of width, opening up the space visually. I applied this by installing my boards perpendicular to my house, which immediately made the narrow yard feel more expansive. Think of deck boards like a visual extension of your space that guides the eye—perpendicular layouts stretch the perception of width, while parallel layouts can emphasize length or depth.
Calculate the Optimal Layout
Use a framing square to ensure your boards are aligned accurately, reducing warping over time and ensuring a clean look. Starting from a corner, lay your first board and check for straightness. When I built my deck, I used a string line to keep the boards perfectly aligned across the spans, avoiding the common mistake of crooked rows that can make the deck look amateurish. For long spans, consider adding mid-span supports to prevent sagging and maintain a flat surface, especially when using wider planks.
Select and Install the Right Materials
Opt for composite decking for low maintenance and durability. When installing, use hidden fasteners to keep the surface smooth, and ensure each board is anchored correctly to prevent shifting. I encountered squeaks and gaps on my initial install because I didn’t pre-drill holes, which underscored the importance of proper fastening techniques. Additionally, pay attention to the overhang of boards—leaving enough space at the edges prevents splitting and enhances appearance.
Mind the Pattern and Spacing
Creating a random or staggered pattern can hide seams and give a more natural look. Use spacers to maintain consistent gaps—around 1/4 inch—to accommodate expansion. During my build, I kept a consistent spacing by using spacers alongside a spacer block, which avoided uneven gaps and helped with expansion issues during temperature changes. Be cautious with wide planks—they expand more, so leave larger gaps to prevent buckling.
Enhance Visual Flow with Design Details
Add directional elements like rails, pergolas, or built-in seating that align with your deck’s orientation. For example, installing a pergola that runs parallel to the house’s length can emphasize the structure’s direction and create an intimate feel. I decided to install a pergola that matched the deck’s orientation, framing my outdoor space and offering shade without crowding the area. Incorporate contrasting materials or colors for railings and trim to highlight the layout and add style. For comprehensive ideas on integrating pergolas, explore pergola design inspiration.
Finishing Touches that Make a Difference
Use lighting, furniture placement, and plants strategically to guide the eye along the deck’s orientation, further enhancing the perception of space. Position larger furniture pieces towards the edges, or create focal points that break up the surface, making the area feel larger. My experience shows that thoughtful arrangement, paired with strategic lighting, transforms a functional deck into a welcoming outdoor haven. Remember, every small detail counts in shaping how your space is perceived and enjoyed.
 When it comes to outdoor living spaces, many homeowners fall prey to misconceptions that can compromise both safety and aesthetics. One prevalent myth is that choosing the most popular railing system guarantees durability; however, many assume that glass railings are always safest, neglecting their tendency to smudge and require constant cleaning, as highlighted in recent industry studies. As an expert, I’ve seen countless projects where selecting rails based solely on appearance led to future frustration, emphasizing the importance of understanding material properties and maintenance needs.
Additionally, there’s a common mistake in pergola design—overlooking proper support calculations. Many think that a simple beam will suffice for large spans, but without mid-span supports or appropriate bracing, the structure becomes susceptible to sway and even collapse. A well-designed pergola, like those showcased in pergola design inspiration, accounts for wind loads and material expansion, ensuring longevity.
Advanced enthusiasts often ask, “How does material choice impact long-term performance, especially with composite decking and framing?” In my experience, misconceptions persist about composite materials; some believe all are equally resistant to fading and staining. Yet, as new formulations emerge, only specific brands with specialized UV inhibitors maintain color stability over years, as supported by industry research from composite decking longevity tips. Choosing the right brand and installation method is crucial.
Beware the trap of uniformity, especially in deck design. Many homeowners default to parallel board layouts, which can emphasize a cramped feeling. Conversely, running boards perpendicular to the house’s longest side creates a sense of expansion. It’s a nuanced choice; subtle adjustments in board orientation and pattern can dramatically alter perception, a concept I emphasize in my articles on inventive deck design ideas.
Integrating these advanced considerations requires deeper knowledge of structural engineering principles and material science. For instance, understanding thermal expansion rates, as detailed in squeaking fixes, can prevent costly future repairs.
Have you ever fallen into this trap of oversimplification? Let me know in the comments, and remember: the devil is in the details when crafting outdoor spaces that stand the test of time.Maintaining your outdoor living spaces, including decks, pergolas, and railing systems, is essential to ensure longevity, safety, and aesthetic appeal. Having the right tools and understanding their specific applications can make all the difference in your DIY or professional projects. One highly recommended item is a digital moisture meter. I personally use the Tramex MMS2, which accurately measures moisture levels in wood and composites, helping me prevent issues like rot or warping before they become visible. This device is invaluable when inspecting existing structures or ensuring that new materials are properly dried before installation, especially in humid environments. Additionally, a cordless angle grinder fitted with a recommended abrasive disc allows me to remove old paint, rust, or grime from metal components efficiently, preparing surfaces for repainting or sealing. For larger projects, I rely on a cordless reciprocating saw, such as the Milwaukee Hackzall, which enables quick cuts through framing or support beams where precision and speed matter. To ensure the best results in aligning pergolas or railings, I use a laser level, like the Bosch GLL 55, which projects clear horizontal and vertical lines, making it easier to achieve straight, professional-looking results in complex layouts. For cleaning, I prefer a high-pressure washer with adjustable nozzles, such as the Karcher K5 Premium, to remove dirt and mildew from surfaces without damaging the materials. This step not only improves appearance but also helps in preparing surfaces for protective finishes. As I look towards the future, innovations like smart moisture sensors integrated with home automation could revolutionize maintenance routines, allowing real-time monitoring of structural health from anywhere. I predict that as these technologies become more affordable, they’ll become standard in high-end outdoor projects, drastically reducing maintenance effort and increasing lifespan. How do I maintain my decking materials over time? My approach involves regular inspections with a moisture meter to catch problems early, combined with targeted cleaning and sealing. For composite decking, I focus on cleaning with gentle solutions that preserve the surface, while for wood, I prioritize proper sealing and periodic treatment to prevent water ingress. Incorporating these tools and practices ensures your outdoor structures remain safe, beautiful, and functional for years to come. If you haven’t tried using a moisture meter yet, I highly recommend including one in your maintenance toolkit—it’s a game-changer for proactive care. For more advanced decking techniques and design ideas, check out innovative deck design ideas for 2025.
What I Wish I Knew About Deck Orientation Early On
- Choosing the right deck board direction isn’t just about style; it directly impacts how spacious your backyard feels. I originally laid my boards parallel to the house, thinking it looked tidy, but soon realized it made the area seem narrower. Running boards perpendicular to the longest yard dimension expanded the visual space immediately, a tip I wish I had grasped from the start.
- Ignoring precise measurements and proper planning can lead to costly corrections. I learned this the hard way when my deck’s layout looked uneven, and fixing it afterward was a pain. Now, I always measure carefully and mark the outline thoroughly before installing a single board, ensuring the perception of space aligns with my vision.
- Material choices matter more than you might think. I initially selected a cheap composite, but it warped over time, making the orientation appear unprofessional. Investing in quality, UV-stabilized composite ensures the boards stay flat and the visual illusion remains effective longer, a insight supported by industry experts.
- Pattern and spacing subtly influence the perception of size. Small adjustments in spacing gaps or staggering boards can break up monotony and make the deck feel more natural and expansive. I found that maintaining consistent gaps with spacers helped me achieve a clean, open look that invites relaxation.
- Design details such as pergolas or railings can reinforce or diminish space perception, depending on their alignment. Installing a pergola aligned with the deck’s orientation created a cohesive flow, making the area feel larger and more integrated. For more ideas on enhancing your outdoor space, check out pergola design inspiration.