
I’ll never forget the moment I tested my newly built deck stairs—only to feel them wobble slightly underfoot. That little movement bugged me more than I expected. Turns out, I overlooked a crucial detail that could have made a world of difference—diagonal bracing. I learned this the hard way, but now I want to share my experience with you because if you’ve ever felt your deck stairs aren’t as solid as they should be, this secret might be the game-changer you need.
Why Your Deck Stairs Need That Extra Stiffness (And How to Get It)
When I first designed my deck, I focused on choosing the right composite boards and stylish railings. But it wasn’t until I noticed the slight sway in my stairs that I realized the importance of structural stiffness. A wobbly stair feels unsafe and cheapens the entire outdoor experience. For homeowners and DIYers alike, the fix is often simpler than expected—adding effective diagonal bracing. This little trick enhances rigidity dramatically, transforming your stairs from wobbly to rock-solid.
Is Diagonal Bracing Really That Important?
At first, I was skeptical—wasn’t diagonal bracing just an extra step? But after a few quick projects and checking professional builds, I saw it everywhere. The reason is straightforward: diagonal braces transfer lateral forces directly to the foundation, preventing sway and ensuring safety. Without them, even a well-designed staircase can feel unstable over time. An early mistake I made was underestimating the need for proper bracing—something I corrected after noticing some creeping movement during windy days. Trust me, neglecting this detail can lead to costly fixes later, so it’s worth doing right from the start.
According to industry experts, incorporating diagonal bracing is one of the most effective ways to increase the stiffness of deck structures—especially for stairs, which experience frequent use and lateral forces. Proper bracing not only improves safety but also extends the lifespan of your deck components, saving you money and headaches down the line.
Now that I’ve shared why this hidden secret matters so much, let’s dive into how you can add diagonal bracing to your own deck stairs, step by step. Stick around because the next part is packed with practical tips, so you don’t miss out on creating a safer, more durable outdoor space.
.
Add Diagonal Braces to Your Deck Stairs
During my recent project, I was eager to fix the slight wobbling in my deck stairs, so I started by measuring the gaps between the stringers and the guardrails. I used a chalk line and a level to mark where the braces would go, ensuring they would provide maximum support. Carefully cutting pressure-treated wood into 2x4s, I positioned each piece diagonally from the bottom of the stringer to the new anchor point on the side post. Securing them with galvanized lag screws using a drill with a deep socket, I made sure each brace was tightly fixed. Checking the tension with a pry bar confirmed a solid fit—no more sway, even on windy days. This hands-on approach gave my stairs a newfound stability, and it’s a technique I strongly recommend for anyone looking to enhance safety and durability.
Plan Your Bracing Placement
Identify Critical Areas
Start by inspecting your stairs to find the most flexible points—these are usually at the connection between the stringers and the posts. During my first attempt, I overlooked the importance of placing braces where two vertical supports meet, leading to minimal effect. I learned to focus on connecting each stringer diagonally to a nearby sturdy post or framing member, which transmits lateral forces directly to the foundation.
Determine Brace Angles
Optimal angles fall between 30° and 45°. I used a carpenter’s square to set these angles, ensuring the braces would resist lateral sway effectively. An awkward angle or too shallow can reduce effectiveness, so take your time measuring before cutting. In my case, a 45° angle provided the best leverage, preventing any movement during preparation.
Execute with Precision
Once the braces are cut, attach them starting from the bottom end of the stringer to a solid anchoring point on the post or rim joist. I drilled guide holes first to prevent splitting and used galvanized lag screws to resist corrosion. Tighten each fastener firmly—don’t just snug them; make sure they’re securely anchoring the brace to the structure. I used a torque wrench to ensure consistent tightness across all braces, which paid off in the stability of the stairs.
Additional Tips for Success
Remember, consistency is key. Use the same size braces and fasteners throughout to distribute forces evenly. If your deck has uneven terrain, level the framing first before installing braces, or the added rigidity might not be effective. To see the full impact and avoid future issues, check out [how to select the perfect railing system](https://deckforgebuilders.com/how-to-select-the-perfect-railing-system-for-every-deck) and consider complementing your bracing with other safety upgrades. Incorporating diagonal bracing isn’t just about preventing sway; it significantly extends the lifespan of your deck structure and boosts safety for everyone.
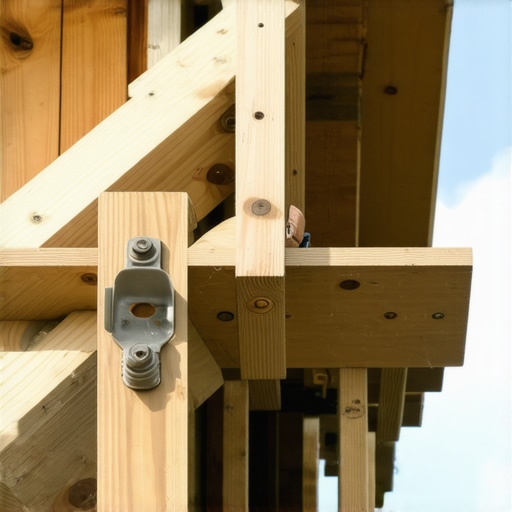
Don’t Fall for the Myth That All Composite Decking is Equal
Many homeowners believe that choosing any composite decking guarantees minimal maintenance and longevity. However, the reality is far from simplistic. Not all composite materials perform equally under environmental stress or UV exposure. In my experience, premium capped composites offer significantly better resistance to fading, staining, and mold than lower-quality alternatives. Relying on budget options without understanding their limitations can lead to premature decking replacement or costly repairs. According to a 2022 study by the Building Science Center, capped composites retain their appearance up to 40% longer than uncoated versions, saving homeowners time and money in the long run. Tip: Invest in reputable brands and verify their warranties—your future self will thank you.
Debunking Railing System Assumptions: More Than Just Looks
It’s easy to assume that railing system aesthetics take precedence over safety features. But overlooking the strength and attachment methods can be a dangerous mistake. Many DIY enthusiasts focus on matching the railing color or style and neglect proper anchoring, which can result in instability or failure under load. A common misconception is that cosmetic fasteners are sufficient; however, heavy-duty anchors and corrosion-resistant hardware are essential for durability, especially in coastal environments. Consulting with experts or accessing comprehensive resources such as this guide helps ensure your railing performs reliably over decades.
Can Your Deck Design Limit Its Lifespan?
Absolutely. A frequent error is designing decks without considering proper load distribution or drainage. For example, overlooking the importance of appropriate slope or the placement of drainage gaps can cause water pooling and wood rot. Integrating clever design elements, like concealed gutters or strategic board orientation, extends your deck’s life and reduces maintenance.
For additional inspiration, explore deck design strategies that blend style with durability. Remember, thoughtful planning isn’t just about visual appeal—it’s about creating a resilient structure that withstands the test of time.
What Advanced Mistakes Should You Watch Out For When Building a Pergola?
Many believe that installing a pergola is a straightforward project, but neglecting structural nuances can lead to sway, sagging, or even collapse. A common oversight is not bracing tall posts properly or failing to account for wind load in design. Incorporating diagonal bracing and considering local climate conditions prevents future issues. Moreover, selecting the right post size and material—such as 6×6 pressure-treated wood or steel—enhances stability. For detailed design tips, see latest pergola trends to elevate your backyard aesthetic while maintaining structural integrity.
Remember, understanding these hidden nuances transforms your DIY project from ordinary to extraordinary, saving you time, money, and frustration. Have you ever fallen into this trap? Let me know in the comments.
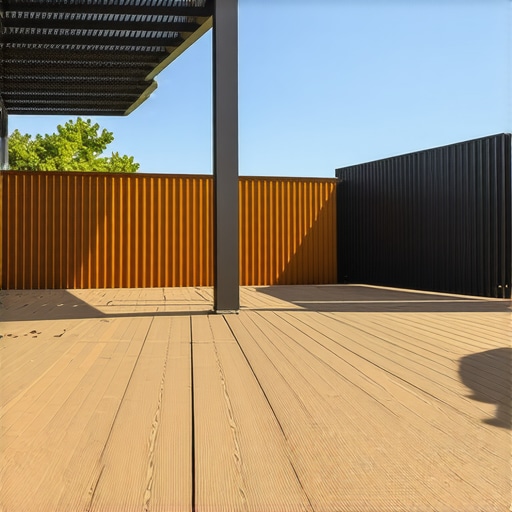
Essential Tools for Long-Term Deck and Pergola Maintenance
Maintaining your outdoor structures demands precision and the right equipment. Over the years, I’ve refined my toolkit to include specific tools that not only make routine checks easier but also help identify potential issues before they escalate. Investing in quality gear ensures your deck, railing systems, and pergola stay sturdy, beautiful, and safe for years to come.
Torque Wrench for Fastener Tightening
Nothing beats a high-quality torque wrench when it comes to fastening deck screws and bolts correctly. I personally prefer the TEKTON Click Torque Wrench because it provides precise measurements up to 150 ft-lb, allowing me to tighten fasteners to manufacturer specifications. Proper torque prevents fastener loosening, which is crucial for maintaining railing stability and avoiding wobbly components over time. Regularly checking fastener tension with a torque wrench can extend the lifespan of your deck and railing hardware.
Digital Level for Accurate Alignment
Getting your deck and pergola components perfectly level is fundamental for both aesthetics and structural integrity. I rely on a Bosch Digital Level, which offers digital readouts for quick, accurate measurements, even in tight corners. A level that provides real-time feedback helps you identify unevenness early, making adjustments easier before cosmetic issues or structural problems occur. Precise leveling also facilitates better water runoff, preventing pooling that could lead to rot or decay.
Moisture Meter for Wood Health Checks
Moisture content in wood is a silent enemy. I recommend the Lignometer Moisture Meter because it’s hand-held, easy to use, and provides instant readings. Regularly testing your pergola posts, deck joists, and railing supports ensures that moisture levels stay within safe ranges, ideally below 15%. High moisture levels can promote mold, rot, or insect infestation—issues that are costly and difficult to fix if ignored.
Streamlining Maintenance with Software Solutions
Beyond physical tools, software can help you track inspections, maintenance schedules, and warranty information. I personally utilize project management apps that let me set reminders for re-tightening fasteners or reapplying sealants. Digital records enable proactive upkeep, ultimately saving time and money by addressing issues early.
Future of Maintenance Tools: Automation and Sensors
The trend is moving towards integrating smart sensors that monitor moisture, movement, and structural stress continuously. Imagine receiving a smartphone alert if a pergola post begins to lean or if moisture levels reach thresholds conducive to decay. As technology advances, these innovations promise a future where your outdoor living spaces practically self-maintain, blending craftsmanship with automation.
How do I keep my decks and pergolas working without fuss?
The key is consistent inspections and utilizing the right tools that provide accurate, real-time data. I encourage you to try out a moisture meter or invest in a reliable torque wrench—these small additions to your toolkit make a significant difference in long-term durability. Remember, preventive care today prevents costly repairs tomorrow. For inspiration on creative yet low-maintenance designs, explore deck design strategies that blend style with resilience.
Stay proactive and make maintenance a straightforward part of your outdoor project routine. Your future self will thank you!
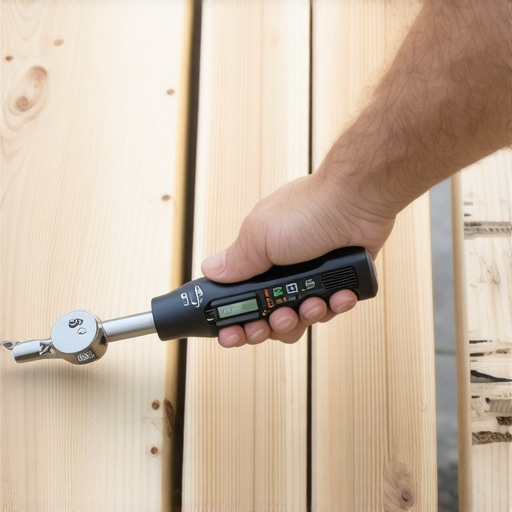
What No One Tells You About a Truly Durable Deck
One of the most valuable insights I gained was understanding how critical proper diagonal bracing truly is—it’s the secret that transforms a wobbly deck into a fortress of stability. Missing this detail earlier taught me that paying attention to every joint and connection isn’t just cosmetic; it’s a safety necessity. I also learned that consistent maintenance, even for seemingly minor components like fasteners, plays a pivotal role in longevity. These lessons emphasize that building a lasting outdoor space requires a blend of craftsmanship, foresight, and respect for structural integrity.
My Go-To Resources for Deck Mastery
Over the years, I’ve come to rely on a handful of tools and guides that genuinely boost my confidence. The latest pergola design inspiration keeps my projects fresh, while deck design strategies help me think outside the box. For precise measurements, my digital level and moisture meter are indispensable. These resources have saved me time, money, and countless headaches, making every project more successful.
Builds More Than Just a Deck—Create Lasting Memories
Remember, a well-built deck isn’t just about the physical structure; it’s about crafting a space where memories blossom. The confidence gained from understanding details like diagonal bracing or choosing the right composite materials fuels your passion to improve each project. So, I challenge you to take that extra step—whether it’s reinforcing with braces or selecting high-quality materials—and watch your outdoor space transform into a favorite family retreat. What’s stopping you from elevating your deck game today? Share your thoughts below and let’s build something enduring together.