
I was standing on top of a wobbly six-foot ladder, squinting through the afternoon sun, trying to hold a heavy cedar beam against a post while balancing a spirit level with my chin. It was a disaster waiting to happen. In that moment, I realized that my dream of a DIY sanctuary was becoming a structural nightmare. My backyard looked less like a professional pergola design inspiration and more like a leaning tower of wood. I failed. Hard. The beam was off by three full inches, and I didn’t notice until I stepped back with a cold drink in my hand. That was the day I swore off the ‘eyeball method’ forever. If you are building alone, you aren’t just the carpenter; you are the quality control, the laborer, and the foreman all at once. You need a system that doesn’t rely on a second pair of hands or a lucky guess. Today, I am going to show you how to use the Level-and-Laser method to get your pergola heights dead-on, every single time, without losing your mind or your patience.
Stop Guessing and Start Measuring Like a Pro
The biggest mistake I made early on was trusting my old spirit level on a windy day. When you are working with pergola posts that need to be 6×6 minimum for stability, even a tiny fraction of an inch at the base translates to a massive lean at the top. I’ve seen guys try to use a garden hose to find level, and while that’s a classic trick, it’s a mess when you’re flying solo. The modern solution is a rotary laser level paired with a solid receiver. This combo acts as the partner you don’t have to buy lunch for. It gives you a consistent, 360-degree reference point across your entire site. Whether you are building on a flat concrete pad or need a shim trick for leveling a pergola on an uneven surface, the laser doesn’t lie. It allows you to mark your ‘story pole’—the master post that dictates the height of everything else—and transfer that exact elevation to every other corner of the structure. Have you ever spent four hours framing something only to realize the whole thing looks like it’s sinking into the ground? If so, you know exactly why I’m obsessed with this.
Will a fancy laser level really fix my wobbly posts?
It’s natural to be skeptical of adding more gear to your shed. You might think a string line is enough, and while I love the string line move for perfectly plumb pergola posts, it has its limits when it comes to vertical height accuracy over long distances. According to the American Society of Civil Engineers, structural misalignments as small as 1% can significantly increase the load stress on fasteners during high-wind events. A laser level virtually eliminates that human error. It’s not just about aesthetics; it’s about making sure your pergola trends actually last through the next decade of storms. By establishing a ‘benchmarked’ height at the start, you ensure that every beam sits flush, every rafter is level, and your composite decking or stone patio underneath doesn’t look crooked by comparison. We’re going to dive into the exact steps of setting up your laser tripod, but first, let’s talk about the specific marks you need to make on your posts before you even think about picking up a saw.
Get Your Laser Leveling Station Dialed In
Setting up the laser is the most critical five minutes of your day. I once set my tripod on soft mulch, and by the time I finished marking the fourth post, the sun had baked the ground, the tripod shifted, and my ‘level’ line was off by a half-inch. Now, I always find a solid patch of dirt or a concrete pad. Once your laser is spinning, find your highest ground point. This is where you establish your benchmark. If you are integrating this into a larger project, you might even use the string line method for perfectly level deck surfaces as a secondary check, but the laser is your primary source of truth. Make sure the ‘eye’ of the laser has a clear line of sight to all four posts. If a stray branch or a pile of lumber is in the way, move it now. You want to be able to walk from post to post without ever bumping that tripod. 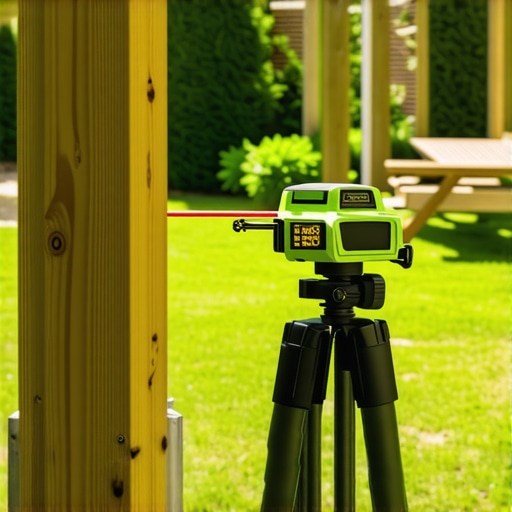
Pick a Master Post to Rule Them All
Instead of measuring from the ground up on every post—which is a recipe for disaster if your patio has a slope—measure once on your ‘master’ post. Decide on your final beam height, say 8 feet, and mark it. Then, use the laser receiver to find that exact ‘solid tone’ at that mark. Without moving the tripod, you now take that receiver to every other post. Mark the beep. That line is your level plane. It doesn’t matter if one post is sitting in a hole and another is on a hump; the laser creates an invisible, perfectly flat ceiling for you to work under. This prevents the nightmare where you have to learn how to fix a sagging pergola beam before the project is even finished.
Slice Once and Make It Count
When you’ve got your marks, it’s time for the saw. But wait—before you cut, remember the thickness of your beams. If you are using the hidden blocking move for supporting heavy pergola beams, your post height needs to account for where that block sits. I remember one July afternoon where I was so proud of my level lines that I zipped through all four posts with my circular saw, only to realize I hadn’t accounted for the 1.5-inch seat of the notch. I had to use the shim trick for leveling a pergola on an uneven surface just to get my height back. It was embarrassing and entirely avoidable. Now, I mark the ‘cut line’ and the ‘beam seat line’ in two different colors of carpenter’s pencil so I don’t autopilot my way into a mistake.
Why Your Notches Need a 10-Degree Tilt
While we are at the top of the ladder, let’s talk about the longevity of those cuts. Water is the enemy of any wood structure, even cedar. When you notch your posts to receive the beams, don’t just make a flat 90-degree shelf. Use the 10-degree miter cut that stops pergola water traps on the outer edges. This small adjustment ensures that rain shed off the beam doesn’t pool in the joint. It’s the difference between a pergola that lasts fifteen years and one that starts rotting at the post-head in five. When you’re working solo, these little details are your insurance policy against future repairs. As you move toward the rafters, you can use the spacer hack for perfectly aligned pergola slats to keep your spacing consistent without constantly fighting a tape measure in the wind.One of the biggest lies in the outdoor living industry is that ‘level and square’ equals ‘lifetime durability.’ I’ve seen perfectly square frames turn into warped messes in under three years. While everyone focuses on the finish, the real magic—and the real mistakes—happen in the thermal movement you can’t see. Most homeowners assume that once a deck is bolted down, it stays put. But according to the North American Deck and Railing Association (NADRA), the leading cause of structural failure isn’t weight; it’s the degradation of connections due to moisture-induced wood movement. Let’s dig deeper into why your high-end materials might be working against you.
The Hidden Battle Between Your Frame and Your Decking
We’ve all been told that hidden fasteners are the gold standard for composite decking trends because they provide a clean, screw-free surface. However, here is a hard truth: why hidden fasteners fail on high traffic areas is usually due to the expansion and contraction of the boards. In intense summer heat, a 20-foot composite board can expand by as much as half an inch. If those clips don’t allow for that movement, or if you haven’t left enough space at the ends, the boards will buckle or ‘mushroom’ around the clip. It’s a common ‘oops’ factor that turns a $15,000 deck into a trip hazard. Have you ever noticed your boards popping up during a heatwave? Let me know in the comments. 
Why does my ‘maintenance-free’ composite feel like it’s falling apart?
The problem often isn’t the decking; it’s the skeleton underneath. I see people spend a fortune on low-maintenance composite decking only to slap it onto a standard pressure-treated frame without a second thought. Here’s the nuance: why pressure treated wood still warps under composite decking is because the frame dries out at a completely different rate than the deck boards. As that wet framing lumber shrinks, it pulls the fasteners with it, leading to those annoying gaps or ‘spongy’ spots. If you want true longevity, you need to use the joist tape secret for doubling your deck’s life. It creates a moisture barrier that stops the frame from ‘breathing’ into the bottom of your deck boards, keeping the whole system stable.
Don’t Let Your Railings Fail the Winter Test
If you are installing a modern railing, you likely want that sleek, minimalist look. But I frequently see 3 mistakes that make your cable railing sag every winter. The most common is failing to account for post-deflection. When the temperature drops, the cables tighten. If your end posts aren’t reinforced with the hidden bracing move for rock-solid corner posts, the tension will actually pull the posts toward each other. By spring, the cables are slack and rattling. It’s not a cable problem; it’s a physics problem. Always over-build your corner posts—usually by doubling them up or using structural blocking—to ensure your custom railing systems stay as tight as a guitar string for decades.
Don’t Fight the Wood—Force It Into Submission
I have spent too many July afternoons wrestling with crowned 2x10s that seemed determined to ruin my frame. If you want a perfectly flat surface, you cannot just hope the lumber behaves. I swear by the clamp and lever move for straightening bowed 2x10s. Using a dedicated deck-straightening tool, like the BoWrench, is the only way I’ve found to close gaps without blowing out my lower back. It allows you to apply hundreds of pounds of pressure to a stubborn board while keeping your hands free to drive screws. This isn’t just about making the deck look good on day one; it’s about ensuring that tension doesn’t pull your fasteners loose three years later. When the wood is forced into a neutral position during the build, it stays there. To prevent future issues, I also apply the joist tape secret for doubling your deck’s life to every single horizontal surface. It acts as a self-sealing gasket around every screw, which is the exact technical recommendation found in the American Wood Council’s DCA 6 – Prescriptive Residential Wood Deck Construction Guide to prevent rot in high-moisture zones. 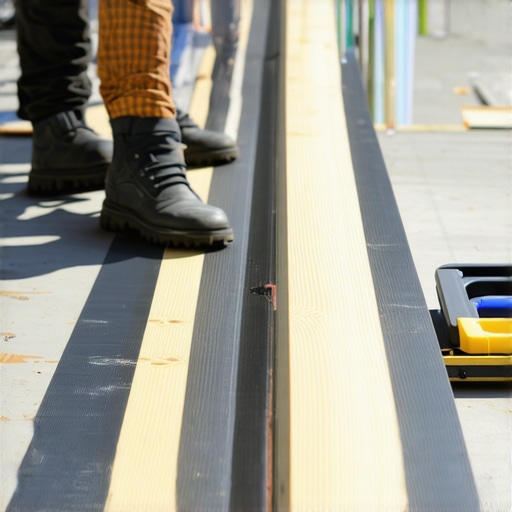
How do I keep my composite deck looking brand new for twenty years?
Maintenance isn’t just about a pressure washer; in fact, I rarely use one. High-pressure water can actually etch the surface of older composite boards. Instead, I focus on the structural ‘health check.’ Every spring, I perform the ice pick test for checking joist strength on older decks. You are looking for soft spots where the ledger meets the house, as that is where 90% of failures begin. For the surface, follow the composite decking secrets and longevity tips for a lasting deck, which includes using an oxygen-based cleaner rather than harsh bleaches. If you have a wood railing, you can restore faded wood railings without sanding for hours by using a high-quality chemical brightener that re-opens the wood fibers before you re-stain. This proactive approach saves you from the ‘total replacement’ nightmare down the road.
Your Backyard is About to Get a Lot Smarter
Looking ahead, I see the DIY space moving toward ‘Integrated Structural Intelligence.’ We are already seeing the rise of pergola trends that include motorized louvers and built-in weather sensors. In the next few years, I expect to see moisture sensors embedded in joists that alert your phone if a leak starts behind the ledger board. We are moving away from just building structures toward creating outdoor ‘living systems.’ Whether you are following innovative deck design ideas for 2025 or sticking to a classic build, the goal remains the same: stability and style. My advice? Grab a roll of butyl joist tape today and apply it to your next project; it is the single cheapest way to ensure your hard work doesn’t rot from the inside out.
The Expensive Mistakes I Made So You Don’t Have To
I used to think ‘good enough’ was okay for a weekend project, but structural integrity doesn’t care about your schedule. If you don’t use the 3-4-5 triangle move for squaring up a new deck frame, that tiny initial error compounds until your final board is inches off. I learned that the hard way when I had to rip up a dozen rows of premium decking. Another lightbulb moment came when I realized that thermal physics is non-negotiable; why black aluminum railings get hotter than you think isn’t just about touch, it’s about how much the entire system expands in the sun. Always plan for the heat, or the heat will warp your hard work. Finally, I never build without joist tape anymore; it is the cheapest insurance policy you can buy to prevent the rot that eventually kills even the best-framed structures, and using the joist tape secret for doubling your deck’s life is a step you can’t afford to skip.
Tools That Saved My Sanity on the Job Site
Building solo means you need gear that acts as an extra set of hands. A self-leveling rotary laser is my non-negotiable partner for any project. For the deck surface itself, I never leave home without the jig i use for consistent deck screw depth; it ensures every single fastener is perfectly countersunk, preventing the ‘mushrooming’ effect that ruins the look of composite boards. I also highly recommend investing in a high-quality BoWrench—it is the only way to win the fight against stubborn, bowed joists without throwing out your back.
#IMAGE_PLACEHOLDER_E#
Bring Your Vision to Life Today
Building your own outdoor space is about more than just lumber and screws; it is about creating a legacy in your own backyard. Whether you are chasing pergola designs that turn your garden into a sanctuary or a sprawling entertainment deck, the effort you put into the foundation today determines your peace of mind tomorrow. Don’t be afraid of the complexity; just take it one level line at a time. What part of your backyard build has been the biggest challenge for you so far? Let me know in the comments below!