
I stood there, squinting against the mid-July sun, looking at thirty feet of expensive composite boards I’d just butchered. I thought I had a ‘feel’ for the impact driver. I was wrong. Every third screw was buried so deep it looked like a tiny crater, while others sat just high enough to snag a flip-flop. It was ugly. It was unprofessional. Most importantly, it was a mistake that cost me a full Saturday of backing screws out and trying to hide the ‘volcano’ marks in the plastic. If you’re aiming for innovative deck design ideas that elevate your home’s curb appeal, you can’t have fasteners that look like they were installed by a caffeinated squirrel. [image_placeholder]
Why Eyeballing Your Fasteners Is a Recipe for Disaster
When I first started out, I figured a steady hand was all I needed. But here’s the cold, hard truth: composite decking isn’t as forgiving as old-school pressure-treated lumber. If you over-drive a screw, you’re creating a permanent moisture trap. According to the North American Decking and Railing Association (NADRA), improper fastening is a primary contributor to surface failure in modern decks because those little ‘potholes’ collect water and debris. This eventually leads to the very issues I talk about when explaining why your deck joists are rotting underneath the tape. I learned the hard way that ‘close enough’ isn’t good enough when you’re following composite decking secrets for longevity.
Won’t a specialized jig just slow down my workflow?
It’s a fair question. You’ve got a whole deck to fly through, and the idea of adding a specific tool for every board feels like a drag. But honestly? It’s the opposite. Once I started using a dedicated depth-setting jig—specifically a torsion-controlled driver bit—my speed actually tripled. I stopped having to pause, lean over, and check if the screw head was flush. I just drove them until the tool clicked. Have you ever spent more time fixing ‘high’ screws than actually building the deck? Tell me I’m not the only one who has fought that battle. Today, I’m going to break down the exact setup I use to ensure every single screw sits exactly where it should, every single time, without the guesswork.
Stop Your Impact Driver from Eating the Board
The secret weapon in my bag isn’t the most expensive tool, but it is the most reliable: the torsion-controlled depth setter. Think of it like a governor on a sports car; it lets you go full throttle without ever redlining. When you’re dealing with composite decking trends for durable solutions, the density of the board varies by temperature and brand. If you use a standard bit, you’re relying on your thumb’s muscle memory. Use a dedicated jig that physically stops the bit when the screw hits a predetermined depth. I prefer the Smart-Bit or similar tools that use a free-spinning stop collar. This prevents the tool from marring the board surface while ensuring the screw head sits exactly 1/16th of an inch below the surface. This tiny gap allows the composite material to ‘self-heal’ slightly over the head, hiding the fastener without crushing the core. This precision is what separates a DIY look from professional deck design strategies.
Dial in Your Torque Before You Drive
Before you commit to your main run, grab a scrap piece of your decking and your actual joist material. This is crucial because pressure treated wood still warps under composite decking, and its density changes the way a screw seats. Back in 2018, I skipped this test on a humid July morning. By noon, the sun had softened the boards, and my settings were driving screws nearly halfway through the plank. I spent three hours that evening backing them out and praying the ‘mushrooming’ wouldn’t be visible in the morning light. Now, I run three test screws every single morning. If the head isn’t flush, I adjust the collar. It’s the same logic I use for the simple jig for drilling straight baluster holes—consistency is the only way to avoid ‘eye-ball fatigue’ after eight hours on the job.
#IMAGE_PLACE_HOLDER_B#
The Trick to Keeping Your Board Pattern Clean
Once your depth is set, you need to maintain a perfectly straight line across the joists. I see too many guys zig-zagging their screws. It makes even the most expensive boards look cheap. I use a chalk line, but not in the way you’d think. I snap a faint line across the joist centers before the boards go down. Then, as I lay each board, I can see exactly where the ‘target’ is. If you miss the center of the joist, you risk the screw ‘walking’ or stripping out, which is one of the main reasons your composite decking looks like plastic and poorly installed.
Stop the Mushroom Effect in Its Tracks
When a screw enters composite, it displaces material. That material has to go somewhere, and it usually goes up, creating a little volcano or ‘mushroom’ around the screw head. If you don’t use a screw specifically designed for composite—one with reverse threads near the head—you’ll be fighting those bumps on every single board. These specialized screws pull that displaced material back down into the hole. If you’re already following the string line method for perfectly level deck surfaces, adding this screw-and-jig combo is the final step to a surface that looks like a high-end interior floor.
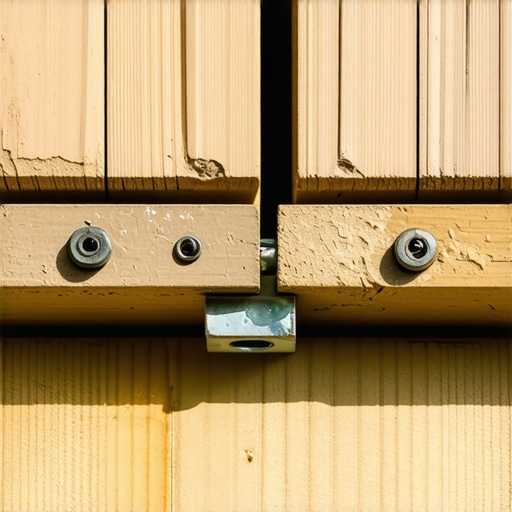
Let’s dig deeper into the stuff the sales brochures won’t tell you. Everyone tells you that hidden fasteners are the pinnacle of maximize outdoor living with low-maintenance composite decking. It makes sense on paper—no visible holes, a smooth surface, a true interior feel. But here is my contrarian take: for many high-traffic decks, hidden fasteners are a liability. I’ve seen more failures with ‘invisible’ clips than I ever have with properly set face-screws. The issue is lateral movement. The reason why hidden fasteners fail on wide-profile boards isn’t just a fluke; it’s physics.
Why do your hidden clips keep popping out when it gets hot?
The ‘Oops’ factor here is ignoring thermal expansion. According to research published in the Journal of Building Physics, wood-plastic composites (WPC) have a thermal expansion coefficient significantly higher than traditional timber. When the sun beats down, those boards want to grow. If your clips are too rigid, they either snap or pull the screw right out of the joist. This is exactly why hidden fasteners pop up in extreme summer heat. I learned this after a client called me back two years after an install because their ‘seamless’ deck looked like a keyboard with half the keys missing.
The Structural Trap Most DIYers Ignore
Another trap is forgetting that pressure treated wood still warps under composite decking. Your frame is alive; your decking is essentially plastic and sawdust. They move at different rates. If you don’t account for this shear stress, you’ll find why your pressure treated frame is pulling your composite apart within a few seasons. Have you ever fallen into this trap? Let me know in the comments. I’m curious if you’ve struggled with those clips as much as I have. Understanding these nuances is the only way to achieve composite decking secrets for longevity and avoid costly repairs down the road.
If you’ve decided to skip the hidden fasteners in favor of face-screws, you’ve already won half the battle against shifting boards. But let’s talk about the skeleton underneath. You’re spending thousands on composite decking trends for durable solutions, but if the wood framing rots, the plastic on top is worthless. I never build a deck now without applying butyl-based joist tape. It’s the joist tape secret for doubling your deck’s life. Without it, water sits in the screw holes and turns the wood into mush. I learned this the hard way on a 2012 teardown where the boards looked pristine, but the joists had the consistency of wet cake. This is exactly why your deck joists need tape to prevent rot.
How can I actually maintain my composite deck over the long haul?
The biggest myth is that composite is ‘zero maintenance.’ It’s low maintenance, not no maintenance. To keep it from looking like a neglected patio, you need a routine. I recommend a simple wash twice a year using a soft-bristle brush and a pH-neutral cleaner. And please, why you should never use bleach on composite decks cannot be overstated—it eats the UV inhibitors. If you spill something like wine or grease, you have to move fast. Knowing how to clean red wine stains off composite decking fast will save you from a permanent reminder of last Saturday’s BBQ. Following composite decking secrets for longevity means staying ahead of the organic growth that loves the shade under your pergola design inspiration.
The One Tool That Saves My Back and Your Boards
I don’t care how straight your lumber looks at the yard; by the time it hits your job site, it’s going to have a crown or a bow. Trying to manhandle a 2×10 joist into place with just your hands is a fool’s errand. I swear by the BoWrench or a similar board-straightening tool. It gives you massive leverage to pull those stubborn joists into alignment. Using the clamp and lever move for straightening bowed 2x10s is how I get my framing perfectly square before the first board even drops. It’s the difference between a wavy deck and a surface that looks like a sheet of glass. For structural integrity, I always refer back to the American Wood Council’s DCA 6 (Prescriptive Residential Wood Deck Construction Guide). They specify very clearly that post-to-beam connections need to be more than just ‘toenails and a prayer.’ I use the double nut secret for rock-solid railing posts to ensure that even a decade of heavy use won’t cause that dreaded railing wobble. Looking toward the future, I see innovative deck design ideas for 2025 leaning heavily into ‘smart’ outdoor spaces. We are moving away from manual awnings toward pergola trends for crafting shade and elegance that include automated louvers and integrated low-voltage lighting. I want you to try this on your next project: Before you screw down a single board, snap your chalk lines and apply joist tape. It adds maybe two hours to the build but adds twenty years to the frame. It’s the highest ROI move you can make for your low-maintenance composite decking project.
What Five Years of Mistakes Taught My Pride
I used to think that speed was the mark of a pro, but I was dead wrong. True craftsmanship in decking is about managing movement. I realized early on that why dark composite boards need extra expansion space isn’t just a suggestion; it’s a rule of physics. If you crowd those boards, they will buckle. Another lightbulb moment? The frame is the foundation of your reputation. I stopped cutting corners on the hidden stuff and started using the joist tape secret for doubling your deck’s life on every single joist. Finally, I learned to respect the ‘self-healing’ properties of the material. If you set your depth right, the board actually hides your work for you.
The Three Tools I Never Leave at the Shop
If you want your deck to look like the ones in the glossy magazines, you need more than a standard drill. First, the Smart-Bit Depth Setter is non-negotiable for face-screwing; it guarantees that uniform look every homeowner craves. Second, the BoWrench is the only reason my lines stay straight when the lumber wants to curve. Lastly, I always keep a digital copy of the DCA 6 Guide on my phone. It’s the gold standard for structural safety. For the finishing touches, I always refer back to my own notes on choosing railing systems for safety and style to ensure the perimeter is as solid as the floor.
Your Weekend Project Starts Now
Building a deck is one of the most rewarding things you can do for your home. It’s not just about the resale value—though innovative deck design ideas that elevate your home’s curb appeal certainly help. It’s about creating a space where your family actually wants to spend time. Don’t let the fear of a few ‘mushroomed’ screws stop you. Take your time, test your settings, and use these composite decking secrets for longevity to build something you’re proud of. Your future self, sitting on that deck with a cold drink, will thank you for the extra effort you put in today. Have you ever had a deck screw ‘mushroom’ on you or ruin a perfectly good board? Let me know your biggest decking frustration in the comments below!