
I’ll never forget the morning I walked out onto my brand-new deck only to find a gap so wide between the boards I could have dropped my car keys through it. I’d spent weeks researching the perfect boards, obsessing over durable solutions for modern outdoor living, only to realize I’d ignored the beast lurking underneath. That beast? A standard pressure-treated frame that was shrinking, twisting, and literally pulling my expensive composite investment into a messy, uneven jigsaw puzzle. It was a heart-sinking moment that taught me a hard lesson: composite decking is stable, but the wood it sits on is an unpredictable, moisture-filled mess that acts like a slow-motion earthquake.
The Violent Tug-of-War Happening Under Your Feet
The problem is simple but devastating. When you buy pressure-treated lumber, it is often “wet” from the treatment plant. As that wood dries out in the sun, it shrinks. Composite decking, on the other hand, is mostly plastic and wood fiber designed to stay put. This creates a mechanical conflict. I made the classic mistake of thinking that because the boards were screwed down tight, they’d stay put. I was wrong. The sheer force of a drying 2×10 joist is enough to shear screws or force boards to buckle. This is exactly why pressure-treated wood still warps under composite decking even when you think you’ve secured it perfectly. According to the USDA Forest Products Laboratory, southern pine can shrink up to 8% in width as it moves from its treated state to its service equilibrium, which is more than enough to ruin your alignment.
Is a traditional wood frame actually a bad investment?
You might be wondering if you should have just used steel or if you’ve wasted your money on a wood skeleton. It’s a fair fear. The truth is, wood is a great material, but we treat it like it’s static when it’s actually alive and breathing. If you don’t account for that movement, you’re essentially building on a shifting foundation. Early in my career, I skipped using joist tape to double my deck’s life, thinking it was just a marketing gimmick. Two years later, the top of my joists had checked and split because they were trapped under the heat of the composite boards, accelerating the “pulling” effect. We’re going to fix this today. I’m going to show you how to stabilize that frame so your composite decking lasts for decades without the gaps. But first, tell me—have you noticed your picture-frame borders starting to separate at the miters? I’ve seen it happen in a single season, and it’s usually the first sign of trouble.
Stop the Twist with Solid Blocking
To keep your deck from acting like a bowl of Jell-O, you need to install solid blocking every 4 to 6 feet along your joists. Think of blocking as the “ribs” of your deck; they keep the “spine” from twisting under pressure. I remember a project in 2019 where I skipped every other row of blocking to save two hours. By July, the mid-section of the deck had a noticeable wave because the pressure-treated lumber began to cup and pull. Now, I always use the string line trick for leveling deck joists before decking to ensure every block is perfectly flush. If a joist is even an eighth of an inch higher than its neighbor, the composite board will teeter-totter on it, leading to that annoying “bounce” you feel when you walk.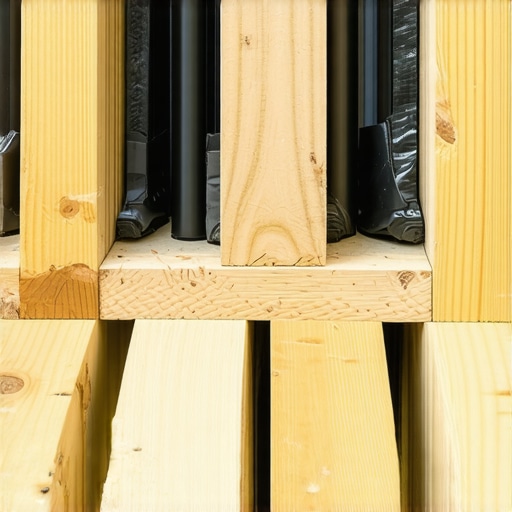
Ditch the Nails for Structural Screws
When you are securing this blocking, do not reach for the nail gun. Over time, the drying wood will simply pull the nails right out of the grain. This is why we stopped using framing nails for structural decking in favor of 3-inch structural screws. Screws bite into the wood fibers and refuse to let go, providing the lateral stiffness needed to fight the torque of a warping 2×10. If you are building a larger platform, you might even find the structural reason your deck needs a mid-span beam is actually to reduce the span and prevent the joists from having enough leverage to twist in the first place. Wood behaves like a lever; the longer the run, the more power it has to bend your deck design out of shape.
Seal the Top to Save the Bottom
Even a perfectly level frame will fail if water gets trapped between the composite board and the wood joist. I learned this the hard way when I pulled up a five-year-old board to find the top of the joist looking like wet cardboard. You must apply a high-quality butyl tape to the top of every joist. This is the joist tape secret for doubling your decks life—it creates a waterproof “umbrella” that prevents rot from the top down. Without it, your screws will eventually lose their grip as the wood softens, leading to the dreaded squeaky board syndrome that ruins a quiet evening.
Protect Your Picture Frame Borders
The most visible failure in any innovative deck design is a separated miter joint at the corners. If you are doing a picture-frame border, you need double joists or ladder blocking at the perimeter. This provides a massive landing zone for your fasteners. I once saw a DIYer try to toe-screw a miter into a single joist; within three months, the gap was big enough to hide a roll of quarters. This is often the result of the chalk line error that ruins your picture frame border, where the layout does not account for the necessary “meat” beneath the boards. Much like the hidden blocking move for supporting heavy pergola beams, extra wood in the frame is never a waste—it is insurance against the physics of shrinking lumber.Everyone tells you that hidden fasteners are the only way to achieve a high-end look. I’m going to challenge that. While they offer a clean surface, I’ve found that hidden fasteners pop up in extreme summer heat because they don’t always allow for the aggressive expansion cycles of darker boards. If you live in a climate with 40-degree temperature swings, sometimes a color-matched face screw is actually the superior choice for long-term flat boards. This is the ‘oops’ factor most pros won’t tell you until they’re back a year later for repairs. It’s not just about the boards, though; it’s about how they interact with the structures sitting on top of them.
The Railing Post is a Giant Lever
Most homeowners believe that a wobbly railing is caused by the railing itself, but the ‘trap’ is actually in the rim joist. Think of your railing post as a 36-inch lever. Every time someone leans on it, they are applying hundreds of pounds of torque to a single point on your frame. If you haven’t used the double nut secret for rock solid railing posts, that wood will eventually compress, and your railing will develop that terrifying ‘death wobble.’ Expert studies from the Forest Products Laboratory show that fastener withdrawal strength in treated lumber can drop significantly if the wood stays damp, which is why your framing prep is more vital than the railing brand you choose.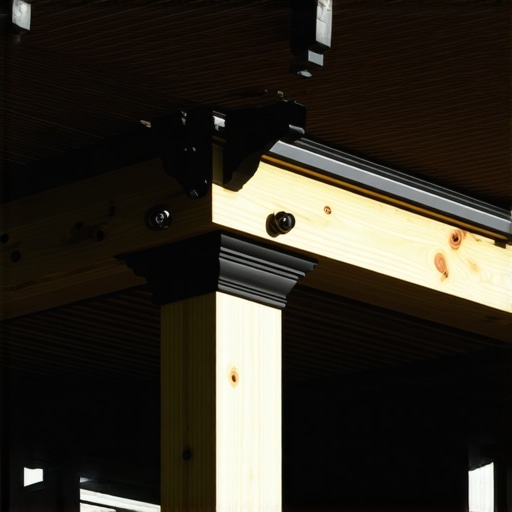
Why does my cable railing feel loose every January?
It’s a common frustration for people who invest in modern aesthetics. You spend a weekend tensioning everything to perfection, and six months later, the lines are sagging like a wet clothesline. This usually happens because of thermal contraction. Steel cables and wood frames react differently to the cold. There are 3 mistakes that make your cable railing sag every winter, and the biggest one is not accounting for ‘frame draw.’ As the wood shrinks in the winter air, it actually pulls the posts inward, slackening the cables. If you didn’t over-build the end posts with internal blocking, you’ll be chasing that tension forever.
Stop Using 4×4 Posts for Pergolas
When it comes to overhead structures, there is a dangerous myth that 4×4 posts are sufficient for a standard pergola. They aren’t. Not only do they look spindly and ‘cheap’ against a heavy deck, but they lack the surface area needed for a truly secure beam-to-post connection. This is why your pergola posts need to be 6×6 minimum for stability; it’s about preventing the structure from ‘racking’ or swaying during a heavy wind. Furthermore, if you are placing a heavy structure on top of composite decking, you need to understand why solid core composite is worth the extra bulk. Scalloped or hollow-core boards can actually crush or deform under the concentrated point load of a heavy 6×6 post over time. Have you ever fallen into the trap of under-building your frame only to realize it too late? Let me know in the comments; I’ve definitely been there myself early in my career.I’ve learned the hard way that the difference between a ‘DIY-looking’ project and a professional-grade masterpiece comes down to the inches and the gear. For example, if you see me on a job site, I’m never without a high-density mallet. I found that why you should use a rubber mallet for seating composite boards isn’t just about protecting the finish; it’s about ensuring the hidden clips are fully engaged without marring the ‘grain’ of the board. It’s those small, intentional choices that prevent the deck from shifting or developing that annoying rattle six months down the line. To be honest, how to stop your deck from rattling when people walk starts with the very first board you lay down, ensuring it is seated perfectly square against the starter clips.
How do I maintain my composite deck over time?
The biggest myth in our industry is that ‘low maintenance’ means ‘no maintenance.’ While you won’t be sanding and staining every spring, you still have to fight the elements. One of my strict rules is to keep the bleach in the laundry room. I’ve seen beautiful, dark espresso boards turned into a chalky mess because a homeowner thought a bleach soak would kill some mildew. This is why you should never use bleach on composite decks; it breaks down the UV inhibitors in the capping. Instead, a simple solution of dish soap and warm water is usually all you need. If you’re hosting a summer BBQ and someone drops a burger, you need to know how to clean red wine stains off composite decking fast to prevent the tannins from settling into the texture. 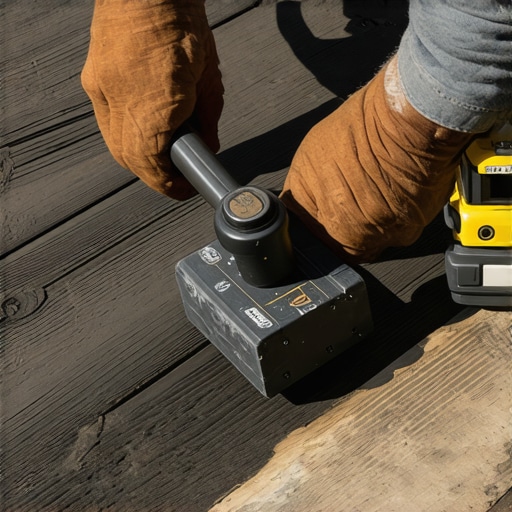 For long-term longevity, keep an eye on the gaps. I always use a leaf blower once a month to clear out the debris between boards. The secret to preventing leaf rot between deck boards is simply airflow; if organic matter sits in those gaps and stays wet, it will eventually rot the joist tape or the wood framing underneath, regardless of how durable your composite is. According to the North American Deck and Railing Association (NADRA), regular inspections of the ledger board and flashing are critical, as nearly 90% of deck failures occur due to the separation of the deck from the house structure.
Why the Next Decade is All About Hidden Tech
Looking forward, I see deck design moving toward complete ‘smart integration.’ We are already moving past simple post-cap lights. I’m now spending more time showing clients how to hide low-voltage wires inside aluminum railing posts for integrated step lighting and perimeter sensors. The goal is to make the technology invisible. When you maximize outdoor living with low-maintenance composite decking, you aren’t just building a platform; you’re building an outdoor room. I recommend trying one advanced move on your next project: use a heat gun to fix those inevitable scuffs. If you’ve never done it, learning how to fix scuffs on dark composite boards with a heat gun is a total game-changer that will save you from replacing an entire board just because a chair dragged across it.
Why the Skeleton Matters More Than the Skin
One of the hardest things to accept as a builder is that composite decking doesn’t solve framing problems; it highlights them. I used to think the boards were the ‘product,’ but now I know the joists are the ‘engine.’ If you ignore the skeleton, the skin will never look right. Over the years, I’ve realized that the most frustrated homeowners are the ones who spent $15,000 on premium boards but skipped the $200 worth of joist tape. Also, pay attention to the environment—I’ve had clients ask why your composite deck is statistically likely to static shock you in dry climates. It’s a small detail, but choosing boards with anti-static properties can save your guests from a surprise during a summer party. Lastly, remember that wood moves and plastic expands; if you don’t leave room for both, physics will eventually win the argument.
My Must-Have Arsenal for a Flawless Finish
I never start a build without 3-inch structural screws; they are the only thing that wins the fight against the torque of twisting southern pine. I also swear by a high-end string line and a magnetic torpedo level. If you are extending your project to include a shade structure, you’ll definitely need to master the shim trick for leveling a pergola on an uneven surface to ensure the beams are perfectly horizontal. For those opting for the modern look of metal, keep in mind that black aluminum railings get hotter than you think in direct sun, so consider the orientation of your deck relative to the afternoon heat. These tools and tips aren’t just about making the job easier; they are about ensuring you aren’t doing the job twice.
Turn Your Backyard Vision into Reality
Building a deck is more than just a home improvement task; it is an investment in your sanity and your family’s weekends. By taking these extra steps now, you are ensuring that your composite decking secrets longevity tips are built into the very DNA of your outdoor space. Don’t be intimidated by the technicality of the framing—once you stabilize the wood, the rest is like putting together a very high-quality puzzle. If you find a board acting up or shifting later, don’t panic; there is almost always a simple DIY solution for squeaky composite boards that can get your sanctuary back to being whisper-quiet. It is time to stop dreaming about that perfect outdoor retreat and start building it. Have you ever discovered a hidden ‘oops’ in your framing after you had already started laying your boards? Let me know in the comments below!