
It was a frustrating Saturday afternoon. I was midway through installing a new railing system on my deck, and my hands were greasy, shaky from the heat, and absolutely tired of battling with stubborn screws that refused to go deep enough into the brackets. Sound familiar? We’ve all been there—struggling to drive those tiny screws, cursing ourselves for not having the right tools, feeling like the project might never end. But then, I had a lightbulb moment about a little-known trick that revolutionized my approach: the magnetic bit.
The Problem with Conventional Screwing Methods
Traditionally, I relied on standard screwdriver bits, which often slipped, stripped threads, or simply didn’t hold the screw securely. Especially when working into deep or hard-to-reach places like heavy-duty railing brackets, the frustration only grew. I found myself repeatedly dropping screws on the deck, wasting time trying to retrieve them, and risking damage to my materials. It was a classic case of fighting against the tools instead of with them.
Could a simple magnetic bit really make a difference?
Absolutely. Early on, I mistakenly thought these bits were just a gimmick—something only professionals used. But after a few failed attempts with regular bits, I decided to give one a try. The difference was immediate. The magnetic tip held the screw in place, even in awkward positions, and I could focus on driving it without worrying about slipping or losing screws. Plus, it reduced the strain on my hands, making the job safer and more efficient.
But here’s the thing—many DIY enthusiasts overlook this little secret because they’re skeptical. They wonder if it’s really worth the hype or just another add-on they don’t need. Well, studies on tool efficiency show that small upgrades can significantly boost productivity and accuracy in projects (source: Home Improvement Tech Magazine). That tiny change truly made my work sit at a whole new level.
So, if you’ve faced the same frustrations I did—struggling with screws that just won’t cooperate—then stick around. I’m going to show you how to harness the power of the magnetic bit to make your next deck, pergola, or railing project smoother, faster, and more enjoyable. Ready to transform those stubborn fasteners into your best friends? Let’s dive into the practical steps and tools that can change the way you build.
Prepare Your Tools and Materials
Begin by gathering all necessary tools: a cordless drill, magnetic screwdriver bits, a level, measuring tape, and protective gear like gloves and safety glasses. Ensure you have high-quality composite or wood deck screws, depending on your material. Set up your workspace by clearing debris and marking where each post, beam, or railing will go. I once started a project without measuring properly, which led to uneven railings; double-checking measurements before drilling saves time and prevents headaches.
Mark and Layout for Precise Installation
Use a chalk line or a pencil to mark the areas for the beams and joists. Floating your deck design, like I did last summer, requires accurate layout to avoid misalignment. For straight lines, stretch a chalk line tightly and snap it firmly to create clear guidelines. For uneven terrain, use a level or laser level to establish even height references. This step minimizes errors during assembly and guarantees a clean, professional look. For example, aligning the railing height with the top of the deck posts took me a few extra minutes but paid off during final inspection.
Cut and Fit Components with Accuracy
Measure each piece carefully, considering expansion gaps—like the 1/8-inch gap for composite boards to accommodate temperature changes. Use a mitre saw for clean, precise cuts, and double-check measurements before cutting. During my last project, I mistakenly cut a beam too short; I learned to measure twice and cut once. Dry-fit components to verify fit, making adjustments as needed. When installing the pergola over a deck, ensure the beams are level and properly spaced for both aesthetics and stability. For details on design choices, visit https://deckforgebuilders.com/pergola-design-inspiration-from-modern-to-classic-looks.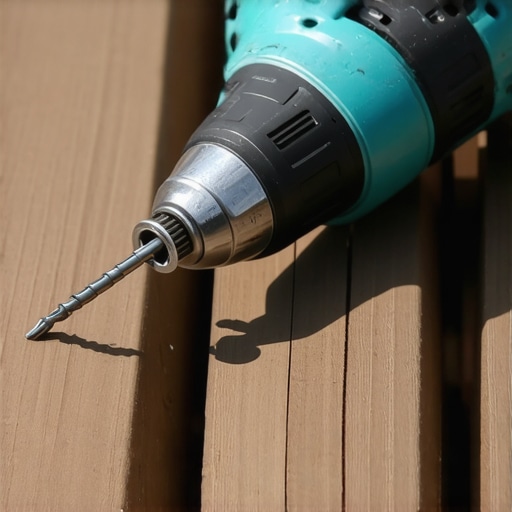
Fasten Components Securely
Use a cordless drill fitted with a magnetic bit to drive screws, which makes the process faster and reduces the chance of stripping. Drive screws straight into framing members, avoiding over-tightening that can cause splitting or warping. Reinforce joints with additional screws if they bear heavy loads, like near a hot tub or heavy planters. Remember, proper fastening isn’t just about holding pieces together—it’s about building a lasting structure. When attaching railings, follow guidelines from https://deckforgebuilders.com/the-complete-guide-to-choosing-railing-systems-for-safety-style for optimal safety and visual appeal.
Check and Correct Level and Alignment
Use a spirit level or laser level to verify that each component is perfectly horizontal or vertical. I once finished installing a railing, only to realize it was leaning slightly—an adjustment that took minimal time but saved me from safety issues later. For wider spans, check at multiple points along the length. When installing the pergola, pay extra attention to the angles to ensure water runoff, referencing https://deckforgebuilders.com/pergola-trends-crafting-shade-elegance-in-your-outdoor-space for design tips.
Seal and Protect Your Work
Once everything is assembled, apply appropriate sealants or protective coatings to prevent weather damage. For composite decking, cleaning and sealing might not be necessary, but regular maintenance prolongs its life. For wood components, use weather-resistant stain or paint, following the manufacturer’s instructions. I learned this the hard way when I skipped sealing my first deck, which led to premature warping and discoloration. Proper sealing ensures your project remains beautiful and durable over time. For maintenance secrets, see https://deckforgebuilders.com/composite-decking-secrets-longevity-tips-for-a-lasting-deck.While many DIYers and even seasoned contractors believe they know the basics of installing pergolas, railing systems, and composite decking, the truth is that some widely accepted practices are based on misconceptions. For example, a common myth is that larger spacing between balusters always offers better views. In reality, code-compliant and safer designs often require narrower gaps—something overlooked by casual builders seeking aesthetic over safety. Additionally, many assume that all composite materials behave similarly over time; however, understanding the nuanced differences in formulation, such as UV stability and thermal expansion, can save huge headaches down the line (source: https://deckforgebuilders.com/composite-decking-secrets-longevity-tips-for-a-lasting-deck).
A critical mistake I see often is neglecting proper drainage when installing pergolas or deck surfaces. Ignoring this can lead to water pooling, which accelerates wood rot or causes deck boards to warp—especially in high-rainfall zones. Incorporating subtle sloping or strategic flashing can significantly extend the lifespan of your structure. Remember, even the most beautiful designs are compromised if water damage occurs early.
For those delving into advanced deck aesthetics, one benefit-first approach is to consider the placement of LED lighting in your railing system. Not only does this improve safety, but it also elevates the enjoyment of your outdoor space after sunset. The key here is integrating lighting thoughtfully, ensuring wiring and fixtures are protected from moisture and corrosion. Check out ideas in https://deckforgebuilders.com/pergola-design-inspiration-from-modern-to-classic-looks for inspiration.
It’s also worth emphasizing that many overlook the importance of precise measurement and tolerances during installation. Small errors, like misaligned joists or improper spacing, can show up as uneven surfaces or unstable railings—disaster in disguise. Embracing advanced techniques such as the “clamping hack” for aligning bowed boards or using the “diagonal bracing” method can be game-changers for achieving professional results.
Do you ever fall into these traps? Let me know your experiences in the comments, and stay tuned as I share how mastering these nuances can elevate your outdoor projects to professional-grade quality.
Keeping It Working: Tools and Strategies for Long-Term Deck Success
Proper maintenance is key to ensuring your deck, pergola, and railing systems remain stunning and durable over the years. I swear by a few specialized tools that have transformed my maintenance routine, making it easier to spot issues early and address them before costly repairs are needed. One such tool I highly recommend is a digital moisture meter. It helps me detect hidden rot or water ingress in joists and posts that aren’t visible to the naked eye. Regular scans every six months have saved me from unexpected structural problems, especially in climates with high humidity.
Tools I Recommend for Hassle-Free Upkeep
Beyond moisture meters, I use a high-quality cordless impact driver fitted with magnetic bits for quick maintenance tasks—tightening loose bolts or replacing worn fasteners without hassle. The magnetic bits I personally prefer are from DeWalt; their strong hold prevents lost screws during adjustments. Additionally, a soft-bristle deck brush paired with a gentle, eco-friendly cleaner like vinegar solutions makes routine cleaning simple without damaging surface finishes. For more complex inspections, a telescoping mirror allows me to see underneath decking and within tight corners without crawling underneath. These small investments in specialized tools have shortened my maintenance cycles and improved safety standards—keeping my outdoor spaces pristine and safe for family gatherings.
Lessons I Wish I Had Learned Sooner in Deck and Pergola Building
- My biggest realization came when I discovered that small details, like properly sealing ledger boards, can save years of headaches from rot and water damage—something I overlooked in my first few projects.
- Understanding the subtle nuances of thermal expansion in composite decking changed my approach to spacing and fastening, leading to a much longer-lasting surface.
- Switching from standard hardware to corrosion-resistant, ceramic-coated screws truly extended the lifespan of my railings and fasteners—an investment that pays off in durability.
- Many DIYers underestimate the importance of precise measurement; embracing laser levels and measurement jigs made a significant difference in achieving professional results.
- Learning to incorporate strategic drainage and flashing into my designs prevented water pooling and structural issues, ensuring safety and longevity over the years.
My Top Tools and Resources for Building and Maintaining Outdoor Spaces
- DeWalt Magnetic Bits: They’re a game-changer for holding screws securely in awkward positions, reducing frustration and speeding up the process—something I couldn’t build without.
- Digital Moisture Meter: Detects hidden water ingress before it causes damage, allowing me to catch issues early and plan repairs proactively, saving money long-term.
- Laser Level: Ensures perfect alignment for deck joists and railing posts, making projects look crisp and professional—worth every penny.
- Deck Maintenance Guide from DeckForgeBuilders: Their comprehensive articles keep me updated with latest trends and best practices, especially for low-maintenance composite materials and weatherproofing techniques.
Embrace Your Passion and Build with Confidence
Building a beautiful, durable outdoor space is both an art and a science. With the right knowledge, tools, and attitude, you’re capable of transforming your backyard into a personal oasis that lasts. Don’t hesitate to experiment, learn from missteps, and leverage expert tips like those found at Transform Your Home With Stunning Deck Design Strategies. Remember, every project deepens your skills and brings you closer to creating something you’ll enjoy for years. So, gear up, take that next step, and turn your outdoor vision into reality.