
Have you ever stood on a sprawling composite deck, marveling at its smooth, seamless appearance—only to notice a tiny gap or an unsightly seam disrupting the flow? I sure have. Early in my deck-building adventures, I thought I was doing everything right, but those visible seams kept haunting me, making the entire project look less polished and more… amateurish. That lightbulb moment hit when I realized there’s a trick—one that transforms a good-looking deck into a stunning, professional-quality space: mastering the art of creating invisible seams in long composite deck runs.
Why Invisible Seams Matter for Your Deck’s Beauty and Longevity
Think about it: your backyard is your sanctuary, and your deck is the stage for family gatherings, lazy Sunday afternoons, and cozy evenings under the stars. A seamless appearance not only elevates your home’s curb appeal but also signals meticulous craftsmanship that lasts over time. When seams are visible, they can trap dirt, trap moisture, and even cause the boards to buckle or warp prematurely. Plus, a tightly integrated surface feels much more inviting and luxurious—like a high-end hotel, not a DIY patchwork.
But here’s the catch: composite decking, with its expansion and contraction properties, can be tricky to install flawlessly over long spans. That’s where the secret comes into play. Over the years, I’ve experimented with and refined techniques (like proper spacing, fastener selection, and precise measurements) to make seams vanish entirely. And I want to share these insights with you, so your next deck isn’t just sturdy but stunning from every angle. Because honestly? The difference is night and day.
Have you struggled with visible seams on your composite deck?
If so, you’re not alone. I’ve made my fair share of mistakes early on—like forcing boards together without accounting for thermal expansion, which made seams open up under the summer heat. Trust me, I learned the hard way, but that experience pushed me to find proven tricks and tools (you might find some tips at this guide) that really work.
In the following sections, I’ll walk you through step-by-step how to achieve those almost-invisible seams that will make your deck the envy of every neighbor—and stand the test of time. Ready to elevate your outdoor living space? Let’s dive in!
Measure and Prepare Your Boards Carefully
Start by selecting boards that have consistent width and thickness. Lay out your deck boards on a flat surface to identify natural variations and plan your seam locations accordingly. During my first project, I made the mistake of choosing boards with inconsistent width, which resulted in uneven gaps. I learned that meticulous selection and planning are vital for seamless results.
Use Hidden Fasteners Professionally
Opt for high-quality, color-matched hidden fasteners designed for composite decking. These fasteners anchor the boards securely while remaining invisible. During installation, I screwed in the fasteners using a torque screwdriver set to the recommended tightness, which prevented overdriving and kept the surface flush. This step ensures the surface remains smooth with no protrusions or visible hardware.
Implement Precise Spacing with Spacers and Spreading Tools
Consistent spacing is critical. Use equal-length composite spacers (like 1/8 inch) between boards during installation. I found that employing a spacer on each side of the board, combined with a tapping block, helped maintain uniform gaps. These gaps accommodate thermal expansion, preventing boards from buckling or open seams in hot weather.
Account for Thermal Expansion
Composite materials expand and contract with temperature changes. During my first heatwave, I noticed boards buckling because I had left no expansion gaps. Now, I leave a 1/4-inch gap at the edges and joints, which I measure on a cool morning and verify periodically. This practice prevents open seams and maintains a uniform look over seasons.
Apply Proper Fastening Technique for a Smooth Surface
When fastening, sink the screws slightly below the surface using a countersink bit, then fill the holes with matching composite filler or use pre-finished fasteners. I used a drill with a depth stop, which prevented overdriving screws into the boards, ensuring the surface remained flat and seamless. This step is crucial for achieving virtually invisible seams.
Finish with Proper Sanding and Sealing
After installation, lightly sand the boards to remove any minor protrusions or tool marks. Then, apply a compatible sealant or protective finish designed for composite decking to enhance the seam’s appearance and longevity. I found that a smooth, sealed surface not only looks better but also resists dirt and moisture, keeping seams invisible longer.
Practice and Patience Lead to Perfection
My early attempts had uneven gaps and visible fasteners, but with practice and attention to detail, I achieved a nearly seamless appearance. Remember, precision in measuring, spacing, fastening, and finishing is key. Take your time during each step—rushing leads to visible seams and uneven surfaces. Keep experimenting, and soon your deck will boast the flawless, professional finish you’re aiming for.
 Many DIY enthusiasts and even seasoned builders often fall into pitfalls when designing decks, pergolas, or railing systems, mainly because of misconceptions that seem logical at first glance. For instance, a prevalent myth is that choosing wider spacing between deck boards improves drainage, but in reality, this can lead to gaps that trap debris and promote wood or composite deterioration. Opting for narrower gaps, combined with proper sealing and drainage considerations, offers a more durable solution, as detailed in expert guides like this comprehensive resource. Additionally, many mistake low-profile pergolas as less visually impactful; however, design nuances such as beam placement and lighting integration can make a small pergola appear grander if planned thoughtfully. One common trap is ignoring thermal expansion in composite decking, which leads to buckling and unsightly seams. An advanced technique involves calculating expansion gaps based on local temperature fluctuations, a detail supported by studies on material behavior from industry professionals. Curious about how to prevent your deck from warping in the heat?
Why does thermal expansion affect long-term deck integrity, and how can I plan for it?
The key lies in understanding that composite and wood materials both expand and contract with temperature changes—failure to accommodate this movement results in open seams, warping, and even structural failure over time. Experts recommend leaving intentional gaps during installation, adjustable fasteners, and periodic inspections to adapt to seasonal movements. Always remember, cutting corners on these details might save time upfront but can cost dearly later. Have you ever fallen into this trap? Let me know in the comments. When designing your outdoor space, thinking beyond the aesthetic to include these nuanced factors ensures a lasting, safe, and visually stunning installation. Better planning and understanding these advanced material behaviors help avoid costly mistakes, making certain your decking, pergola, or railing system stands the test of time, just like the professionals do.
Keep Your Deck in Top Shape with Proven Tools and Methods
Maintaining a durable and beautiful deck requires more than just initial installation; it involves regular upkeep using the right tools and techniques. Over the years, I’ve curated a set of specific tools that make long-term maintenance manageable and effective, ensuring your investment continues to shine.
Power Washers for Gentle Yet Deep Cleaning
I always recommend a quality pressure washer with adjustable settings, like the Sun Joe SPX3000. Its variable pressure allows me to clean composite surfaces thoroughly without risking damage. Using a wide fan tip at low pressure, I can remove dirt, algae, and grime, restoring the deck’s vibrancy and preventing deterioration—especially important for maintaining seamless seams and preventing moss buildup.
Specialized Brushes for Delicate Surfaces
For areas that need detailed attention—like railings and embossed patterns—I use soft-bristle brushes such as the OXO Good Grips Scraper & Brush. These help in scrubbing away stubborn stains or debris without scratching the surface, extending the lifespan of composite materials and preserving their appearance.
Composite Deck-Specific Cleaners
Regular cleaning is crucial, but using the wrong cleaner can harm your decking. I prefer brands like these composite-specific cleaners that gently break down dirt while sealing the surface against future stains and mold. Integrating such cleaners into a routine prevents buildup that can cause seams to open prematurely or boards to warp.
Inspecting and Tightening Hardware with Precision Tools
Periodic inspections often reveal loose fasteners or wobbly railing posts. I utilize a torque wrench calibrated to manufacturer specifications to snug fasteners evenly. This maintains the structural integrity of your railing and frame, thwarting potential safety hazards and ensuring your deck remains visually seamless.
The Future of Deck Care Looks Bright
Emerging technologies, such as smart sensors that monitor moisture levels or structural movement, may revolutionize maintenance strategies soon. Until then, embracing these proven tools and methods will keep your deck, pergola, or railing system resilient against the elements and time. Remember, consistent upkeep is your best defense against costly repairs or replacements down the line. Try scheduling monthly cleanings with your power washer and inspecting hardware with your torque wrench; these simple actions pay off exponentially. Interested in scaling your efforts? Check out this guide on low-maintenance decking solutions to reduce long-term work and maximize enjoyment.
How do I maintain my deck over time?
Regular cleaning, hardware inspections, and timely repairs form the core of effective deck maintenance. By investing in good tools like a pressure washer, soft brushes, and a torque wrench, you ensure the longevity and safety of your outdoor space. Keep a maintenance schedule, and your deck will reward you with beauty and durability for years to come.
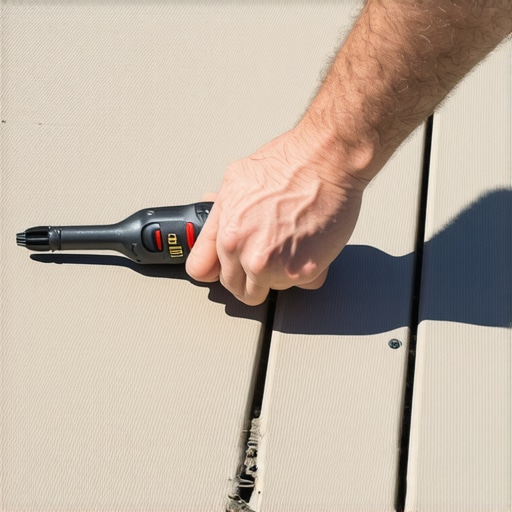
Suggested image prompt: A close-up of a hand holding a torque wrench tightening railing bolts, with a well-maintained composite deck in the background. Alt text: “Using a torque wrench to tighten deck railing bolts for safety and longevity.” Title: “Precision Maintenance Tools for Deck Safety”
Busting Myths That Held Me Back in Deck Craftsmanship
One of the toughest lessons I encountered was believing that wider gaps between composite boards improved drainage. In reality, this often led to debris buildup and faster deterioration, reminding me that precision and thoughtful planning trump shortcuts. Another misconception was thinking that small pergolas would look insignificant; instead, strategic design and lighting can turn a modest pergola into a captivating focal point. Recognizing the impact of thermal expansion was a game-changer, as ignoring it caused warping, but understanding and planning for seasonal movement ensures longevity and seamlessness.
Tools and Tips That Elevated My Deck Building Routine
Investing in quality tools like a torque wrench for fastening hardware and a pressure washer with adjustable settings transformed my maintenance approach. Reliable composite cleaners and soft-bristle brushes became essential for preserving appearance and preventing seams from opening. These tools allow you to maintain beauty and safety without extensive effort, ultimately protecting your investment over years of outdoor exposure.
Embrace the Journey: Your Outdoor Space Has Potential
Your backyard is more than a DIY project—it’s a reflection of your craft and care. Take the lessons learned about precise measurements, thoughtful design, and regular upkeep seriously, and your deck will become an enduring haven for family and friends. Remember, patience and attention to detail are your best allies in creating a space that stands the test of time. Want to dive deeper into expert strategies? Explore this comprehensive guide for enduring decking tips.