
I remember the first time I attempted to extend my deck with new boards. Eager to make everything look perfect, I laid down the new planks and torqued the screws tight—and then stepped back, only to notice a glaring gap that ruined the whole look. It was a lightbulb moment: no matter how carefully I measured or how high-quality my materials were, that gap betrayed my effort.
If you’ve ever faced this frustrating problem, you’re not alone. The frustration of visible gaps when splicing two boards can turn an otherwise beautiful project into an eyesore. It’s a common challenge among DIY enthusiasts and professional contractors alike. But here’s the truth: there *is* a way to splice boards seamlessly, making the transition nearly invisible to the naked eye. And trust me, mastering this technique can save you hours of rework and restore the confidence in your craftsmanship.
Why Ignoring Tiny Gaps Could Cost You in the End
Many DIYers overlook the importance of precise joint techniques, thinking a simple butt joint or tight screwing will suffice. Early in my woodworking journey, I made the mistake of rushing through measurements, assuming that tight fits alongside slight imperfections wouldn’t matter much. Yet, over time, I discovered that subtle inconsistencies in spacing lead to gaps that get worse with temperature fluctuations and wood expansion. According to experts, even a fraction of an inch off can become significantly noticeable under outdoor conditions, especially in environments with humidity swings or temperature changes (source: https://deckforgebuilders.com/composite-decking-secrets-longevity-tips-for-a-lasting-deck).
So, why does this matter? Because visible gaps not only detract from aesthetic appeal but can also allow water infiltration and debris buildup, accelerating wear and tear. Choosing the right splicing method ensures a smooth, seamless look that lasts for years.
Now, I know what you might be thinking: “Is it really possible to splice boards perfectly without a gap?” The answer is a resounding yes. Later, I’ll walk you through some professional techniques that have transformed my projects—simple adjustments and trusted tricks that anyone can implement. Whether building a new deck or restoring an existing one, these tips will help you blend new boards with existing materials flawlessly.
But before diving into those methods, let’s consider a common misconception that trips up even seasoned DIYers: the fear that perfect alignment requires fancy tools or pricey equipment. That simply isn’t true. The real secret lies in understanding how to account for material expansion, use proper fasteners, and employ strategic planning. If you’re ready to ensure your boards meet seamlessly, keep reading. Your perfect, gap-free splice awaits.
Prepare Your Materials and Workspace
Before starting, gather all necessary tools: a saw, drill, clamps, measuring tape, and a carpenter’s pencil. Clear your workspace to ensure safety and efficiency. Take a moment to inspect your boards for defects or warping, which can complicate seamless splicing. My first attempt involved rushing through measurements, leading to uneven joints, but setting up a clean, organized workspace changed my results.
Accurately Measure and Mark
Precision is critical. Use a tape measure and square to mark the exact points where boards will join. Add an extra 1/8 inch to the measurement if you’re working with composite decking, allowing room for expansion. For wood, consider the seasonal swelling; leaving a small gap helps prevent buckling. Remember, a chalk line can help create a straight, visible guide for your cuts.
Cut with a Sharp Blade for Clean Edges
Use a fine-tooth saw or a quality circular saw with a new blade to make precise cuts. A clean, straight cut ensures that the boards will fit tightly and reduces visible gaps. In my experience, using a saw with a guide or jig made a significant difference in achieving uniform cuts, especially on longer runs. This step avoids uneven joints that can cause gaps over time.
Align and Temporarily Clamp
Place the boards together to check fit. Use clamps to hold them firmly in position; this prevents shifting during drilling or fastening. My go-to trick is placing a scrap piece of wood on top of the joint to distribute pressure evenly, preventing bowing. Proper alignment here is vital; a misaligned start is impossible to correct later.
Use Strategic Fastening Techniques
For composite decking, hidden fasteners are ideal, but if you’re using screws, pre-drill holes to prevent splitting. Drive fasteners flush with the surface to avoid bumps. Stagger fastener placement along the joint to distribute stress. When I installed a new section, I drilled pilot holes slightly smaller than the screw diameter, which minimized cracking and ensured a snug fit.
Account for Material Expansion
Leaving a small gap—about 1/8 inch—between boards helps accommodate expansion and contraction, especially in outdoor environments. Applying this principle prevented warping in my last project during a hot summer.
Finish and Inspect
After fastening, remove clamps and check the joint visually and physically. Run your hand along the seam to feel for evenness. Sand any rough edges or splinters for a smooth finish. Lastly, fill any small gaps with a suitable sealant if a perfectly flush look is desired.
Review Your Results
Observe the joint over time, especially after weather changes. If gaps reappear, consider adjusting your expansion gaps or fastener tightness next time. Learning from each project helps refine your technique for near-invisible splicing every time. For further insights on enhancing your outdoor space, explore designs offered in custom railing systems or pergola styling ideas.
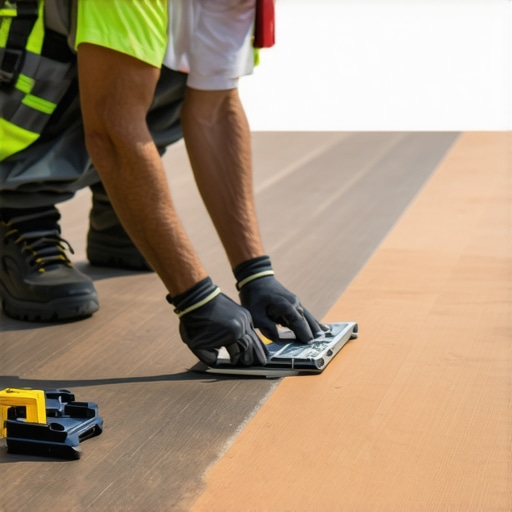 While many homeowners focus on choosing the right materials or color schemes for their outdoor spaces, there’s a less obvious trap lurking beneath the surface—misunderstanding the intricacies of design nuances that can make or break your project. It’s common to hear that selecting the most popular railing system or trendy pergola style guarantees success, but in my experience, overlooking subtle yet critical factors can lead to costly mistakes and aesthetic mishaps. For example, many assume that all composite decking is created equal, but according to experts like those at DeckForge Builders, the choice between hollow and solid core composite boards dramatically affects durability and heat retention, especially in coastal or high-UV environments. Moreover, a prevalent myth is that any pergola will automatically enhance your garden’s sanctuary vibe. However, integrating pergolas seamlessly requires understanding advanced considerations such as proper rafter spacing to avoid water pooling, or the right pitch to prevent standing rainwater, as discussed in this guide. One often overlooked detail is the importance of not just aesthetics but structural integrity—using materials and connections that withstand wind loads and seasonal shifts. An advanced misconception is that larger spans can be supported without intermediate posts; the truth is that consulting structural calculations and professional standards, like those outlined in this article, can prevent wobbling or failure. A common ‘oops’ factor I’ve seen is homeowners selecting deck railings solely based on style, neglecting safety codes or their specific environmental conditions, leading to future code violations or hazards. Remember, optimal deck and pergola designs aren’t just about following trends—they require a strategic combination of materials, load considerations, and aesthetic cohesion. Have you ever fallen into this trap? Let me know in the comments. To deepen your understanding, explore how custom railing systems can elevate both safety and style or get inspired by diverse pergola designs that marry form and function.
Keeping your outdoor structures in top shape requires the right tools and consistent maintenance practices. Personally, I rely on a few specialized pieces of equipment to ensure my decks, pergolas, and railing systems stay durable and beautiful over the years. One indispensable tool I recommend is a high-quality cordless power drill with variable speed control. It allows for precise fastening and reduces the risk of overdriving screws that can damage composite decking or wood materials. I prefer models with ergonomic grips and long-lasting batteries, such as the Milwaukee M18 series, which I’ve found to be reliable even after years of use.
Another game-changer in my toolkit is a digital moisture meter. Regularly checking the moisture content in wood components helps prevent issues like warping or rot, especially when maintaining pergolas or wooden railings that are exposed to weather. Ensuring the wood has a moisture level below 15% can significantly extend its lifespan, according to expert guidelines (source: DeckForge Builders).
For cleaning and minor repairs, I use a gentle pressure washer set to a low-pressure setting — never exceeding 500 psi — and a soft-bristle brush. It’s crucial to avoid high-pressure washers on composite materials, as they can damage the surface and lead to premature wear. Additionally, a sealant applicator brush helps in sealing gaps and cracks around joints or fasteners, maintaining water resistance. My go-to product is a high-quality, UV-resistant sealant specifically formulated for outdoor use, which I apply annually to keep mold and moisture infiltration at bay.
Maintaining your deck and pergola isn’t just about tools; routine inspections are vital. I set monthly reminders to check for loose fasteners, signs of rot, or pest intrusion. Catching issues early prevents costly repairs and preserves the functionality and safety of your outdoor spaces.
Looking ahead, I believe the integration of smart technology into outdoor maintenance — such as IoT sensors monitoring moisture or structural shifts — will become more prevalent in the near future, providing homeowners with real-time data and proactive alerts.
How do I keep my decking and pergolas in prime condition over time?
One effective strategy is to adopt a scheduled maintenance plan that includes cleaning, sealing, and tightening fasteners at least once a year. Using a combination of these tools and practices ensures your outdoor structures remain resilient and visually appealing for years to come. If you’re interested in exploring more about how to elevate your backyard, check out innovative deck design ideas or dive into custom railing systems for safety and style. Try incorporating a moisture meter into your routine — it’s a small investment that yields big dividends in your outdoor living’s longevity.
Lessons that Changed My Approach to Outdoor Living
One surprising lesson I learned was how small adjustments in measurement and a keen eye for wood behavior can make the difference between a visible gap and a seamless joint. I used to rush measurements, only to find gaps emerging after a few seasons, but understanding how materials expand and contract transformed my craftsmanship.
Another insight was the importance of pre-drilling and fastener selection. I once drove screws without pilot holes, which caused splitting and uneven joints. Now, I always prioritize precise drilling and choose fasteners suited for the material, ensuring a tight, lasting splice.
The third game-changer was learning to anticipate seasonal changes. I realized that leaving the right expansion gap prevents buckling in summer heat and moisture. This awareness profoundly improved the durability of my outdoor structures over time.
Lastly, observing professional projects taught me that even the most hidden joints can reflect care and expertise. Small details, like flush screw placement and sanded edges, elevate the overall appearance and showcase a mastery that makes your outdoor space stand out.
Tools and Resources That Elevate My Deck and Pergola Projects
My go-to toolkit includes a high-quality cordless drill, like Milwaukee’s M18 series, which offers precision and reliability for all fastener tasks. A digital moisture meter is indispensable for tracking wood and composite moisture levels, helping prevent expansion issues and rot. For cuts and adjustments, a fine-tooth saw with a guide ensures smooth, accurate joints every time.
When it comes to learning and inspiration, I often turn to custom railing and shade ideas. They provide innovative concepts that can be tailored to your space. Also, pergola design inspiration helps spark creativity and refine your vision for outdoor harmony.
For in-depth technical knowledge, I recommend the comprehensive guides on composite decking longevity and trends, which are invaluable for selecting the best materials for durability and aesthetics. Staying informed about advances in outdoor construction tools and materials ensures your projects are built to last and look perfect.
Your Next Step Toward Perfect Outdoor Spaces
Embrace the learning curve of deck and pergola construction with confidence—each project is an opportunity to refine your skills and express your style. Remember, meticulous planning, the right tools, and a keen eye for detail can turn a good outdoor space into a stunning retreat. Dive into innovative design ideas and elevate your backyard into a true sanctuary by exploring modern deck concepts or design strategies that transform your home.