
I was on my hands and knees under my first big project, a beautiful cedar deck, when I felt that sickening squish. I had spent thousands on composite decking secrets and high-end hardware, but I had ignored the very backbone of the structure: the beam. I reached up and literally pulled a handful of wet, pulpy wood out of the top of a 6×10. It was devastating. That moment taught me that no matter how much you spend on the surface, it is what happens on top of the framing that dictates whether your deck lasts thirty years or ten. Today, I am showing you a trick that costs next to nothing but saves everything.
The Afternoon My Deck Beam Turned into Spilled Oatmeal
When I started out, I had this naive idea that pressure-treated lumber was basically immortal. I figured if it could handle being buried in the dirt, it could certainly handle a little rain sitting on top of a beam. Boy, was I wrong. Water does not just run off; it sits in the tiny cracks of the wood grain, creating a perfect petri dish for fungus. I learned the hard way that deck joists need tape to prevent rot, but for the heavy-duty beams that hold the real weight, I found an even more robust solution used by old-school carpenters: the shingle trick. It is simple, effective, and uses materials you might already have lying in your garage.
Is This Just a Cheap Shortcut for Lazy Builders?
You might be thinking, ‘Why use a roofing shingle when they sell specialized flashing tapes?’ It sounds a bit like a DIY-gone-wrong, does it not? But here is the reality: asphalt shingles are literally designed to shed water and withstand the baking sun for decades. While I love the joist tape secret for standard 2x8s, a wider beam needs something with a bit more girth and durability. According to research from the Forest Products Laboratory, wood decay thrives when moisture content exceeds 20 percent in trapped horizontal spaces. A shingle creates a physical, waterproof cap that keeps that moisture from ever soaking into the grain. It is not lazy; it is smart engineering on a budget.
Stop Your Beam from Rotting Before It Even Starts
Today, I am going to walk you through exactly how to apply this method so you are not stuck doing a structural vulnerability assessment in five years just to see if your deck is still safe to walk on. We will talk about why the overhang matters and how this simple addition can double the life of your frame. Have you ever noticed water pooling on your framing after a storm, or are you just starting your very first build? Let me know if you have seen signs of rot already—I have made every mistake in the book so you do not have to.
Shield Your Framing from the Top Down
To start, you need to think of your beam like a house. Just as you would not let your plywood roof sit exposed to the rain, you should not leave the top of a 3-ply 2×10 beam naked. I call this the ‘Cap and Shed’ method. First, ensure your beam is level and the top surface is clear of debris. Even tiny wood chips can create a gap where water likes to hide. If you are building a massive structure, like one that requires a mid-span beam, this protection is even more critical because the weight involved makes replacement a nightmare. You are dealing with hundreds of pounds of pressure, and any rot in those top fibers will cause the beam to compress like a sponge.
Make Your Own Custom Drip Edge
The magic happens in the overhang. When I did my first shingle-cap on a project in coastal Oregon, I realized that just covering the top was not enough. You need to cut your shingles so they extend about half an inch past the edge of the beam on both sides. This mimics the drip edge trick used on ledger boards. By doing this, gravity pulls the water down the face of the shingle and forces it to drop straight to the ground, rather than letting it ‘wick’ back under and into the seam of your laminated beam. I used a simple utility knife and a straight edge to rip the shingles into 7-inch wide strips for my 6-inch wide beams. It felt tedious for the first ten minutes, but when a sudden rainstorm hit mid-build, I watched the water jump off the shingles while the beams stayed perfectly dry. 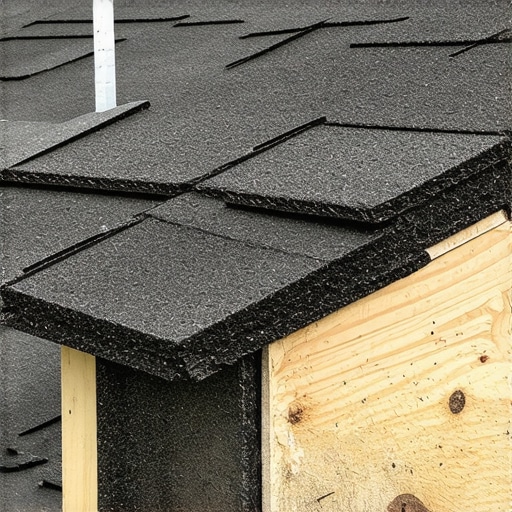
How to Lay the Shingles Without Creating a Water Trap
The orientation of your shingles is where most people mess up. You have to overlap them exactly like a roof—start from the lowest point and work toward the highest. This ensures that as water travels, it always passes over the top of the next layer. If you do it backward, you are essentially creating small buckets that catch water and funnel it directly into your beam. Fasten them using stainless steel staples or small roofing nails driven into the side of the beam, never through the top. Poking holes in the top defeats the entire purpose of the waterproof cap. This attention to detail is vital because your pressure-treated frame is pulling your composite apart as it dries and shrinks; keeping the moisture levels consistent prevents that violent movement.
Why Girth Matters on Triple-Beams
When you are working with triple-layered beams, you have two deep, longitudinal cracks running the entire length of your framing. These are essentially highways for rot. Traditional tapes are great, but for these wider surfaces, the thick asphalt of a shingle provides a much more rugged barrier. It can withstand the friction of seating composite boards during installation without tearing. I once saw a guy try to use thin plastic flashing that shredded as soon as he dragged a joist across it. The shingle, however, takes a beating and keeps its shape. It is the difference between wearing a cheap plastic poncho and a heavy-duty Gore-Tex jacket in a storm. By the time you get to the finishing stages, like installing railing systems for safety, you will have the peace of mind knowing the very foundation of your deck is impervious to the elements.
Building on that shingle trick, we need to address the biggest lie in the industry: that composite is maintenance-free. While we all want to maximize outdoor living with low-maintenance composite decking, the reality is that your ‘maintenance-free’ boards are actually massive thermal batteries. I’ve seen homeowners spend thirty thousand dollars on premium materials only to have the boards buckle because they didn’t account for expansion. Everyone tells you to gap your boards for water, but in my experience, the bigger threat is the sun. Why dark composite boards need extra expansion space isn’t just a suggestion; it’s a physics requirement. If you lock those boards down too tight, the force of them expanding can literally shear off hidden fasteners or pull your rim joists out of alignment.
One trap I see even ‘pro’ crews fall into is the ‘over-fastening’ of breaker boards. When you’re trying to achieve the secret to invisible seams in long composite deck runs, you might be tempted to pin everything down hard. Don’t do it. A single twenty-foot board can move up to half an inch between a cold morning and a hot afternoon. If that movement has nowhere to go, your deck will ‘burp’ or develop a wavy profile that no amount of shimming can fix. 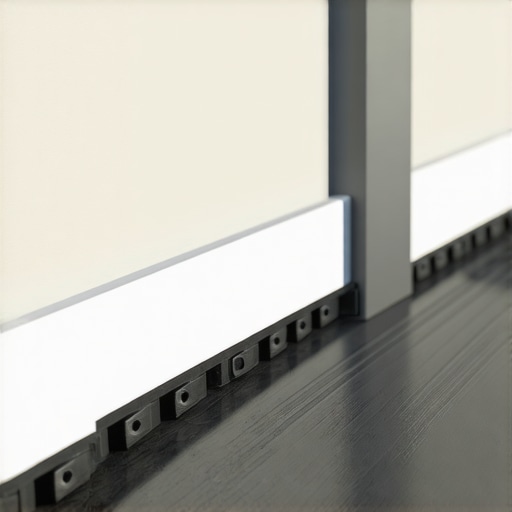 Have you ever fallen into this trap and seen your boards turn into a roller coaster? Let me know in the comments.
Why does your rock-solid railing still feel like it’s vibrating after three years?
This is the ‘Expert Level’ headache. You used 4×4 posts and heavy-duty bolts, but the rail still has that annoying ‘shiver’ when someone leans on it. The hidden nuance here is the leverage ratio. A thirty-six-inch post acts like a giant crowbar on your framing. If you haven’t used the double-nut secret for rock-solid railing posts, you’re relying on the wood grain not to compress over time. According to a safety study by the North American Decking and Railing Association (NADRA), structural connection failures are the leading cause of deck collapses, often starting with post-to-joist connections that were tight on day one but loosened through ‘wood creep.’ For those using modern aesthetics, why cable railing tensioners fail usually boils down to the same thing: the frame is compressing, not the cable stretching. You need to reinforce the entire corner, not just the post.
Taking the time to understand these invisible forces—the thermal expansion of the boards and the compression of the wood grain—is what separates a five-year deck from a thirty-year heirloom. When you start looking at innovative deck design ideas that elevate your homes curb appeal, remember that the prettiest deck is the one that stays level and safe for the next generation. It’s all about respecting the physics of the materials.
I’ve spent more on high-end equipment than I care to admit to my spouse, but three items have saved more projects from failure than anything else: a high-torque impact driver, a stand-up hidden fastener tool, and a self-leveling green-beam laser. When you are trying to stay ahead of composite decking trends, you quickly realize that hand-driving screws is a recipe for carpal tunnel and crooked lines. I personally use the Camo Drive tool for every install because it allows me to stand upright while securing boards, ensuring I don’t miss the joist when things get repetitive. It is about more than just speed; it is about consistency. If your fasteners are not perfectly aligned, the human eye will catch that deviation immediately, ruining the premium aesthetic of your outdoor space. For structures that reach for the sky, like pergola designs that turn your garden into a sanctuary, a laser level is absolutely non-negotiable. I used to trust my old 4-foot bubble level until I built a 20-foot long pergola and discovered I was two inches off from one end to the other. Now, I use a Bosch GLL3-330CG for every layout. It projects a 360-degree line that allows me to cut every post to the exact same height before the beams even go up. This precision ensures that why your pergola posts need to be 6×6 minimum for stability isn’t undermined by uneven load distribution or a sloping header. 
How do I keep my composite deck from looking like a plastic playground after five years?
Maintenance isn’t just about the occasional scrub; you need a proactive strategy to protect your investment. Every spring, I perform the ice pick test for checking joist strength on older decks, even on my newer builds, just to ensure no moisture has bypassed my flashing or shingle caps. For the surface, stop using standard dish soap. It leaves a microscopic film that actually attracts pollen and dust. I use a dedicated composite cleaner once a year and keep a bottle of specialized degreaser handy for when the BBQ gets messy. Knowing how to clean red wine stains off composite decking fast is the difference between a permanent blemish and a clean finish that stays ‘new’ for decades. According to the American Wood Council’s DCA 6 Prescriptive Residential Wood Deck Construction Guide, structural integrity relies on these connections remaining dry and tight, so do not ignore the substructure while you are pampering the surface boards. Looking ahead, I see a major shift toward ‘Smart Decks.’ I am already starting to experiment with low-voltage systems that sync with home automation to adjust lighting based on the time of day. While using the string line move for perfectly plumb pergola posts will always be the physical foundation, the ‘finish’ of 2025 and beyond will involve much more tech integration. Go out and try the ice pick test on your oldest joist today—it takes five seconds and could save you a five-figure repair bill later.
Why Your Future Self Will Thank You for Over-Engineering the Frame
If I could go back to that first project, I wouldn’t just add shingles; I would rethink the entire concept of airflow. One of the biggest ‘lightbulb moments’ for me was realizing that the rubber spacer trick for better airflow under joists is just as important as the flashing itself. Trapped air is trapped moisture, and moisture is the enemy of every innovative deck design idea you might have. Also, never assume your hardware is permanent. I’ve started treating deck building like I’m building a boat—every seam, every screw, and every connection needs to be scrutinized for how it will handle a deluge. Finally, trust the ice pick test for checking joist strength; it’s the most honest tool in your belt. If it feels soft, it is soft—don’t talk yourself out of a necessary repair.
Three Tools That Saved My Sanity on the Job Site
I don’t get paid to promote these, but I wouldn’t step onto a job site without them. First, a high-quality 360-degree laser level—it turns a three-man leveling job into a one-man breeze. Second, the Camo Drive system for composite decking secrets like perfect gapping without the backache. And third, the North American Decking and Railing Association (NADRA) safety manuals. They provide the structural data that keeps your railing systems for safety from becoming a liability. These resources bridge the gap between ‘handyman’ and ‘craftsman.’
Build a Backyard That Stands the Test of Time
At the end of the day, building a deck or a sanctuary-style pergola is about creating a space where memories are safe. You aren’t just slapping boards together; you’re engineering a platform for family dinners and quiet mornings. By applying these small, inexpensive tricks—like the shingle-cap or the double-nut secret—you’re ensuring that your composite decking investment pays off for decades, not just seasons. #IMAGE_PLACEHOLDER_E# Now it’s your turn to get out there and build something that lasts. Have you ever discovered rot in a spot you thought was perfectly protected? Let me know in the comments below!