
It was a searing July afternoon, and I was standing on my nearly completed dream deck with a cold drink in my hand, ready to celebrate. But as I looked down the length of my brand-new composite decking, my heart sank. The boards did not look like the pristine, linear masterpiece I had envisioned. Instead, they looked like a gentle, agonizingly obvious wave. I had painstakingly spaced every single board, yet the run was completely crooked. In my rush to finish, I made the classic rookie mistake of trusting my joists to be perfectly straight. They never are. I ended up having to unscrew half the deck, wasting hours of daylight and a chunk of my sanity. That day, I learned the hard way that you cannot just lay boards blindly. You need a reliable reference line. Today, we are going to fix that exact headache so you never have to face the misery of wavy deck boards. Whether you are working on a classic wooden platform or integrating advanced composite decking trends, there is one old-school framing secret that will save your project every single time: the humble chalk line. I am going to show you how this incredibly cheap tool can completely transform your installation process.
The Costly Illusion of Straight Joists
When you buy pressure-treated framing lumber, it looks straight enough on the rack. But wood is organic. It twists, shrinks, and crowns as it dries out. According to building science experts at the Forest Products Laboratory, typical construction-grade lumber can experience significant volumetric shrinkage and warping as its moisture content acclimates to the local environment. When you run your deck boards tight against an uneven rim joist, you are literally transferring those structural imperfections directly into your finished surface. If you are aiming for a flawless look—especially if you plan to install high-end features like custom railing systems—even a quarter-inch bow in your decking will scream amateur hour to anyone who stands on it. I used to think I could just eye-ball the straightness, or perhaps rely on plastic spacers to keep things uniform. But spacers only keep the gaps between boards consistent; they do absolutely nothing to keep the overall run parallel to your house.
Is a simple string really better than high-tech laser levels?
Yes, it absolutely is. While laser levels are fantastic for indoor remodeling, bright outdoor sunlight completely washes out the beam, making them incredibly frustrating to use on a deck. A heavy-duty chalk line, however, does not require batteries, costs less than ten dollars, and leaves a highly visible, physically undeniable line directly across your joists. It is the ultimate truth-teller on a construction site. Have you ever stepped back from a hard day of building only to realize your layout lines went completely crooked? Let me know in the comments below, because I know I cannot be the only one who has suffered through that realization. Let us dive into how we actually snap these lines to guarantee perfection before you drive your next screw.
Snapping the Reference Line Step by Step
To get your decking running dead straight, you have to establish a benchmark that does not care about the natural curves of your wood. Think of your first snapped chalk line as the foundation of your entire layout; if this line is crooked, every board you lay afterward will amplify that mistake. I remember a humid afternoon working on a tricky wraparound project where I skipped this step, thinking my joists looked flawless. By the time I reached the outer edge, the final board looked like a banana, and I had to spend hours backing out screws. To avoid this, you need to establish a perfect reference line. Start by measuring out from your house wall at both ends of the deck. Mark your desired distance on the two outer joists. For example, if you want your first few rows of composite boards to sit perfectly, measure out exactly 48 inches at both ends. Hook your chalk line on your first mark, pull it incredibly taut across the joists to the second mark, and snap it cleanly. This leaves a bright, perfectly straight path across every single joist.
Adjusting for Natural Joist Crown
You cannot just screw your boards down blindly, even with a line. Some joists will crown upward, while others might sag. When you place your board along your snapped chalk line, you will inevitably see areas where the joist face sits slightly above or below the reference point. Treat your chalk line like a structural straightedge. If a joist is sitting too high, you can use a hand plane to shave down the high spot before securing your decking. Conversely, if you notice a joist that dips too low, you can sister a small scrap block to the side of it to raise the plane. This meticulous adjustment is especially crucial if you plan on installing premium features later on, such as custom railing systems or heavy pergolas, which require a completely flat subfloor to prevent structural wobbling.
Why the 3-4-5 Rule Safeguards Your Layout
Before you snap that first line, you must guarantee your deck frame is actually square to the house. If your frame is trapezoidal, your boards will run off at a bizarre angle. I always rely on the classic 3-4-5 triangle method. Measure 3 feet along your house wall from the corner, then 4 feet out along your outer joist. The diagonal distance between those two points must be exactly 5 feet. If it is not, your frame is out of square. Applying the 3-4-5 rule for squaring your deck frame every time ensures that your reference lines are truly perpendicular. 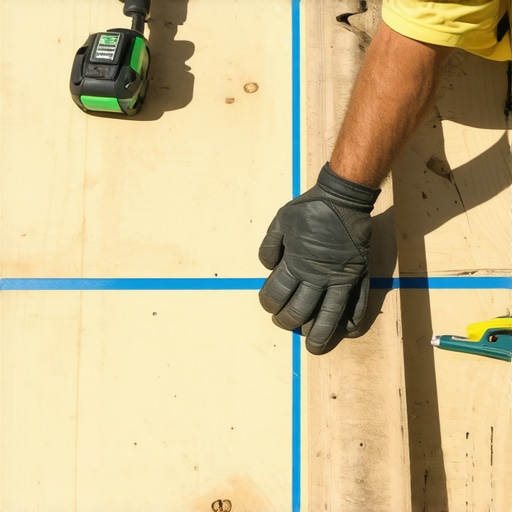 If you are working with modern synthetic materials, keeping things square is even more critical because the uniform edges of composite decking trends will immediately expose any parallel layout errors.
Managing Board Expansion and Spacing
Once your reference lines are snapped and your frame is square, you can begin laying boards. However, never butt composite boards tight against one another or against your house siding without checking manufacturer specs. Temperature swings cause these materials to grow and shrink. To prevent buckled boards or loose fasteners, you must understand the simple way to stop composite boards from expanding into your house siding. Use temporary spacer blocks along your chalk line to maintain a perfectly uniform gap while allowing the boards the physical freedom to breathe as the weather changes.
The Myth of the Maintenance-Free Composite Deck
Many homeowners and even some builders are lulled into a false sense of security by the marketing promise of composite materials. Everyone says that switching to composite means you can completely forget about structural movement, but in my experience, the opposite is true. While you do not have to worry about the boards splintering or rotting, synthetic planks are highly sensitive to thermal expansion. This is where the standard rules of carpentry can lead you astray. If you secure composite boards down with the same casual attitude used for pressure-treated pine, you are setting yourself up for a wavy, buckling nightmare. A study by the American Wood Council highlights that temperature swings cause synthetic materials to expand linearly far more than natural wood. This hidden physical force means that if you block the ends of your boards or use the wrong fastening systems, the energy has nowhere to go but up, resulting in warped, distorted surfaces.
The Hidden Fastener Trap
The biggest mistake I see in modern deck design is the blind reliance on hidden fasteners without understanding their structural limitations. We all love the clean, seamless look of a deck surface with no visible screw heads, which is a major selling point in modern composite decking trends. However, many hidden clip systems do not actually allow the boards to slide and breathe along their length. If your joists are slightly out of alignment, or if you fasten the clips too tightly during the heat of the day, you create localized stress points. When the temperature drops at night, the boards contract, pulling against those rigid clips. This tension is a major reason why your composite decking is warping at the joists over time. To avoid this trap, you must use high-quality, manufacturer-approved clips that feature a built-in expansion gap tolerance, allowing the boards to glide micro-millimeters without warping the entire field.
Why do some areas of a composite deck warp while others remain perfectly flat?
The answer almost always comes down to microclimates and uneven solar exposure. A portion of your deck that sits in the shade of a custom pergola will experience drastically different thermal expansion rates than the section fully exposed to the afternoon sun. When one end of a continuous board is blazing hot and expanding while the other end is cool and stable, internal shearing forces build up within the material. If you have not built your deck frame with robust structural support to counteract this, you will notice localized buckling. When planning your innovative deck design ideas for 2025, you must account for these temperature differentials. Adding extra blocking and implementing a double rim joist layout provides the rigid skeleton needed to force those expanding boards to stay flat. 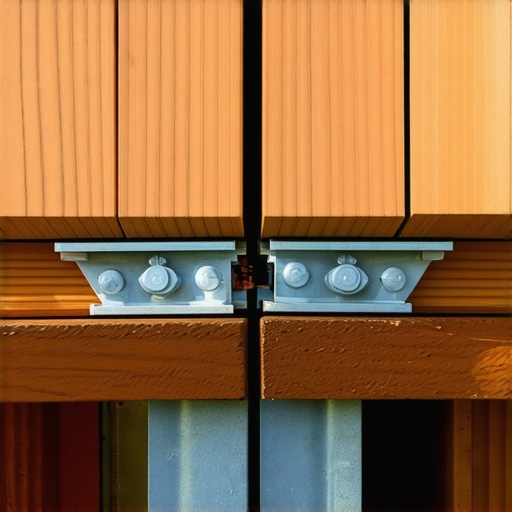 Have you ever fallen into this trap and noticed mysterious warping under your shadow lines? Let me know in the comments below.
Why Mitered Corners are a Disaster for High-Traffic Zones
Another advanced nuance that rookies and seasoned builders alike overlook is the classic picture-frame border. It looks incredibly sharp on a blueprint, but executing mitered corners on composite decks is a recipe for heartbreak. Because composite expands and contracts along its length, those perfect 45-degree mitered joints will inevitably open up into gaping, uneven chasms in the winter, or smash into each other and warp in the summer. Instead of traditional miters, I always recommend butt-jointing your picture-frame borders or using transition boards to manage the movement. If you must have mitered corners, you have to use advanced techniques like pocket-screwing the joint from underneath and applying specialty adhesives. Understanding the pvc glue trick for gap-free composite miters can save your high-end border from looking sloppy after just one season. When you pair these advanced structural details with properly anchored railing systems, you create an outdoor space that stays flat, safe, and stunning for decades.
The Exact Tools in My Rig That Keep Boards Flawless
Many DIYers assume that a standard hammer and miter saw are all it takes to build a modern outdoor space. But when you are working with premium synthetic materials, relying on basic carpentry tools will quickly lead to visible cosmetic mistakes. Through years of trial and error, I have refined my toolkit to a few indispensable pieces of equipment that save me time and eliminate structural shifting. First, I never start a layout without a high-tension chalk reel filled with black or dark blue semi-permanent chalk. Regular red chalk can stain light-colored composite, while standard white chalk disappears too easily. I also carry a dedicated bow-wrench board straightener. If a joist is slightly twisted or a composite board has taken on a slight sweep in the sun, this tool locks onto the joist and forces the board perfectly straight while I secure the fasteners. To ensure my frame remains completely waterproof over the next twenty years, I cover every single joist with a butyl-based flashing tape. Incorporating the joist tape secret for doubling your decks lifespan prevents moisture from pooling in screw holes, protecting your subframe from premature rot.
How do I maintain my composite deck over time?
While composite materials are incredibly durable, they are not completely self-sustaining. To maintain the original look and performance of your deck, you must perform a thorough deep clean twice a year—specifically in the spring and autumn. I recommend using a soft-bristle brush and a specialized composite deck cleaner that contains sodium percarbonate, rather than harsh chlorine bleach. Bleach can strip the UV-resistant capped layer of the synthetic wood, leading to premature fading. Furthermore, you must actively manage organic debris. If pine needles, pollen, or leaves settle into the gaps between your boards, they will trap moisture and create a perfect breeding ground for mold and mildew. If you notice localized fading or minor surface scuffs over the seasons, understanding how to restore the color of a faded composite deck can bring back that rich, out-of-the-box luster without needing to replace costly boards.
Where Synthetic Outdoor Living is Heading Next
The world of outdoor design is changing rapidly. When looking ahead at the industry, I predict we will see a major shift toward smart, thermally isolated decking systems. Manufacturers are already experimenting with micro-engineered core materials that significantly reduce thermal expansion, meaning we will soon design decks that experience zero shifting between seasonal extremes. Furthermore, as homeowners seek highly integrated backyard structures, the demand for cohesive systems that combine low-maintenance surfaces, custom railing systems, and automated shade is skyrocketing. To guarantee you are building a structure that will remain stylish and structurally sound for decades to come, check out these innovative deck design ideas for 2025. In the future, every component of your outdoor space—from the perimeter posts to the shade canopy—will need to work together to manage structural load and material expansion seamlessly. 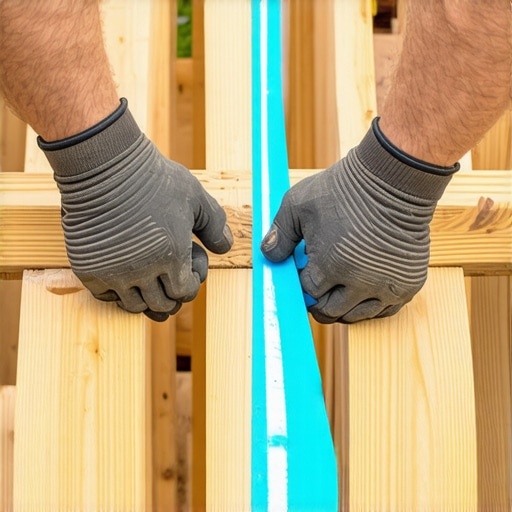 For your very next project, I highly recommend trying the reference line technique on your outer joists. Put away the laser level for the day, buy a quality high-tension chalk reel, and snap a true physical line across your joists before laying your next board.
3 Myths About Composite Decking That Left Me with a Wavy Deck
When I first started building, I fell hook, line, and sinker for the common industry marketing. I assumed that because these premium boards are engineered in a factory, they would naturally behave perfectly once laid out. Here is what I actually learned on the job:
- The ‘Pre-Straightened’ Fallacy: Just because a composite board looks incredibly straight when you slide it out of the bundle does not mean it will stay that way. The moment sunlight hits the synthetic polymers, the physical board will bend and flex, conforming to whatever structural curve your joists have.
- The Impervious Subframe Illusion: Many DIYers think that installing top-tier composite decking trends excuses them from checking their pressure-treated framing. The truth is, modern synthetic materials actually highlight structural waves and crowns in your joists much more clearly than traditional natural wood ever would.
- The Myth of Single-Day Installation: Real, professional-grade results require patience. If you rush through your layout without taking the time to double-check your squaring, you will inevitably end up with a crooked run that requires unscrewing the entire field. Taking time to execute the 3-4-5 rule for squaring your deck frame every time saves hours of frustration later.
My Essential Toolkit for a Flawless Layout
If you want to achieve razor-straight lines and a flat, beautiful finish that lasts for decades, you need to step away from basic carpentry gear and use tools designed for the unique movement of modern materials. Here is what I keep in my rig:
- High-Tension Braided Chalk Reel: I use a heavy-duty reel filled with non-staining blue chalk. Unlike cheap cotton lines that bleed, a braided line holds tight and snaps a crisp, clean line directly across your joists.
- The Bow-Wrench Board Straightener: This tool is non-negotiable. It locks onto your floor joists and allows you to physically bend stubborn, crowned boards straight while you drive your hidden fasteners.
- Butyl-Based Flashing Tape: Before laying a single board, I cover every joist face. Utilizing the joist tape secret for doubling your decks lifespan protects your critical structural timber from rot and keeps the subfloor stable for the lifetime of your synthetic decking.
Bring Your Dream Space to Life the Right Way
Building a custom outdoor living area is one of the most rewarding home improvement projects you can tackle. By using a simple chalk line, ensuring your frame is perfectly square, and accounting for the physical expansion of your boards, you elevate your craftsmanship from basic DIY to a true professional-grade masterpiece. Do not let minor framing issues ruin your gorgeous new deck. Take your time, trust the math, and build a flat, stunning structure you will be proud to stand on for years to come. If you are also planning to add matching overhead shade, make sure you understand the details of pergola designs that turn your garden into a sanctuary to complete your backyard transformation.
Have you ever struggled with wavy deck boards or experienced mysterious warping after a hot summer day? Let me know in the comments below!